Photobucket Photobucket Photobucket Photobucket Photobucket Photobucket

Friday, July 30, 2010

Card 1

Hello! Happy Friday!

So, today it starts! Yay! I've had to really focus my time and let go of my own anal-ness as far as a card being "perfect". I don't know about you, but sometimes I see something that inspires me, be it a card, layout or a picture in a magazine, and I so desperately want to recreate it that I miss the fun of just making a card. I'm really trying to let this part of me go, and to focus on the fact that everyone enjoys getting a handmade card.


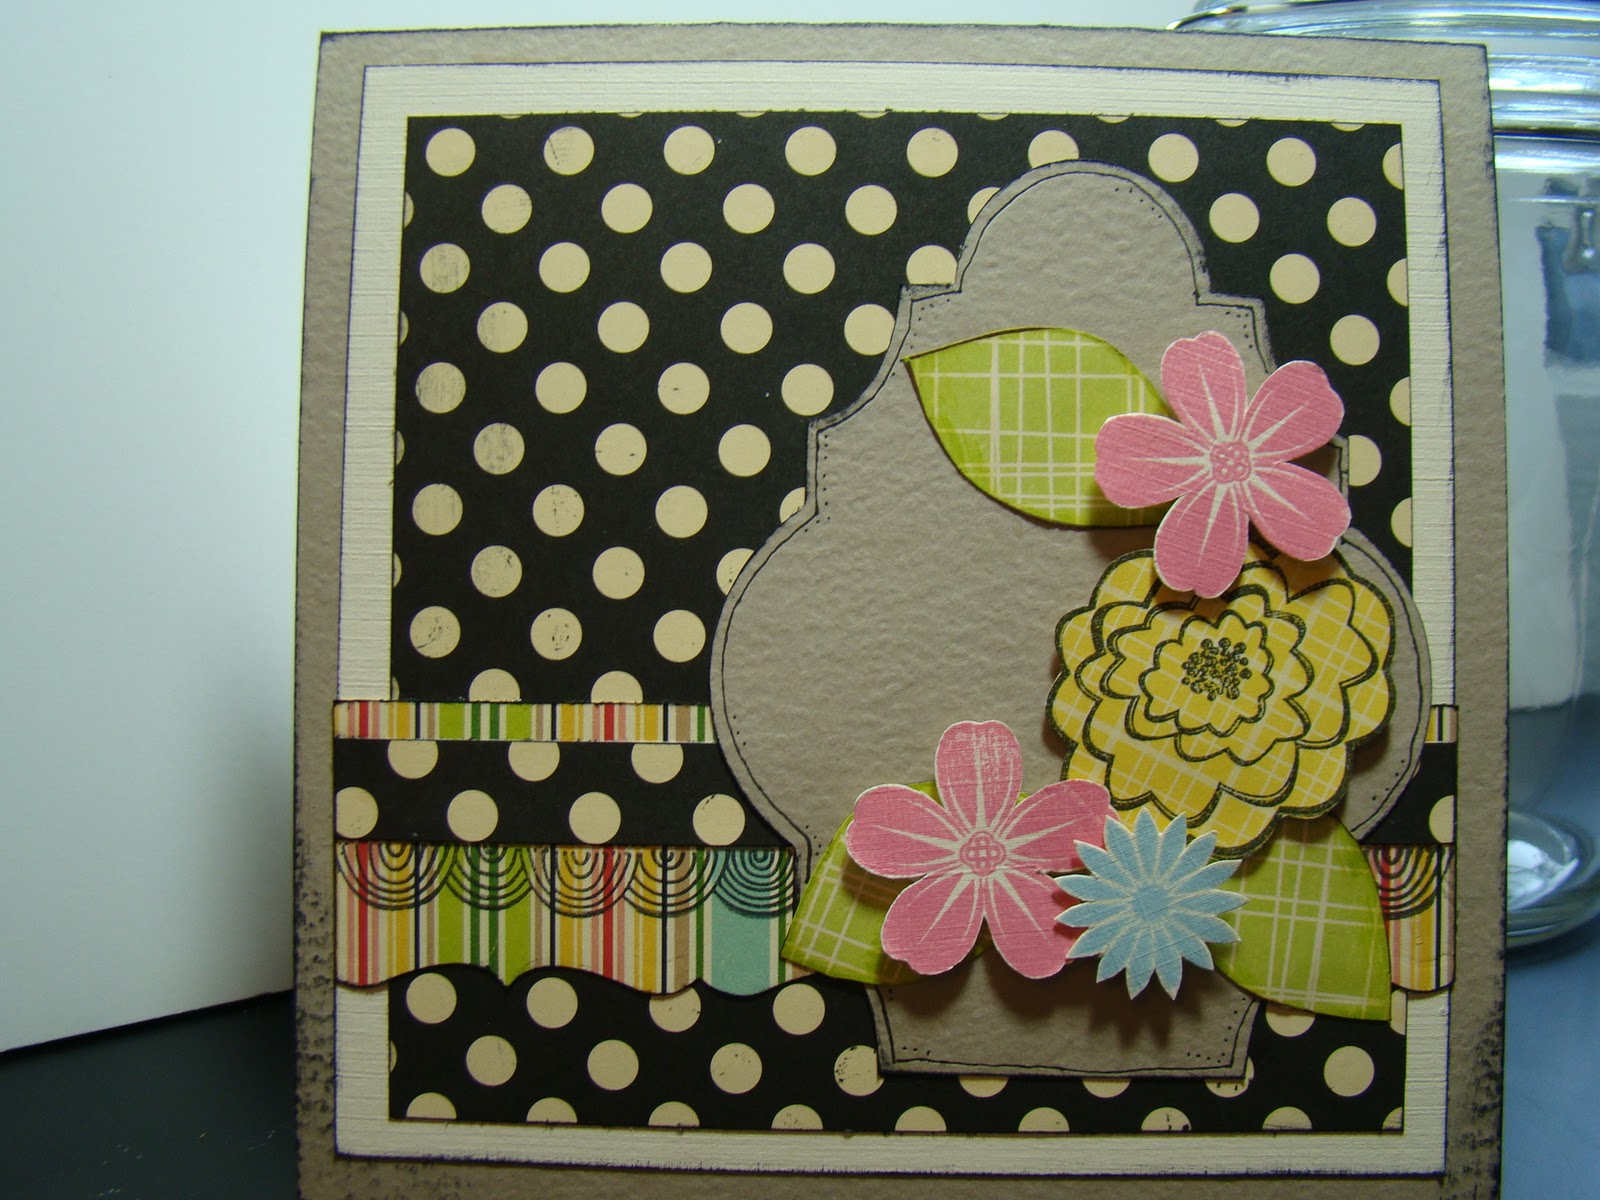
So, for my first card I used the new line of paper from Echo Park (I received this paper in my July kit from WIPkits - which I just love! And Trish even threw in some fun extras just because she's super!) and instead of die cutting I used the die cut stickers from the same line and some of the titles that they have on a 12x12 sheet of paper. Talk about easy! To be honest, this card, from conception to completion, took me about 15 minutes! That's a record for me!
I took a 6x6 in. card (tan), inked the edges in Dark Brown Chalk Ink, then added a piece of green patterned (5.5x5.5 in) which I cut a couple of small slits on 3 of the sides and then peeled back the corners, inked and adhered. I then took an orange patterned piece, cut to 2x5.5 in., inked and adhered. Then cut the flowered patterned piece to 3x5 in., inked and adhered. I then cut the "Thank You" title from the paper, inked and adhered with pop-up tape. I took a scrap of ribbon, glued it beneath the thank you, added a yellow button and tied a knot from the same ribbon and glued that to the button. Viola! A cute and fun card in no time!

IF you decide to try 30 Cards, 30 Days (like Rose, Thanks for joining me!) and would like to share, please email me a picture of your card at raven26105@msn.com and I'll post it up!

Thanks, and tune in tomorrow for Day 2!
Andrea

Wednesday, July 28, 2010

30 Cards, 30 Days

I thought that this would be a challenge for me, and could also be a challenge for you! I took an idea that I saw on a different blog where the person made 30 different flowers in 30 days - so I've decided to translate that to cards! I'm only using the supplies that I have, which could make it really hard towards the end! So, stay tuned! I'll post a picture of a card that I completed the day before every day! Whew - I'm very excited! But I'd better get cutting!

See you Friday!
Andrea

I'm really trying

Adam has been in his room, tearing it apart for 2 hours now. I've rocked him, sang to him, read to him, put his blankie on 100 times and... no nap! I'm not pulling out my hair or banging my head on the wall, I have given up! He beat me - which is embarrassing to admit. But, then again, without a nap, bedtime comes sooner soo - who wins now???

I'll check back in tonight and post a blog about crafting instead about desperate mommies, I'm trying to decide, should I do 30 cards, 30 days or Cards:Inspired? What do you think? What do you want? I'll decide by tonight and if you have an opinion, please share it!

Thanks!
Andrea

Friday, July 23, 2010

More "Birds and Bees" Fun

Happy Friday!
I love Friday, the anticipation of the weekend, sleeping in on Saturday and Sunday, our traditional BIG breakfast on Sunday or Donuts (1 splurge a week:), getting to do work stuff without a 2 year old demanding "Mama, Adam watch trash truck", which happens after each trash truck video on YouTube runs out (some which take less than 1 minute) and overall weekend fun!

So, just in case you're looking for a little weekend inspiration, here's a few cards and layouts that I created this past week using the Birds and Bees release from QK - they may look a little similar to my Design Team posts but, well, sometimes I can do the same layout or card 2 or 3 different times and end up with totally different pages just by using different paper combos and dies.


(Catepillar, branches, bee - new QK Release)

(Ladybug, vine, flowers - new QK Release)

(Flower, leaves - new QK release)

(Birdhouse, bird, branch - new QK release)


If you have any questions, please let me know!
Happy Weekend, All!
Andrea

Tuesday, July 20, 2010

I put my mark on them!

Hello Everyone!

Well, I thought that I was totally ahead of the game! My plan was to post a project and picture 2x's a week... Opps, I guess I forgot! So, I'm pretending that last week was my planning week and this week I will start fresh with my twice weekly goal! So, here goes!

I've been very into stamping lately. I think it's because the stamps are just too cute and you can really stretch your dollar with stamps! I posted some stamped pages a few weeks back and I still loooovve those, but I've also done a few cards with stamps for an upcoming class and I wanted to share some of them with you!


(Thanks Card)

(Just My Type Card)

(All Occassion Flower Card)

(Doilies Card)

(Lil' Cupcake Card)

(Any Occassion Card)

As I'm sure you've noticed, I'm head over heels in love with October Afternoon and Cosmo Cricket Paper Companies... I just can't stop hoarding, I mean, using them! The coolest thing that I found is that October Afternoon is making stamps to compliment their lines - very cool! I used the clear cling stamps that they made, but I also know that Unity Stamps creates stamps for Cosmo Cricket as well - can't wait to find some of those. Soo, please take a gander at my cards and let me know what you think! My fav - the vintage "Just My Type" card!

Happy Tuesday Everyone!
Andrea

Tuesday, July 13, 2010

Silhouette

Hello!

I've spent the past week working on a sweet Summer mini-album - it turned out more girly than I usually do (I love girly stuff but with a little boy... girly isn't always an option) but I really enjoyed making it because . . . I used my Silhouette for every page!

I received my Silhouette last August and was super excited about it. I set it up, uploaded the program and then - well, used it very little. I don't know why, I think it was because I never took the time to get fully acquainted with the computer program (which is very easy to use) which I should've done since they have a great tutorial on their website.

So, I decided to bite the bullet recently and started reading their blog (not just looking at the pictures for inspiration!) to see different tips and techniques along with reading their WHOLE online tutorial - which I'll have to go back and read for references now and then - and viola! A very fun, made to my measurements, summer mini-album with October Afternoon's 'Fly a Kite' and 'Thrift Shoppe' paper lines, Stickles in sooo many colors, Diamond Glaze, Liquid Applique... so much of my favorite stuff!


(Lazy Summer Day's Cover)


(My favorite page in the album!)

So, I guess my point is:
"Don't be afraid of the machine, it's a lot harder to break than it looks!!!"

Happy to Everyone!
Andi

PS - the Mini-Album is a class at Collective Journey's on August 29th - call 909-793-2200 for details and to sign-up!

Saturday, July 10, 2010

Summer's Noteable Moments

I was inspired by a project that I saw on http://wipkits.blogspot.com/ under their Gallery button - take a look if you'd like to see great projects by sooo many talented ladies!!! - so I decided to make my own -


(Summer Noteables Cover)

(Inner Pages)

(Inner Pages)

(Inner Pages)

It's so simple, and I used the Bird's and Bee's QuicKutz Release, all I did was create a word document for the inner pages so that each page would be 4.25 x 5.5 in. when they were cut down. I covered chipboard (4.25 x 5.5 in) with a white solid on both sides, then cut a patterned piece of paper (4 x 5.25 in) and then added a little strip of striped paper (1 x 4 in) and die cut the Cookie Cutter Flowers from the release and added the word "Summer" in the Katie Font. I doodled around the edges of everything ( i love doodling right now!) and when I had my pages cut down to the right size I scalloped border punched one edge just for some interest. So easy and simple but a fun little reminder of the Summer of 2010! Thanks WIP for the inspiration!

Saturday, July 3, 2010

Vinyl Wall Decals

Hello!!! Happy 4th of July Weekend!!! We're pretty tame around here, it seems like we're using the 4 day weekend (my amazing husband has 4 days off of work - yay!) to get some projects done that we've been thinking of doing for... well, since we moved into our house!!!

My weekend project is to finish Adams playroom! I was inspired 2 years ago when I saw a letter wall in a family room - I thought "I could do that..." so, when we started painting the playroom I drew letters on the wall to paint... then I realized that this was going to take forever and because we have cottage cheese walls (I'm sure that's not the technical term), I realized that my letters weren't going to look clean and crisp... hmmm, what to do, what to do? So, I painted over my drawn letters and let that hang out for a year and still pondered. Then, almost a year ago I got the Silhouette SD machine and my LSS started selling vinyl by the roll and I realized that I could use my machine to cut out letters of any font and size that I wanted! And so, here is my wall today.


 I still have more work to do, I used a whole roll of vinyl on this corner, but it looks super cool and I'm very excited. It's very easy too, once you get the hang of it. Here's my two suggestions:

1. Create a whole page of letters and place them where you want them (size, spacing, position) on your word doc. If you know where you want them on your page it's easy to transfer them and get the same look on your wall.

2. USE TRANSFER PAPER!!!! The first time I placed the letters on my wall I took them off the sheet one-by-one and tried to place them like they were on the sheet. What a pain. When I placed them onto the wall they were crooked, the spacing was off and some of them would stick to themselves. Once I read the transfer paper instructions and tried it that way, soooo much easier!!! I even used the same sheet of transfer paper 2 or 3 times before I threw it away!

I also cut some letters from my QK dies to fill in the gaps between some letters. Just use the vinyl, cut it down to fit the letters that you want to die cut and run it through your Epic the same way you'd do paper.

Remember, you can cut any shape from vinyl if you have a machine to cut it from or a die!!! I plan to make a bunch of shapes and give them to Adam so he can decorate his own wall - hopefully it doesn't take me 2 years to do it, tho!!!

Happy and safe 4th of July to everyone!!!
Andrea