Photobucket Photobucket Photobucket Photobucket Photobucket Photobucket

Saturday, June 28, 2014

Candy Dispenser Terrarium

Hello...

It's June!  Actually, its the END of June!  Is anyone else shocked by this fact?

I barely have enough time to squeeze in my WeR Lifestyle Crafts Studio Team project and post!  And, the crazy part is, my project has been done for weeks!  But, I started back to school, yes, me! in early June so all of my computer time has been doing homework and once I'm done with homework, I put my computer down with relief and ignore it until I need to do more homework so the blog has suffered greatly!

But enough about homework, lets talk terrarium!


Terrariums are kind of the cool thing right now.  If you're been on Pinterest or read any sort of design/DIY magazine lately, or basically existed, you've probably seen some sort of terrarium.

I love the idea of making up little worlds inside our world.  The idea of fairies, gnomes, imps, etc. living in a miniature world under our feet makes me happy.  I've been on the lookout for a cute container to make my own world in with succulents and flowers and happened upon this cute, old fashioned looking candy dispenser at a yardsale for $1.  I snatched it up, took it home and knew that it would be a perfect, fun container to create a miniature world in for the playroom.


I had everything for my terrarium, so I cleaned the candy disassembled and cleaned out the candy dispenser.  I then lined it with garden fabric and taped off any openings with blue tape.  I filled it with 3 different layers:
1.  Glass Marbles
2.  Succulent soil
3.  Pea Gravel
I placed my small succulents in the soil and realized that I may have filled it up just a little too much, but luckily for me, succulents aren't that picky and I was able to move them around until I had the formation I wanted.


I asked Lil' A what kind of world he wanted for his terrarium and he picked a prehistoric one, so I used my QuicKutz dinosaur die and a few flowers to cut from solid paper.  We made the dinosaur blue and the flowers yellow, hoping the colors would pop against the succulents.


I taped toothpicks on the back of the flowers and dinosaur so that they would stand up in the terrarium and it worked like a charm!

The fun part of this is that we can change it out with ease!  We can do a seasonal theme, match the terrarium to whatever Lil' A is into at any given moment with no expense and very little time!

You can do this same idea in any container, it doesn't have to be a candy dispenser!  You can go to the DollarTree or the 99Cents Store and find a number of containers that would work... let your imagination grow roots!

And, if you need any dies for your terrarium, use code KUTZPAPER at checkout to receive 20% off!


Thanks for stopping today!  Here's to hoping we can all find a little magic in our worlds today!
Andrea

Wednesday, May 14, 2014

BIG SHOP NEWS!

Good Morning!

A few months back, I said that there were going to be some big changes in my KPS Etsy shop... and I've finally put those changes in play.

I've decided, after over a year of contemplation, talking with my husband, watching the needs of my little family change, to close the Kutz. Paper. Scissors. Etsy Shop.

This was not an easy decision to make, which is probably why it's taken me so long to actually close it, but fortunately, I had a kick in the pants this spring due to my families health issues and now, a person/family in need.

Meet Sarah Amento and her beautiful family.


I've never met Sarah but I've been following her story for a while now.  A friend of ours is a good friend of hers and she's posted numerous messages about Sarah's battle with cancer, fundraisers to help Sarah and her family, etc on her Facebook Page.  The thought of her having to leave her family is so wrong, well, there's nothing else to say.  It's all wrong.

And while I can't do much to help this family, there's an upcoming fundraiser where they're hoping to raise enough money to send Sarah to Austria for a treatment they're hoping will extend her life up to 5 years. So, I donated my entire KPS inventory to the fundraiser.  I'm hoping they sell everything I gave them and that they use that money for whatever they want.  I wish I had more to donate.

You can read more on Sarah's story here:
http://www.fightlikesarah.com/

You can also visit her Facebook Page here:
https://m.facebook.com/fightingcancerwithsarah

So, you can see why closing the Kutz. Paper. Scissors Etsy Shop became less of a decision I had to make, and more of an action I had to do.  There's no better way to run out of inventory!

As for my KPS Blog - don't worry, it's still here and not going anywhere!  I love sharing ideas, recipes, family life and more with all of my readers.

I hope you have a great day, and please, if you have a moment, read Sarah's story.
Andrea

Tuesday, May 13, 2014

WeR's Evolution Advanced Debut!

Good Morning!

When I was at CHA back in January, I saw the NEW Evolution Advanced, which was amazing!  Why is it amazing?  Well, let me tell you!

The Evolution Advanced is perfect for die-cutting, embossing, and letterpressing.

Cool features:
1.       It has an adjustable roller so with the switch of a dial you can set the machine for your project instead having to figure out which mat combinations to use.  (AMAZING!!)
2.       The Evolution Advanced is interchangeable with a hand crank or motor option. (Hello, arthritis or tendinitis sufferers!  This is just what my Mom needs!)
3.       The tool folds up and has built in storage. (Yay!)

If you want to see the Evolution Advanced in action, check out the video tutorial:  http://tinyurl.com/nbwvc7e

And here's the link to the WeR info page: http://www.weronthenet.com/Evolution_Advance_Debut

The Evolution Advanced is making it's debut on HSN tomorrow, May 14th, at a great price so check it out! There's a very limited quantity, no pressure here, but if you like it, you should jump on it!


Have a great day!
Andrea

Thursday, May 8, 2014

Holy Momofuku Cornflake-Chocolate-Chip-Marshmallow Cookies & Teacher Appreciation Gift

Good Morning!

Momofuku.

Could be my new favorite word.  I know it's Lil A's new fav.

Its definitely my new, favorite cookie!


Today, for Teacher Appreciation week at Lil A's school, it's bring your Teacher something to Eat!  So stay with me, we've done SUP and now E=Eat!  Some kids brought the teacher fruit (nice, healthy) and other kids brought Starbucks cards (yum!) but NOT us!  We went with a cookie that has everything sweet and sticky in it under the sun... that also happens to be the MOST DELICIOUS COOKIE EVER!


Lil A and I were watching something (I have no idea what!) and they were talking about a restaurant in NY, Momofuku Milk Bar and there were talking about the Momofuku Cornflake-Chocolate-Chip-Marshmallow Cookie and Lil A just thought the name was the. BEST. name. ever.  So, when I asked him what kind of cookie he wanted to make for his teacher, he cried out "Moooo-Moooo-Fu-Coooooo!!!!"  Seriously, it was the hilarious hearing him say the same.  So, I googled the cookie and found the recipe here.

It was time consuming, you have make the cornflake crunch first and let it cool, so I think we started making the cookies around 12:45 and ended up cooking the first batch at 3 pm (there's also fridge time, we weren't working on the cookies the whole time!).

We also baked the first batch a little too long... the recipe called for 18 minutes, and that's what we did, but I think we should've taken them out at the 16 minute mark.


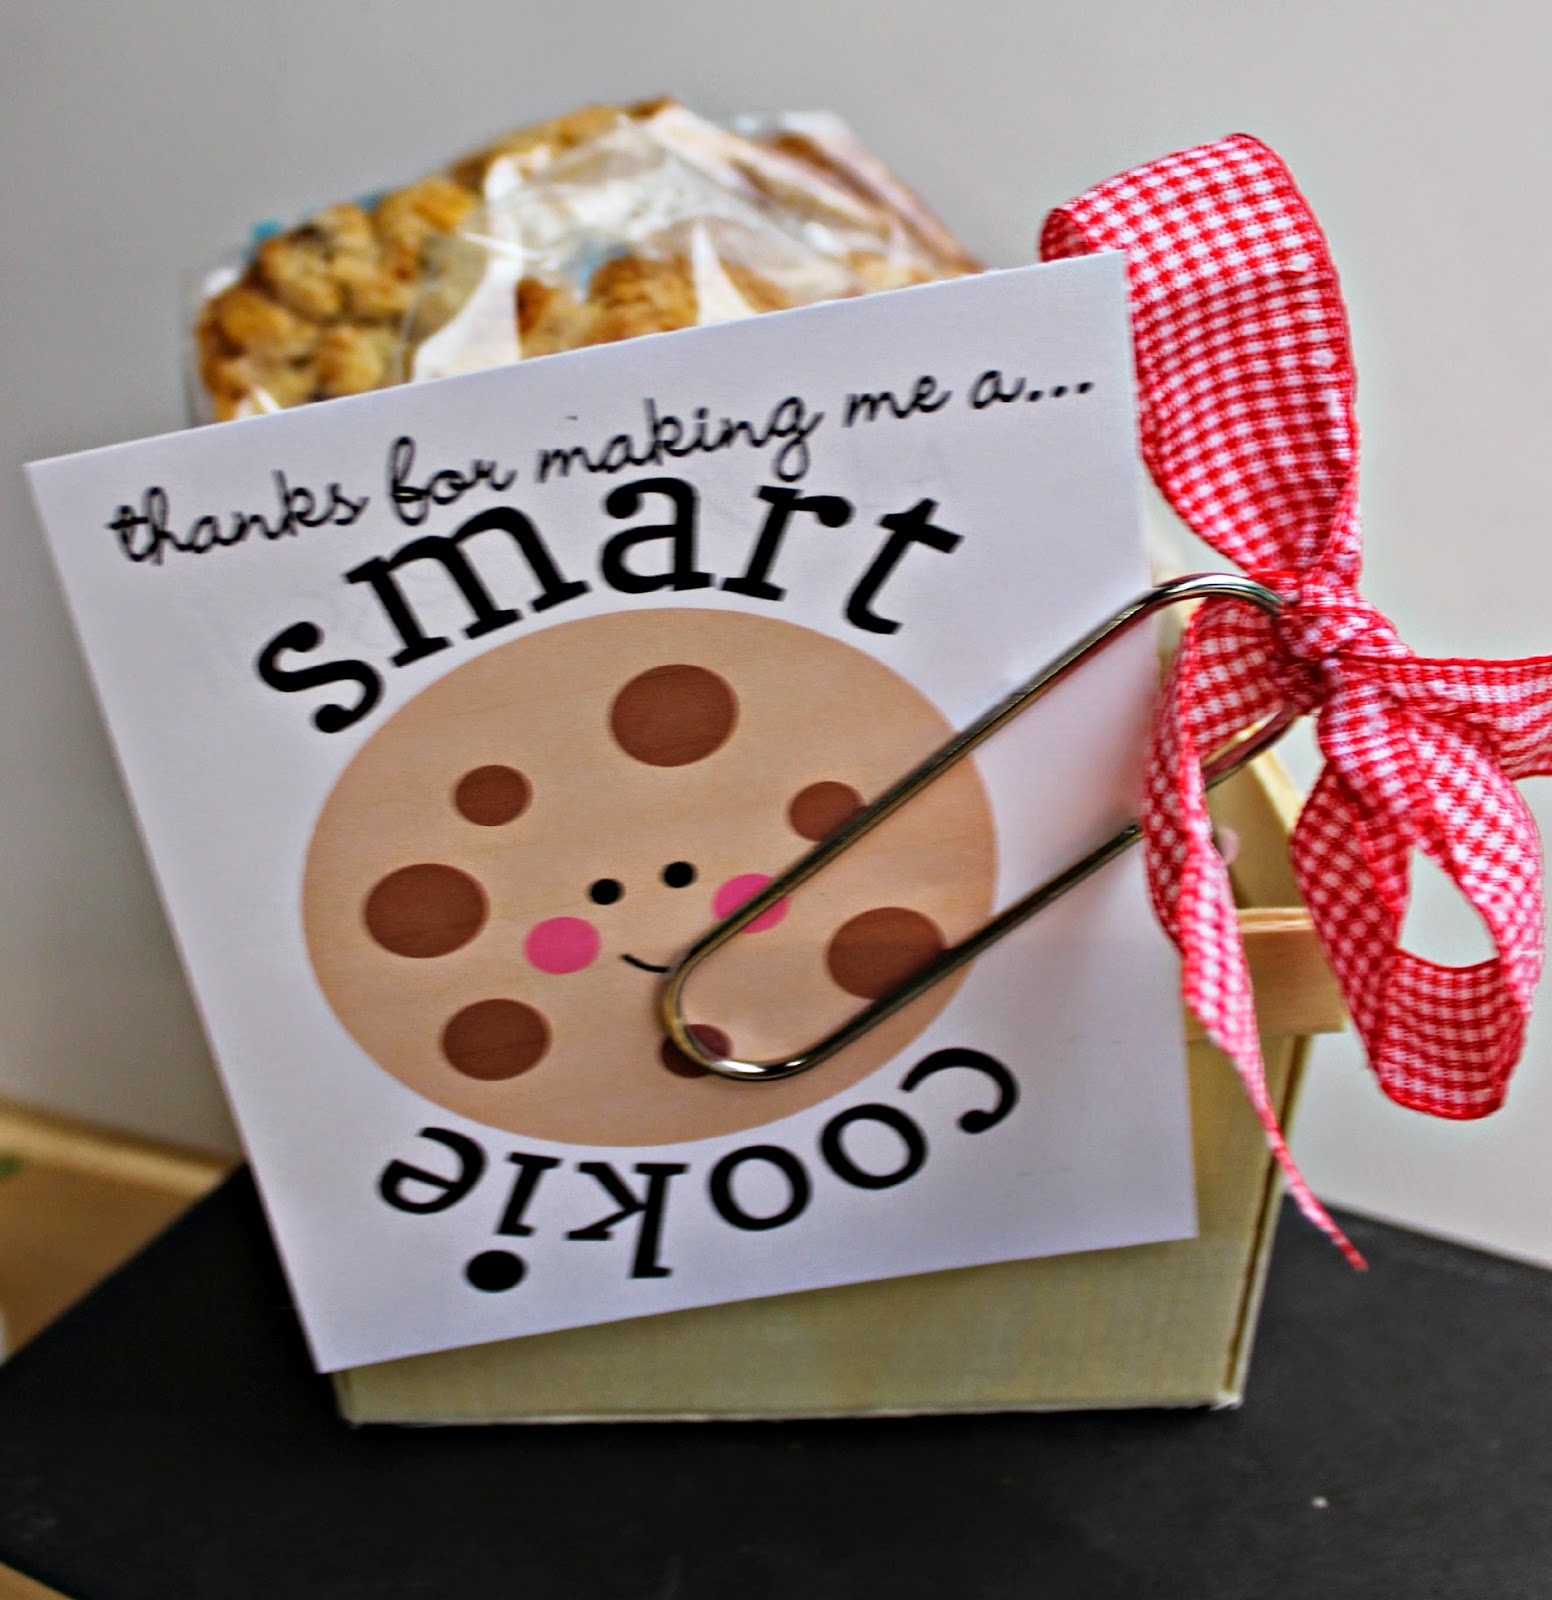
We ended up putting the cookies into cello bags (1 cookie per bag) and I used WeR Washi Tape to close them up.  We put them in these super cute, wooden berry containers that I purchased from Michael's with a little shred.


I made the cookie tag with my Silhouette's Print and Cut feature. It's so cute! I tied ribbon into a bow onto a super big paperclip and used that to attach the tag to the berry container.

So, go on, make a Momofuku recipe!  And say Momofuku in as many fun, crazy voices as you can come up with - I'm telling you, it makes the cookies taste better.  I'm eager to try the Crack Pie and Strawberry Lemon Cake from Momofuku as well...

Have a great day- hopefully it's involves a cookie!
Andrea

Wednesday, May 7, 2014

Choose Happy Wooden Sign - Teacher Appreciation Week!

Good Morning!

Happy Wednesday!  If you have a little person that's of school age, then you probably know that this week is Teacher Appreciation Week!  Our Schools theme for the week is Super Hero's and they also sent home a very helpful note suggesting what we can bring our teacher every. day. of. the. week. So far, we've taken supplies (the "S" in "super"), something unique or useful (the "U" in "super") and today, we took something pretty (the "P" in "super").  Here's what Lil A and I made...


I asked Lil A what he wanted to get for his teacher for something pretty... I suggested going to Collective Journey (our local paper crafting and gift store) and picking something out but he said "I want to make her something!", so I said, "Like a picture or something?" and he replied, "No, like a sign like you make for your business".  Now, I'm going to admit that I was not thrilled at this prospect... since it was Tuesday afternoon at 2 pm, all I could think of were the other million things on my To-Do list that weren't going to get done, but then I reminded myself that he's not always going to think what I do is cool, or that crafting is fun and at some point, he may even think that picking something from a store is more meaningful that making something (gasp!).  So, I went with it.

I had 2 slices of wood that I'd gotten from Joann's around Christmas time, so I unwrapped the packaging from one, measured and grabbed my computer.  I knew I wanted to use WeR's Farmer's Market paper line, I loved the soft hues and thought it looked like colors and patterns his teacher would like.  I let Lil A pick everything else out - we looked at my shape library on the Silhouette and he picked out the Cute Flower Wreath and the "Choose Happy" saying (I made the shape with my text and weld buttons), which I then sized with my Silhouette Software and cut with my Cameo.


I had Lil A glue all the different elements to the wood with Scrappy Glue.  Talk about a lesson in patience, I kept telling myself to let him do it, even if it was crocked or off center... my OCD was screaming the whole time,  but it's perfect! He did such a good job and he was so excited to give it to Mrs. L this morning!  You could see his pride!


I guess he choose happy in this picture, huh?  You should've seen the other ones we took, one of them was super cute, the others he was making a mad face and moving the sign up and down over his face and changing his expressions...  he's a character!

You could really make this sign for anyone - just change the saying, design, colors, paper to reflect the holiday or the recipient.

We hope you enjoyed today's project, have a great day!
Andrea (and Lil A!)

*As always, if you like the paper you see here, visit ShopWeR to purchase and use code KUTZPAPER at checkout to receive 20% your total!

Monday, May 5, 2014

Fiesta En Una Caja! (Party in a Box) AND Happy Cinco de Mayo!

Happy Cinco de Mayo!

One of my favorite things about the Mexican culture is how bright and fun everything is.  I'm half Latina, so maybe it's in the blood, but the colors, flowers, happy, good time loving muertes, FOOD, music... it just makes me want to fiesta!  So, what better way to celebrate Cinco de Mayo than with a Fiesta in a Box?


Bright, fun colors are a trademark of the Mexican culture, so when I was deciding what would go into my box, I knew that I had to make a cheerful banner. I used yellow, green, blue, purple, red, pink and orange cardstock for my banner along with my Lifestyle Crafts Doily Banner die. Aren't those great!?


I was able to get 6 flags from each 12" piece of cardstock - I used red and white bakers twine to string them with.  Also, when I was popping out all the little shapes that create the design, I kept them all to create confetti.  Hello!  Two-fer!


I made a bunch of tissue flowers using the Lifestyle Crafts Nesting Flowers die.  This went by super fast, I was able to cut 15 pieces of tissue at once! I used a brad for my center - this held all the different layers together while giving me something to bunch all the different layers of petals around. You can tape the flowers to your wall for a pop of fun or stick them to skewers and have them coming out of a salsa jar on your table...


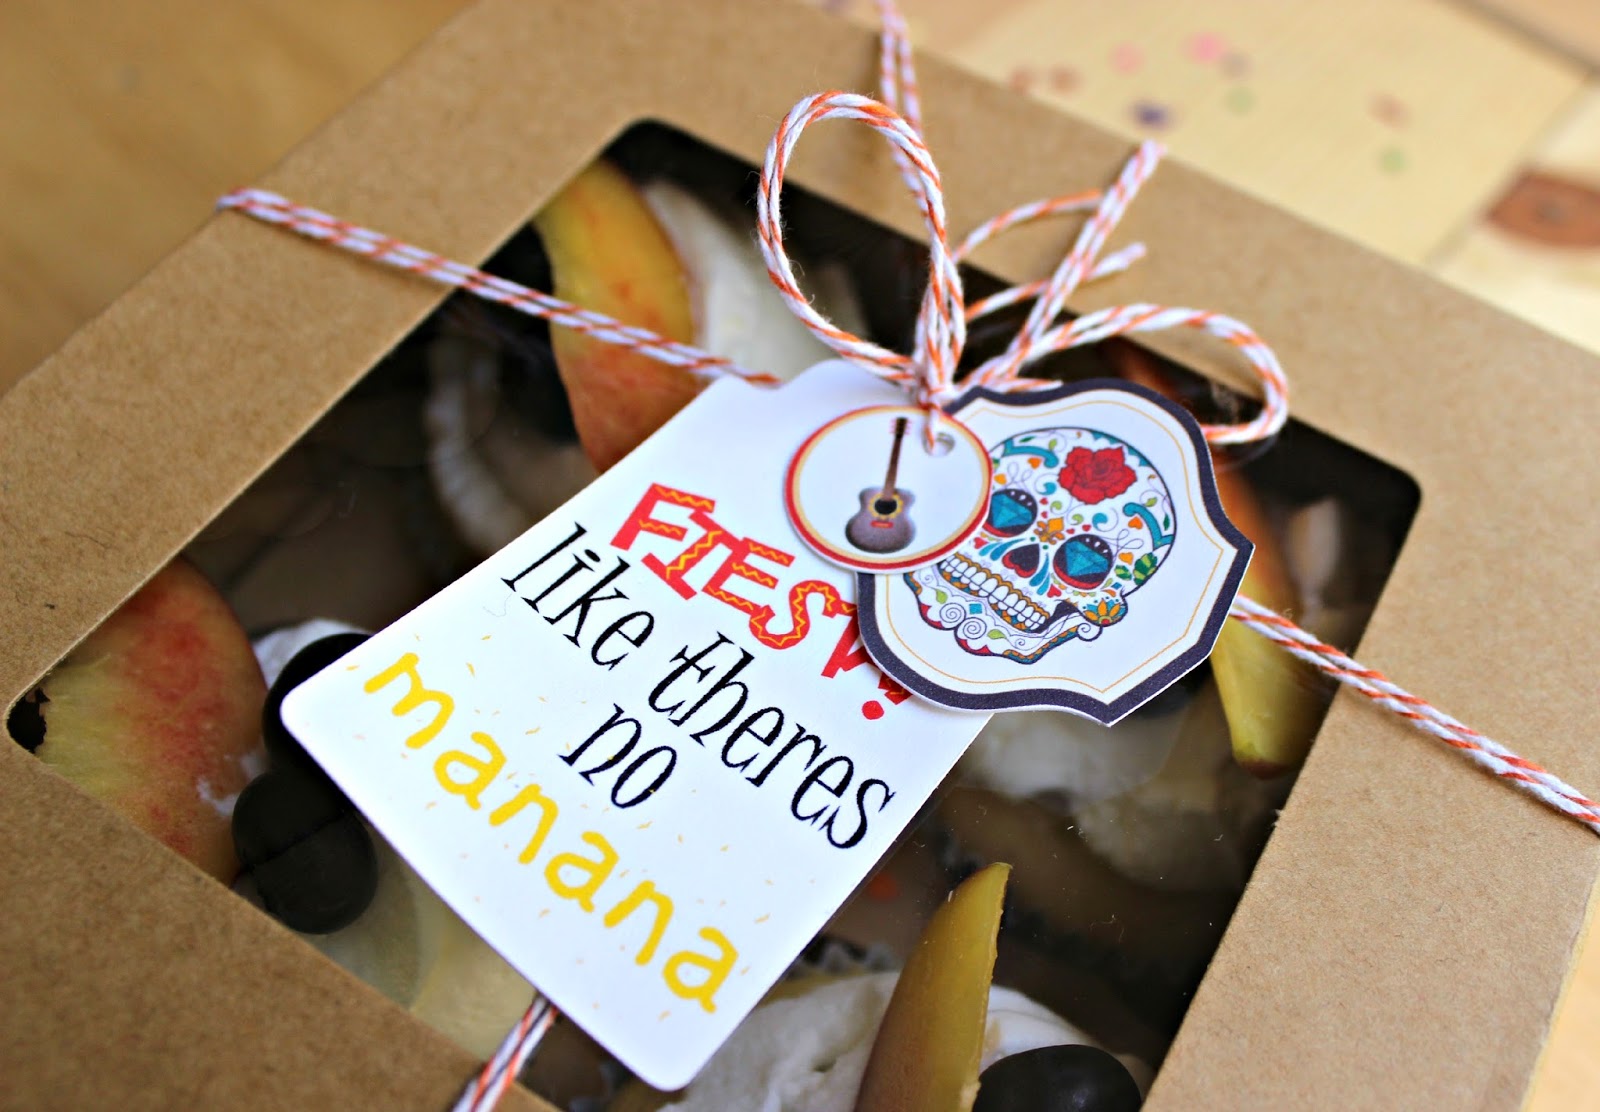
I used my Silhouette Cameo to create the tags to close my cupcake filled bakery box.  Silhouette had these great print and cut "Fiesta" labels and tags (the sugar skull and the guitar tag) and I created the "Fiesta like there's no manana" tag using their software.


And last, the highlight of the box (in my opinion), are the Tres Leche Cupcakes.  Tres Leche is a traditional, Mexican dessert that is super yummy, light and easy to make; the Tres Leche name comes from a delicious mixture of Condensed Milk, Sweetened Evaporated Milk and Whole Milk!  I used this recipe from Martha Stewart, which I highly recommend.  The cupcake is a little dense, but after you poke holes and pour your tres leche sauce over it, the dense cake is necessary so that your cupcake doesn't end up mushy.  The "frosting" is a handmade, whipped cream mixture that I topped with fresh peaches and blueberries, but you could do cinnamon with a caramel drizzle if you wanted a little more richness.  But these are perfect just the way they are in my book!

Side Note - I used foil wrappers for my cupcakes to help keep the moisture in!  This is a great tip if you decide to duplicate these cupcakes.  I cooked them at 325 degrees for 20 minutes and they were perfect.  If you're making the cake per the recipe, just follow the directions.

And last, once you have all of your goodies packed up and ready to go, drop them on your friends doorstep, ring the doorbell and run!  Who wouldn't want to open their door to find a Fiesta En Una Caja?  I also added some wooden castanets for the kiddos (yes, your friends may or may not love these) that I found in the Target party aisle and a few tissue fans that they could put together and hang around their house.  

Ole!
I hope you have a great day, celebrating Cinco de Mayo in, or out of, a box!
Andrea
KPS

As always, if you want to purchase any of the dies that I used in today's post, visit the ShopWeR page and use code KUTZPAPER at checkout to receive 20% off your purchase!


Friday, May 2, 2014

NSD LIfestyle Studios Design Team Blog Hop!

Hello!

Happy (almost) National Scrapbook Day!  I LOVE NSD - what's better than a day dedicated to (most) of my favorite things... paper, dies, glue, sparkle and photos?!

And to celebrate this fantastic day, KPS is participating in the Lifestyle Studios Design Team Blog Hop!  Can you say that 3 times fast?  Take a gander at my project...


Since I'm on the Home Lifestyle Studios Team, I decided to make a fun, wall sign for my May Project.  I know, I know, it's not a scrapbook layout, but I did use all of my papercrafting supplies for this project so it kind of counts, ya?  And you could easily duplicate this idea on a scrapbook page... have I convinced you yet?


I started off by making my board.  I plan to hang this above my fireplace, so I made the sign 2'x3', which will fit nicely in my little niche!  After I cut and laid out all of my boards, I glued them together and then added brackets to the back to stablize it.  More on this soon!  I then stained the wood (okay, Big A stained it!) in a very pretty, grayish color named Driftwood.


Next, I started die cutting.  I grabbed my Lifestyle Crafts 4x4 Feather Die and my the feather dies from my Lifestyle Crafts Feather Headband die because I knew I would need a range of sizes to create my large heart.

I fell in love with WeR's Inked Rose paper pack - everything about the paper, from the designs to the colors were exactly what I was looking for, so I picked out my papers and cut:
(2) sets of feathers from my 4x4 feather die
(2) small feathers from my feather headband die
(1) large feather from my feather headband
There were a few reasons that I cut more than one set - 1. I knew I wanted a large heart so I'd need a LOT of feathers and 2. I liked the pattern on both sides of the papers.

I also used the Embossed Sticker sheet from the Inked Rose Paper pack, a 12x12 sheet of WeR Gold Metallic paper, 2 round punches (7/8" and 1"), clear rhinestones, the Silhouette Cameo and Scrappy Glue.


Once I had all of feather die cut, I started by laying out my design.  I made the outline of my heart with my feathers first, adjusting it as I went.  I then started filling in the heart with the remaining feathers, gold circles and stickers.  When I was happy with the way it all looked, I grabbed my Scrappy Glue and started gluing everything down.  I added the rhinestones as I went, wherever I need a little filler or sparkle!


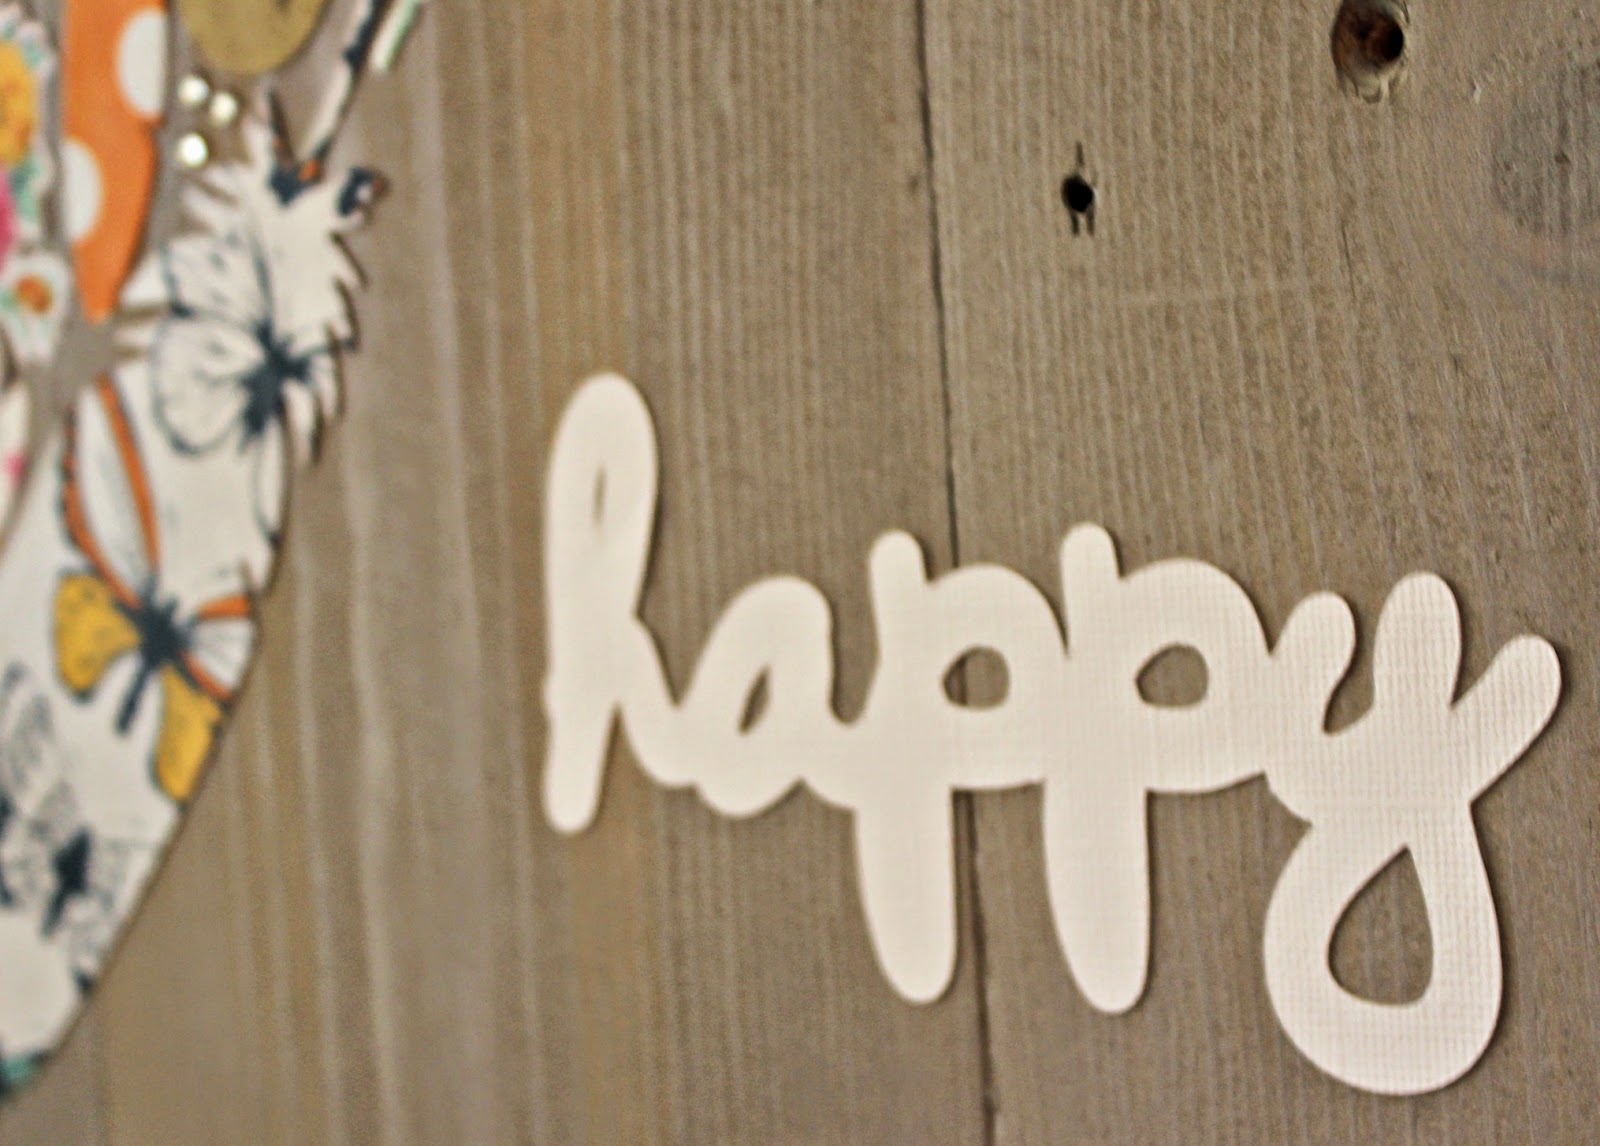
I asked my husband to pick 1 word that described our family and, as cliche as it may sound, he picked "happy" and I couldn't agree more, so I formatted and cut my "happy" phrase with my Silhouette Cameo from white cardstock and glued it to my sign.  I will say that I'm a little unhappy with the size of the phrase, but it's glued down good so I just have to deal with it!


So that's it!  My Scrappy Heart Wall Art!  If you see any products here that you need (like the Inked Rose Paper pack - seriously, you guys!  You must get it!), visit ShopWeR and use code KUTZPAPER to receive 20% off!

And if you'd like to keep getting inspired for NSD or any day, please check the other talented ladies on the Lifestyle Studios Design Team!

Aimee's Armoire
Benzie Felt Fanare
Cokie Pop Paper
Cutesy Crafts
Ginger Snap Crafts
Gluesticks Blog
Homework
Missy Dear                       www.missy-dear.com

Making the World Cuter
Midwestern Girl
One Scrappin Mama
Popsicle Toes
Pretty Providence
Scrap Time
Sew Craft Create
Snapping Monsters
The Creative Mom
Tried and true
Waffleflower
We R Memory Keepers
Worley House

And don't forget to enter WeR's NSD Giveaway to win this fun tote!  And you can enter as many times as you want... and if you share with your friends, you get more chances to win!

I hope you have a wonderful weekend and that you celebrate NSD covered in glue, paper and dies!
Have a great day!
Andrea