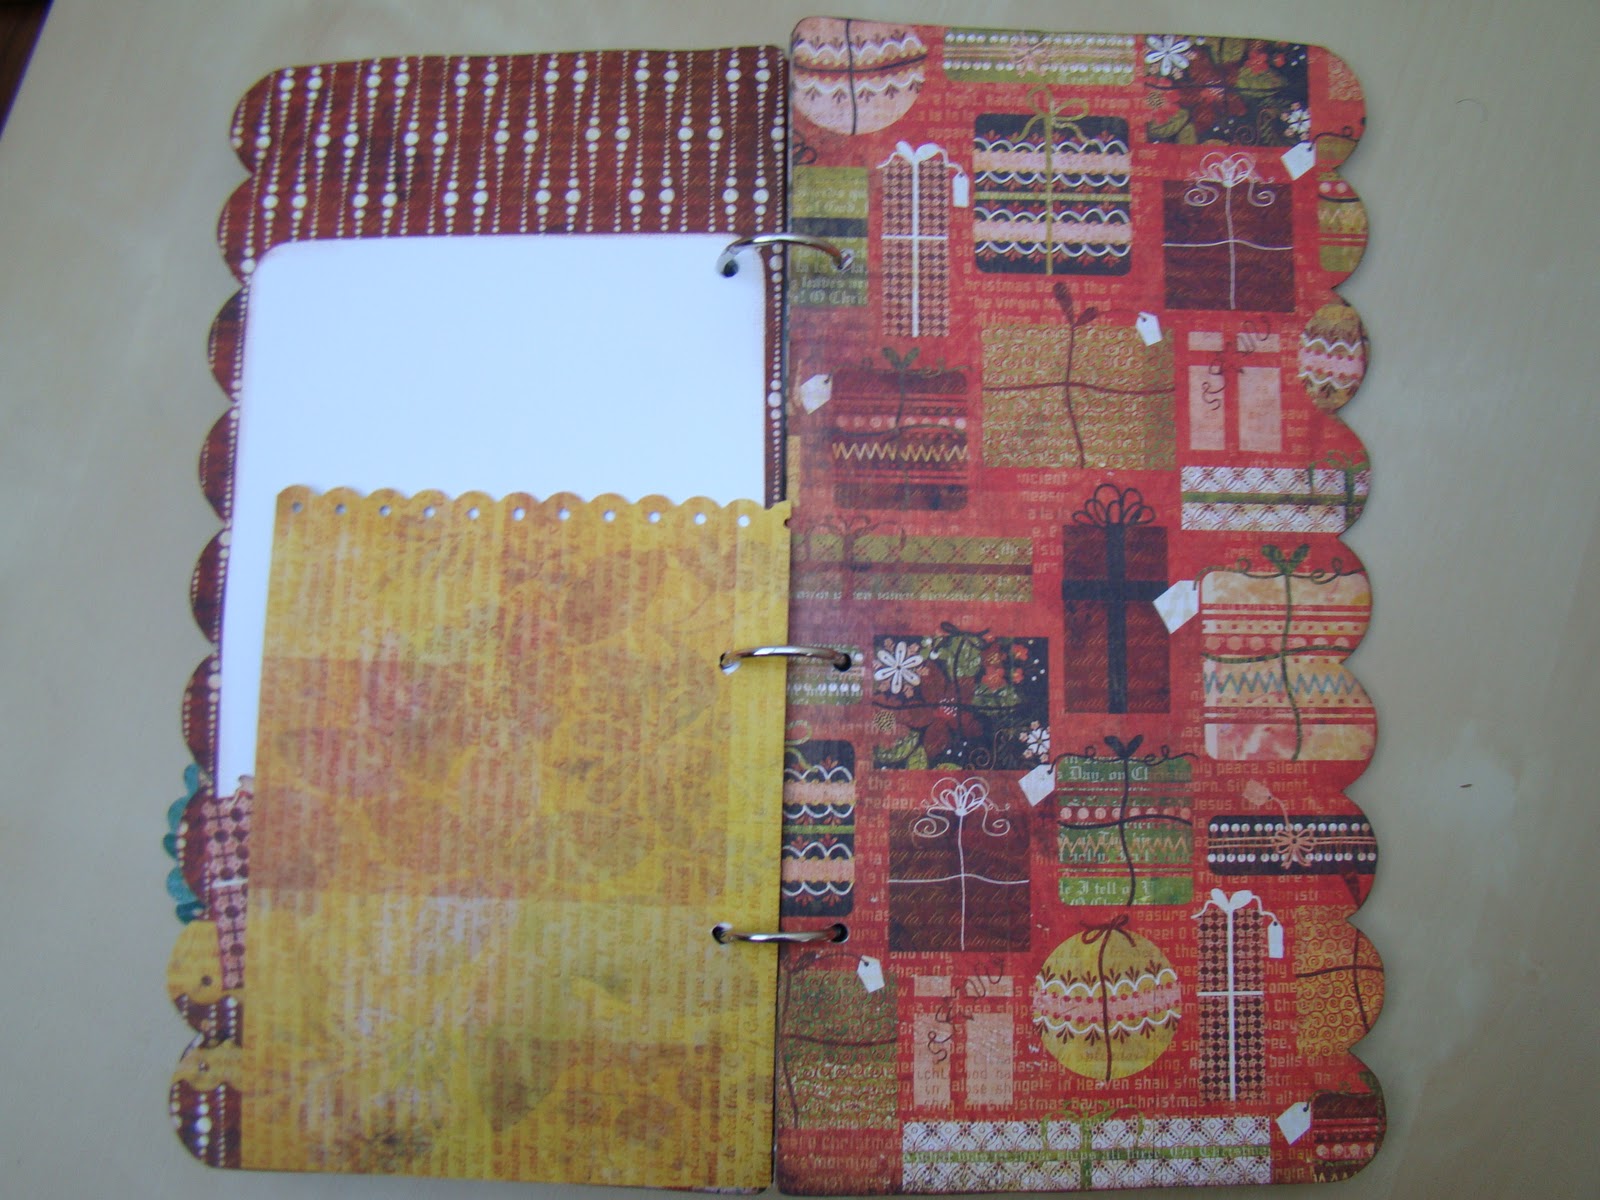
Here's an album that I made using all Basic Grey's Jovial paper line. I used the Element Sticker and the Chipboard stickers that coordinated with the same line. I also used a few embossing folders because I love how much they add for so little work!! My goal was to make 25 pages for 25 Days of Christmas but I think I scrapped in with 23 pages... oh well. I can always add when I'm feeling inspired again!
Remember, you can always enhance your book with a fun pocket and page, and if you made some of your pages different sizes and shapes then I think it really helps stretch your supplies and keep your interest! The fun part about using this paper was that since the paper was so cute, I didn't really need a ton of work for my pages, I was able to keep them pretty simple which made the whole project easier!
Only 12 days till Christmas! Are you ready??
Andrea
Monday, December 13, 2010
Friday, December 10, 2010
Wish Coupon Book
Here is a fun idea for a project using Life Style Crafts Winter Wishes Gift Set.
I'm planning/hoping to make a few of these for friends to hold their Holiday pictures, but I know that they're also a cool way to give someone gift cards or even for a child to make a coupon book for a parent or grandparent.
The "Book" is 6x6. The accordion fold that the pockets are glues to is 5 x 6 in. with a fold every inch. I think that if you included different size pockets that would be fun, add a cute message or picture in the smaller ones and a gift card in the larger one... whatever you do, you'll knock the stockings off of the recipient!
Have fun!
Andrea
Thursday, December 9, 2010
Tags!
Here are two more tags. I actually have a lot to share so I figured, why drag it out???
The first one is cut from the Silhouette SD, I then took a scrap of Christmas paper from WeR's line and glued it, then wrapped some red/white bakers twine around the tag and then take another scrap of patterned ledger paper and stamped the heart/noel stamp in red. I love the combo of teal and red - Pretty pretty. The stamp is from the Unity Cosmo Cricket Mitten Weather set.
The second tag is pretty simple. I took a 3x4 in black piece and made that my tag base. I stamped a music stanza (October Afternoon Thrift Shoppe Stamp Set) on a piece of kraft solid and adhered that. I also stamped a Cosmo Cricket Snowman (same set as above) on a piece of white paper and cut it out AND onto the kraft paper. I then placed the cut out white snowman over the one stamped onto the kraft so you could see the arms w/o having to cut ridiculously thin arms!!! I added a scarf and a little broom that I had left over from Halloween! Add a little bit of Melissa Frances Glass Glitter and you have a fun and vintage-y (in my opinion) tag for a package! Love this little guy!
Happy Holiday crafting, crafters!!!
Andrea
Wednesday, December 8, 2010
Vinyl Joy
Hello!
I've been racking my brains on something creative to do for our Christmas Cards this year. Ever since Adam was born, I've tried my hardest to think of cute and different ideas for any thing that we send in the mail... his birth announcement looked like an invoice, our moving postcard had him popping out of boxes with our new address... last Christmas I lite up a string of lights and let him play with them and shot it in the dusk... but this year I was stumped! I saw a picture in Jan. issue of Creating Keepsakes where they took a picture and used photoshop to write straight onto the picture. I really liked the effect, but I knew that I wouldn't have the time to take a cute picture and then play with it and then create the cards and then mail them!!! People would be lucky if they got them by the 4th of July! So, I put my thinking hat on and decided that I could get a similar effect if I used my Silhouette and cut out letters, placed them on the wall and then had Adam pose next to them. This is what I ended up with. The picture isn't perfect, the glare was hard to control and my camera wasn't exactly level... but I figure, it goes with the theme of our world! Not perfect, a little off level but pretty darn cute!
EnJOY!
Andrea
(Here's a picture of how I used the same idea, vinyl letters, to finish my mantle. We love The Beatles soo I choose a quote that fit our family!)
I've been racking my brains on something creative to do for our Christmas Cards this year. Ever since Adam was born, I've tried my hardest to think of cute and different ideas for any thing that we send in the mail... his birth announcement looked like an invoice, our moving postcard had him popping out of boxes with our new address... last Christmas I lite up a string of lights and let him play with them and shot it in the dusk... but this year I was stumped! I saw a picture in Jan. issue of Creating Keepsakes where they took a picture and used photoshop to write straight onto the picture. I really liked the effect, but I knew that I wouldn't have the time to take a cute picture and then play with it and then create the cards and then mail them!!! People would be lucky if they got them by the 4th of July! So, I put my thinking hat on and decided that I could get a similar effect if I used my Silhouette and cut out letters, placed them on the wall and then had Adam pose next to them. This is what I ended up with. The picture isn't perfect, the glare was hard to control and my camera wasn't exactly level... but I figure, it goes with the theme of our world! Not perfect, a little off level but pretty darn cute!
EnJOY!
Andrea
(Here's a picture of how I used the same idea, vinyl letters, to finish my mantle. We love The Beatles soo I choose a quote that fit our family!)
Tuesday, December 7, 2010
Christmas Tags
The tree is up, well, both trees are up - and the living room and playroom are decorated... only have the dining room left... which makes me feel very relaxed about all of my Christmas gifts that I have yet to start... but am in the motion of starting! I keep telling myself, "Self, it's only the 7th of December and you only have 10 maybe 11 gifts to create - no problem!" This is my problem every year... my self is a procrastinator!
But, what I didn't procrastinate on is my gift tags! I actually worked up a bunch of samples for a class but knew that I'd be keeping them for my own presents - talk about double duty!! I'm going to post tags off and on for the next 2 weeks; I thought about doing a 25 Tags of Christmas but then we all know how my 30 Cards: 30 Days went... so, I thought I'd show a few here, a few there... in between other projects!
Here's a super easy tag that I cut from my Silhouette SD using JilliBean paper - which I love! I also used the Unity Cosmo Cricket Mitten Weather Stamp for the saying "It's hard to be this good" which I feel sums it up! I cut 2 stockings from the LifeStyle Crafts Christmas release and used a little bit of Bakers Twine. I then covered everything on the white part of the tag with diamond glaze EXCEPT for the twine and the stocking, I wanted dimension. Easy. I think that stamps are the key to tags, they can make everything so easy and you can use scraps from your Holiday cards or projects.
See you soon!
Andi
But, what I didn't procrastinate on is my gift tags! I actually worked up a bunch of samples for a class but knew that I'd be keeping them for my own presents - talk about double duty!! I'm going to post tags off and on for the next 2 weeks; I thought about doing a 25 Tags of Christmas but then we all know how my 30 Cards: 30 Days went... so, I thought I'd show a few here, a few there... in between other projects!
Here's a super easy tag that I cut from my Silhouette SD using JilliBean paper - which I love! I also used the Unity Cosmo Cricket Mitten Weather Stamp for the saying "It's hard to be this good" which I feel sums it up! I cut 2 stockings from the LifeStyle Crafts Christmas release and used a little bit of Bakers Twine. I then covered everything on the white part of the tag with diamond glaze EXCEPT for the twine and the stocking, I wanted dimension. Easy. I think that stamps are the key to tags, they can make everything so easy and you can use scraps from your Holiday cards or projects.
See you soon!
Andi
Sunday, December 5, 2010
Pillow is the name of my game
I was watching HGTV the other night - it was their decorating special - and one of the tips that they recommended was adding festive pillows to your decor to bring the Christmas feeling all throughout your home! So, here's another pillow that I created using my Silhouette SD, Heat Transfer Flocked Material and seasonal fabric. You can follow my directions from the "Believe" pillow that I made and shared a few weeks back. I already gave this pillow to my Mother-in-Law who loves Snowmen and my son!!!
I'll start sharing tags this week so stay tuned!!!
Andrea
I'll start sharing tags this week so stay tuned!!!
Andrea
Friday, December 3, 2010
Advent Calendar
Hello!
I'm sorry it's been so long, Thanksgiving has come and gone and we are heading (with lightening fast speed!) into the crazy/fun Holiday season! Our house is full of snot, hot tea, chicken soup and blankies... but we're still happy that Christmas is around the corner! So, to start it off, I thought I'd show you an Advent calendar that I created using LifeStyle Crafts Winter Wishes gift set.
I used Making Memories Noel paper (I love the cool vintage feel) and I was able to get 4 pockets from 1 sheet of 12x12 paper - so you'll need 7 sheets of paper, plus more for the cards that you put in the pockets (I haven't made mine yet...). Then I just gathered a bunch of materials that I had laying around, little flowers, trim, bells... and some punches to use on my scraps and started diecutting and gluing! I made the letters with my Silhouette, that way I could do different sizes and fonts (although I ended up sticking to the same font, Georgia!). When I was done, I took 2 rulers (I cut one down) and a few screw eyes and attached the two rulers with ribbon through the screw eyes. Attach the pockets on with binder clips (I used misc office ones and Tim Holtz Binder Clips) - you can glue them on if you don't want to worry about them falling off, but this will make it harder to store. I hope you enjoy, I had a great time making this project, it was fun and easy, just the way I like my projects!
See you soon! I have tags and pillows ready to show!
Andrea
I'm sorry it's been so long, Thanksgiving has come and gone and we are heading (with lightening fast speed!) into the crazy/fun Holiday season! Our house is full of snot, hot tea, chicken soup and blankies... but we're still happy that Christmas is around the corner! So, to start it off, I thought I'd show you an Advent calendar that I created using LifeStyle Crafts Winter Wishes gift set.
I used Making Memories Noel paper (I love the cool vintage feel) and I was able to get 4 pockets from 1 sheet of 12x12 paper - so you'll need 7 sheets of paper, plus more for the cards that you put in the pockets (I haven't made mine yet...). Then I just gathered a bunch of materials that I had laying around, little flowers, trim, bells... and some punches to use on my scraps and started diecutting and gluing! I made the letters with my Silhouette, that way I could do different sizes and fonts (although I ended up sticking to the same font, Georgia!). When I was done, I took 2 rulers (I cut one down) and a few screw eyes and attached the two rulers with ribbon through the screw eyes. Attach the pockets on with binder clips (I used misc office ones and Tim Holtz Binder Clips) - you can glue them on if you don't want to worry about them falling off, but this will make it harder to store. I hope you enjoy, I had a great time making this project, it was fun and easy, just the way I like my projects!
See you soon! I have tags and pillows ready to show!
Andrea
Subscribe to:
Posts (Atom)