Photobucket Photobucket Photobucket Photobucket Photobucket Photobucket

Wednesday, August 21, 2013

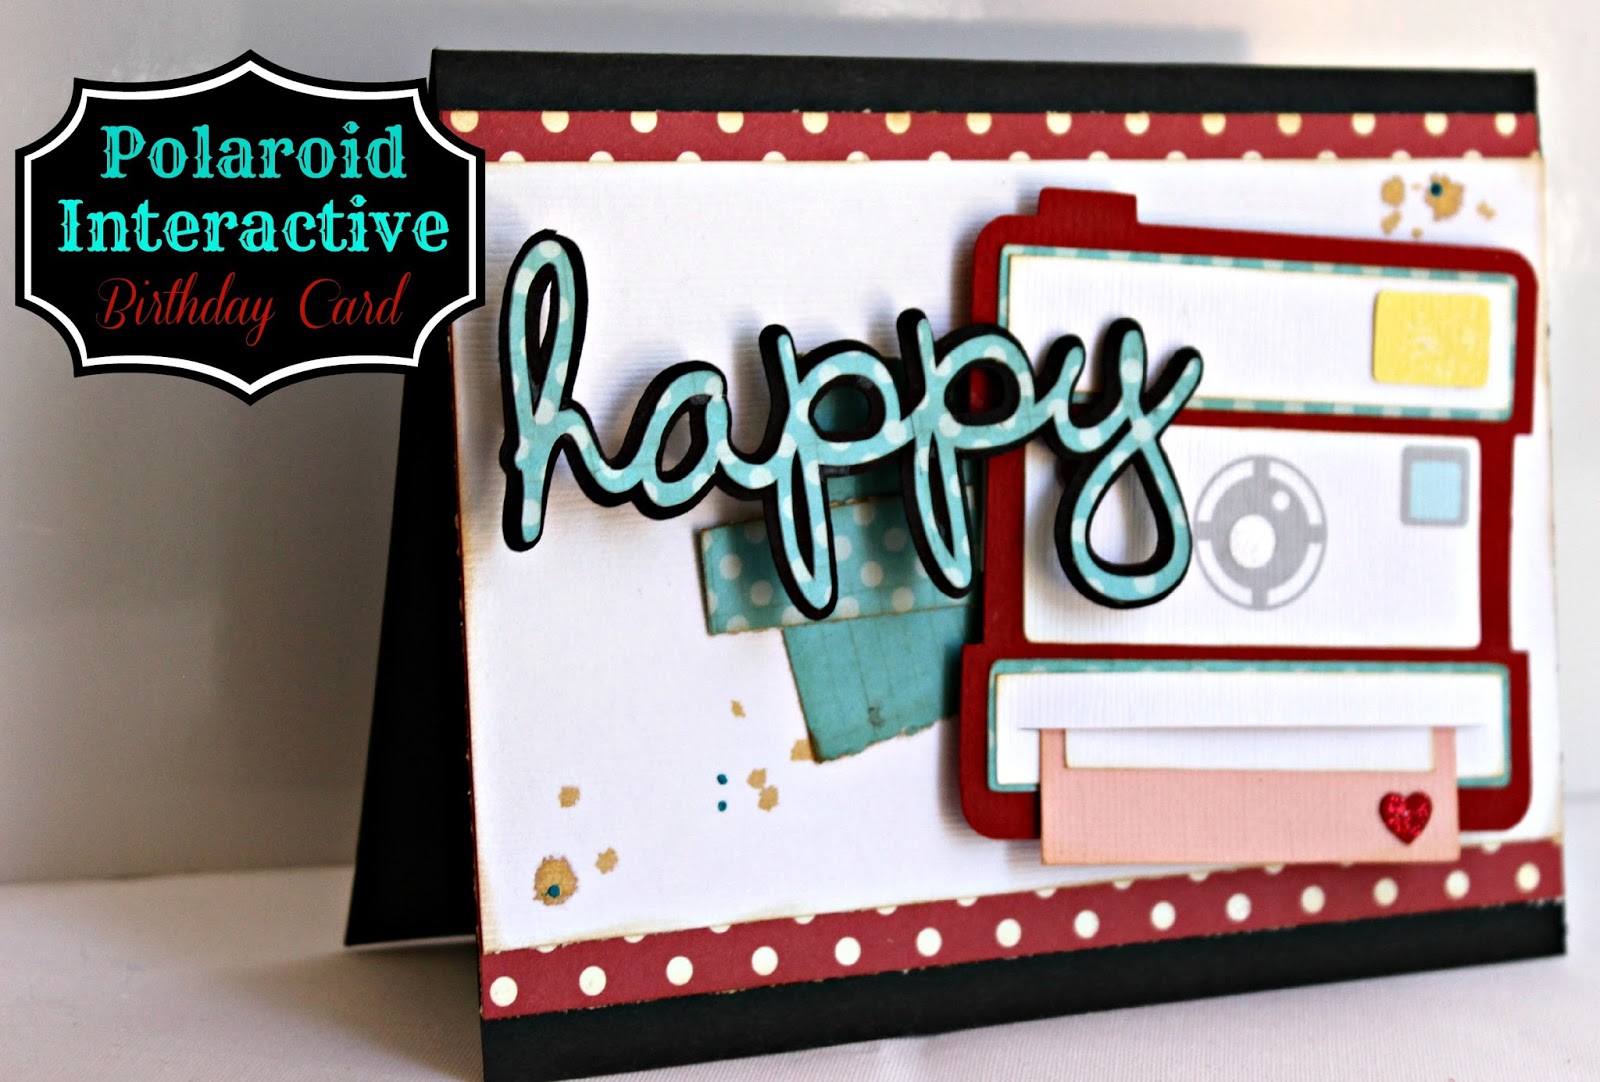
Polaroid Interactive Birthday Card

Hello!

I know I've said this before, but I've really be enjoying using my Silhouette Cameo - I used it for the Back To School Party, for work and for everyday occasions like birthday cards!  I had seen some really fun, interactive cards on the Silhouette Blog and, like any good student, got to work learning the tools so that I could make my own!

"Shake it Shake it
Shake
Shake it Shake it
Shake it like a Polaroid picture.. Oh ho"

Yes, OutKast and I have a love of Polaroid pictures in common.  Well, maybe their song is less about Polaroid pictures than my card, but still - once again, a card makes a song repeat like it's on a loop in my head!


I formatted the entire card with my Silhouette software after watching the YouTube video - it was surprisingly easy!  I also used my Offset tool for the "Happy" wording on the card so that I'd have a black background for the fun print.  You may remember me talking about the offset button when I learned how to use this tool earlier this summer!  I LOVE learning a tool and finding a constant use for it!

**CLICK!!**

Zoom.

Whirl.

ZZZzzzzzz


Pull on your Polaroid and wait to see how your photo develops...


A Polaroid of a cupcake!  Yum.


Isnt' it cute?  When I formatted the Polaroid camera, I made a slit where the photo would come out of my camera.  The hardest/time consuming part was making sure that the slit lined up on each layer of the camera.  I did turn the cupcake and some pieces on the camera into a print and cut for two reasons:
1.  I was lazy and didn't want to mess with tiny pieces on the camera
2.  I wanted the cupcake to look like a print since it's supposed to be a Polaroid!


There was a ton of dimensional tape used on this card.  The camera had to be popped up so that you could pull the Polaroid out.  The happy is popped up off the camera, so the "h" and "a" on happy have 2 layers of dimensional tape while the "y" only has one layer so that the word is level but still popped up.

Of course, I added glitter.  glitter on the cherry.  Glitter on the camera flash.  Glitter on the camera lens.  I added some brown, spray ink and tiny drops of blue from my Viva Pearl Pen for a little extra something... and because they did it in the sample on the Silhouette blog and I loved it!

I saved the formatted file so that I can easily make these cards for a variety of occasion's - just change the word and the picture and you're good to go!

I hope you enjoyed this fun card!
Have a great day!
Andrea

Tuesday, August 20, 2013

Back to School Party Table Decor! Back to School Week

Hello!

Phew - today's the day that everything gets pulled together!  I love the way the table came together... I still have pieces of the decor up in our dining room - hey, it's school time until Halloween in our house!


Now, I'm not going to lie - I was not ahead of the game with this party.  We passed out/put invites in the mail the Friday before the party, which gave me about 6 days to get everything ready.  And I didn't even really start getting stuff together until the Monday before, so really, I had Monday thru Thursday to prep... and of course, I wanted to do way more than I should've, but this party was just so fun, I couldn't stop!


I started with cream tablecloths that I always use - they were given to use by one of Big A's homeowners and they've gotten a ton of use!  I also cut down some extra orange/cream chevron fabric into runners to run crosswise on the table - I love the extra punch of color they gave!  I used my Alphabet Burlap runner to go down the center of the table.
 
 
I borrowed a ton of old, childrens books from my Mom - I used to think she was crazy for collecting them but boy was I wrong!  Or, if she's crazy, then this crazy apple didn't fall too far from the crazy tree!  I tied the books together with brown bakers twine - thank goodness I have thousands of yards of that stuff!  I hotglued pencils around a mason jar to create a vase for flowers, tied the same brown bakers twine around it and hotglued a fun, school-ish word card to the front.  I couldn't stop there, that would be crazy, so I glued a small, red gingham bow to the side.  Yes, that's exactly what it needed!


I cut stems and leaves from my Silhouette and hot glued them to my red plates - hello apples!  I used fun, dot napkins (again, from the Dollar Tree) which added just a little more cuteness!  I wrote each childs name on a blank name card and laid them on the plate - what kid doesn't like to see their name all over?


The bus goody boxes were filled with erasers, pencils, sharpeners and a little bit of candy.  Each bus was placed right next to the childs place.  I also found apple juice's (Martinelli's) that are in the shape of an apple!  Those were so stinkin cute and I'm already planing what I'll use the discarded plastic containers for!


Big A and I made some paper air planes and hung them with fishing wire from the hanging light fixture over the table.  Big impact, little expense or time!


I know it's a little hard to see, but in the middle of the tables I put a glass bowl full of apples and another mason jar that I glued crayons to.  Every vase (pencil and crayon) was filled with a wildflower assortment for the party.

Phew!  So that's it!  That's our Back to School Party!  It was so much fun, the kids were great, the cost was minimal and I loved every second of it!  I also love that I'll get to use the decor year after year!  Oh, you want to see a picture of Lil' A on his first day of Kindergarten?


Thank goodness we got one before the tears!  Have a great day!
Andrea

Monday, August 19, 2013

Chalkboard Globe Welcome! Back to School Week

Good Morning!

 I hope you had a great weekend!  I finally opened a box of NEW fabrics that I need to start cutting and sewing for pillows and runners... I celebrated a friends birthday with some fun filled fondue, lots of laughs... some references to when we were younger and overall happiNess.  We had alot of chores to do, the first week of school left little time for cleaning/organization but I'm hoping that we can change that so that the house is always 10-15 minutes from looking good and we're never scrambling to find the 'Homework' folding as we're running out the door...

Today and tomorrow I'm sharing the last little bits of fun from the Back 2 School Party!  It's amazing to me, when planning a party, how much "stuff" I have and how much I don't have to purchase in the way of decor.  I'm lucky that my family and friends are "gatherers" like me - and that we all enjoy a similar style.

So, I'd found this image on Pinterest and I loved it!  I love the colorful, but not too juvenile feel.  I love the antique/found feeling... I love it all! 


No, I don't have all of the same items and I wasn't totally successful with making my "Welcome" sign as cute and awesome as this, but since I didn't spend any money and I just grabbed things from my home, I think the outcome was pretty cute!


I grabbed Adam's step stool (Ikea), an old book (courtesy of friend's stash) my chalkboard globe, the leftover banner and sight words and made this little vignette by our front walkway.


I wrote "School Is Cool!" in chalk and, I know you can't see it because the picture didn't really turn out, but after this little greeting, there's a chalk hopscotch on the walkway leading up to the front door - which, I'm proud to say, was my husbands idea!

Sure, it's not identical to the inspiration but it was items I already had or had left over from other decor which means it's pretty awesome in my textbook!

I guarantee that from now on I'll be looking for old books, old lanterns and lunch boxes, old step stools and I'll continue my globe hunting (I've been doing that for a while now)...  And next year hopefully I'll be closer to my inspiration... and every year after!

I'll be back tomorrow with the final outcome and my favorite part (aside from the wreath) - the table decor!
Andrea

Friday, August 16, 2013

Art Table! Back to School Week

Hello!

I've been sharing all of the fun, crafty stuff that I got to play with for the Back to School Party this week, but you might be wondering "What did the kids do?".  At first I wasn't going to organize anything, I was just going to let them play with the toys inside and out but then I started thinking that we were going to have girls and boys or all ages and that everyone may not (shocking) like to play police or "Under Arrest" which seem to be the favorite game(s) - does it even qualify as two, I don't know -  around here so I set up an Art Station.


I forgot to take a photo of the before table, where everything was put away in it's space, nice and neat and photo ready so here's a photo after it's been malled by tiny hands...

I grabbed 3 paint cans (2 large and 1 small) from Lowes, 3 plastic tablecloths from the Dollar Tree adn bunch of art supplies.  I ended up draping a blue cover all over the table and then taped 1 end of the plastic table covers into each paint can and letting them "spill" all over the tables.  I placed 1 large and 1 small can with "spilling" paint on a small stool so the paint could really flow.  I then placed the last can on it's side in the back corner of the table and lets more paint spill out of that.  So cute - and hard to mess up because it's supposed to look messy! 

Here's what we had to create with:
Markers
Foam Shapes
Glue
Paper
Popcicle Sticks (colored and plain)
Glitter Pens
Fuzzy Balls
Pipe Cleaners
Googley Eyes
Colored Pencils
Crayons
Science Projects

{A few of my favorite artistes creating}
 
I also decided to give the kids some wall space to paint on... well, not walls because I didn't want to send the wrong message and have one of the kids go home and paint on the walls in the house and have a Mom then leave them on our front porch...  So, we hung some kraft paper on the fence and let the kids paint to their hearts content.
 
{Futher Picasso}
 
We also had some wooden birdhouses, wooden pirates, signs, alligators ready for the kids to paint and take home.


I'm pretty sure the Art Station was a huge success... and don't worry, we had some "Under Arrest" and "Police" going on as well, which is why you hardly see any boys in the Art picture!
 
Yay for Art!  Yay for painted bird houses and lots of glitter glue!  I'm feeling almost ready for school - how about you?  And since I have more school party to share, we're going to keep on going with the Back To School Week on Monday!  Yay!  Anyone else realize there are 3 "Yay"s in this paragraph - that's a lot of happy!  It's pretty close to Happy Happy Happy, but we do it Yay Yay Yay.
 
Have a great weekend!
Andrea
 

Thursday, August 15, 2013

Buffet Party Table!!! Back to School Week!

Hello!

Today I'm sharing the buffet table from the party... it was so fun to put it together and I kinda... sorta... got a little tiny bit carried away!

Let's just say that my Silhouette Cameo has been getting a lot of use... A LOT!  Between printing, cutting, there was constantly some sort of buzz coming from that machine for the past week!

 
I saw this super cute 3D School House when I was looking online for school shapes - it looked easy enough and I figured it would be a cute addition to the decor - little did I know that once Adam saw the school house he said "Mommy, I LOVE that!  I have a great idea!  We can make a neighborhood with houses and cars and buildings and skyscrapers... isn't that a great idea Mommy?".  It was a great idea and I realized that my perfect little guy had gotten the Yokley Party gene!  Yes, it's true - it's a genetic trait among us... my Aunt has it, my Mom has it, my sister-in-law has it, I have it and now Adam has it!  I'm a little more than a little proud.  


Then I saw the 3D School Bus on the Silhouette Blog and a light bulb went off.  Goody Box!  I was trying to cut down on time so I ended up formatting the file into a print and cute file so that each different element was printed and then cut - this way I wouldn't have to cut a ton of tires, windows, etc out of different colored paper.  The boxes were taking a little more than a little bit of time to assemble (my patient Mother-in-Law was stuck with this unfun job) so I had ANOTHER great idea!  I could make the entire thing a print and cut!  Meaning, I placed each window, light, door, tire onto the bus and then had it printed!  Now there was only 1 piece to cut and then some gluing - easy peasey!

 
Since we were serving sandwiches at the party, I wanted to make sure everyone knew what they were getting so I ended up making cute food tags that were self-standing and could be placed in front of each dish!  I used my Silhouette Cameo (yes, again!) and turned each cut image into a print image.  I made sure each image would fit into the same size circle and after I was done printing the, I placed them into my machine so it would cut them out.  I also formatted the perforated circle base to leave a little mat around each circle and glued the printed circle onto the perforated circle.  This helped make little self standing tents!


And here's the finished table!  I used a plain, off white table cloth on the buffet and then put a smaller, orange chevron runner centered on top and the Letter Burlap runner down the top center!  You can find the Letter Burlap Runner in my Shop here (psst - it's on sale).  I used a lot of cream platters that I had on hand to hold the food along with some red platters that I made from an old project (25 Days of Christmas series - painting glass vases).  We had pb&j, chicken salad sandwiches, ham and cheese sandwiches and tomato, basil and provolone sandwiches - yum!  I cut the pb&j sandwiches into hearts and the ham & cheese into stars with my sandwich cutters.  My two amazing friends (thanks M and V!) helped with the fruit and veggies - using clear plastic cups we put ranch at the bottom of the cup and veggies standing in it and then for the fruit my fabulous friend made a yummy fruit dip that we spooned into the bottom followed with skewered fruit standing in the cup - so cute and delicious!

 
I also made apple shaped  Apple Hand Pies and star shaped Cherry Hand Pies - this was super easy with the Williams-Sonoma pie press!  And I loved the way they turned out!


And a very talented friend, Sylvia, made the school themed cookies for the party!  They turned out so cute, everyone loved them and the best part is, they're delicious!  If you'd like information on ordering some decorated sugar cookies, please leave me a comment and I'll get you the info!
 
Phew!  This was a long one!  Hope you're having a great Back-To-School week!  It's a pretty exciting time around here!
Andrea


Wednesday, August 14, 2013

Flash Card and Sight Word Banners!!! Back to School Week

Hello!

I'm back... I've taken Adam to school and cried buckets by now.  I was crying yesterday sitting through the "Meet the Teacher" as she was reading "The Kissing Hand"... I was crying in the car as I called my sister (yes, I was hands-free) saying how scared I am to leave my little, sweet, loving boy in such a big, wide open, full place without me... and last night as he was crying in bed, worrying that no one will like him in his class I had to hold back the tears and be positive.  So that's me, positively positive that he'll have an awesome day and I cannot wait to hear about it!

One might call it a "banner" day...

Good lead in?  Or too much?


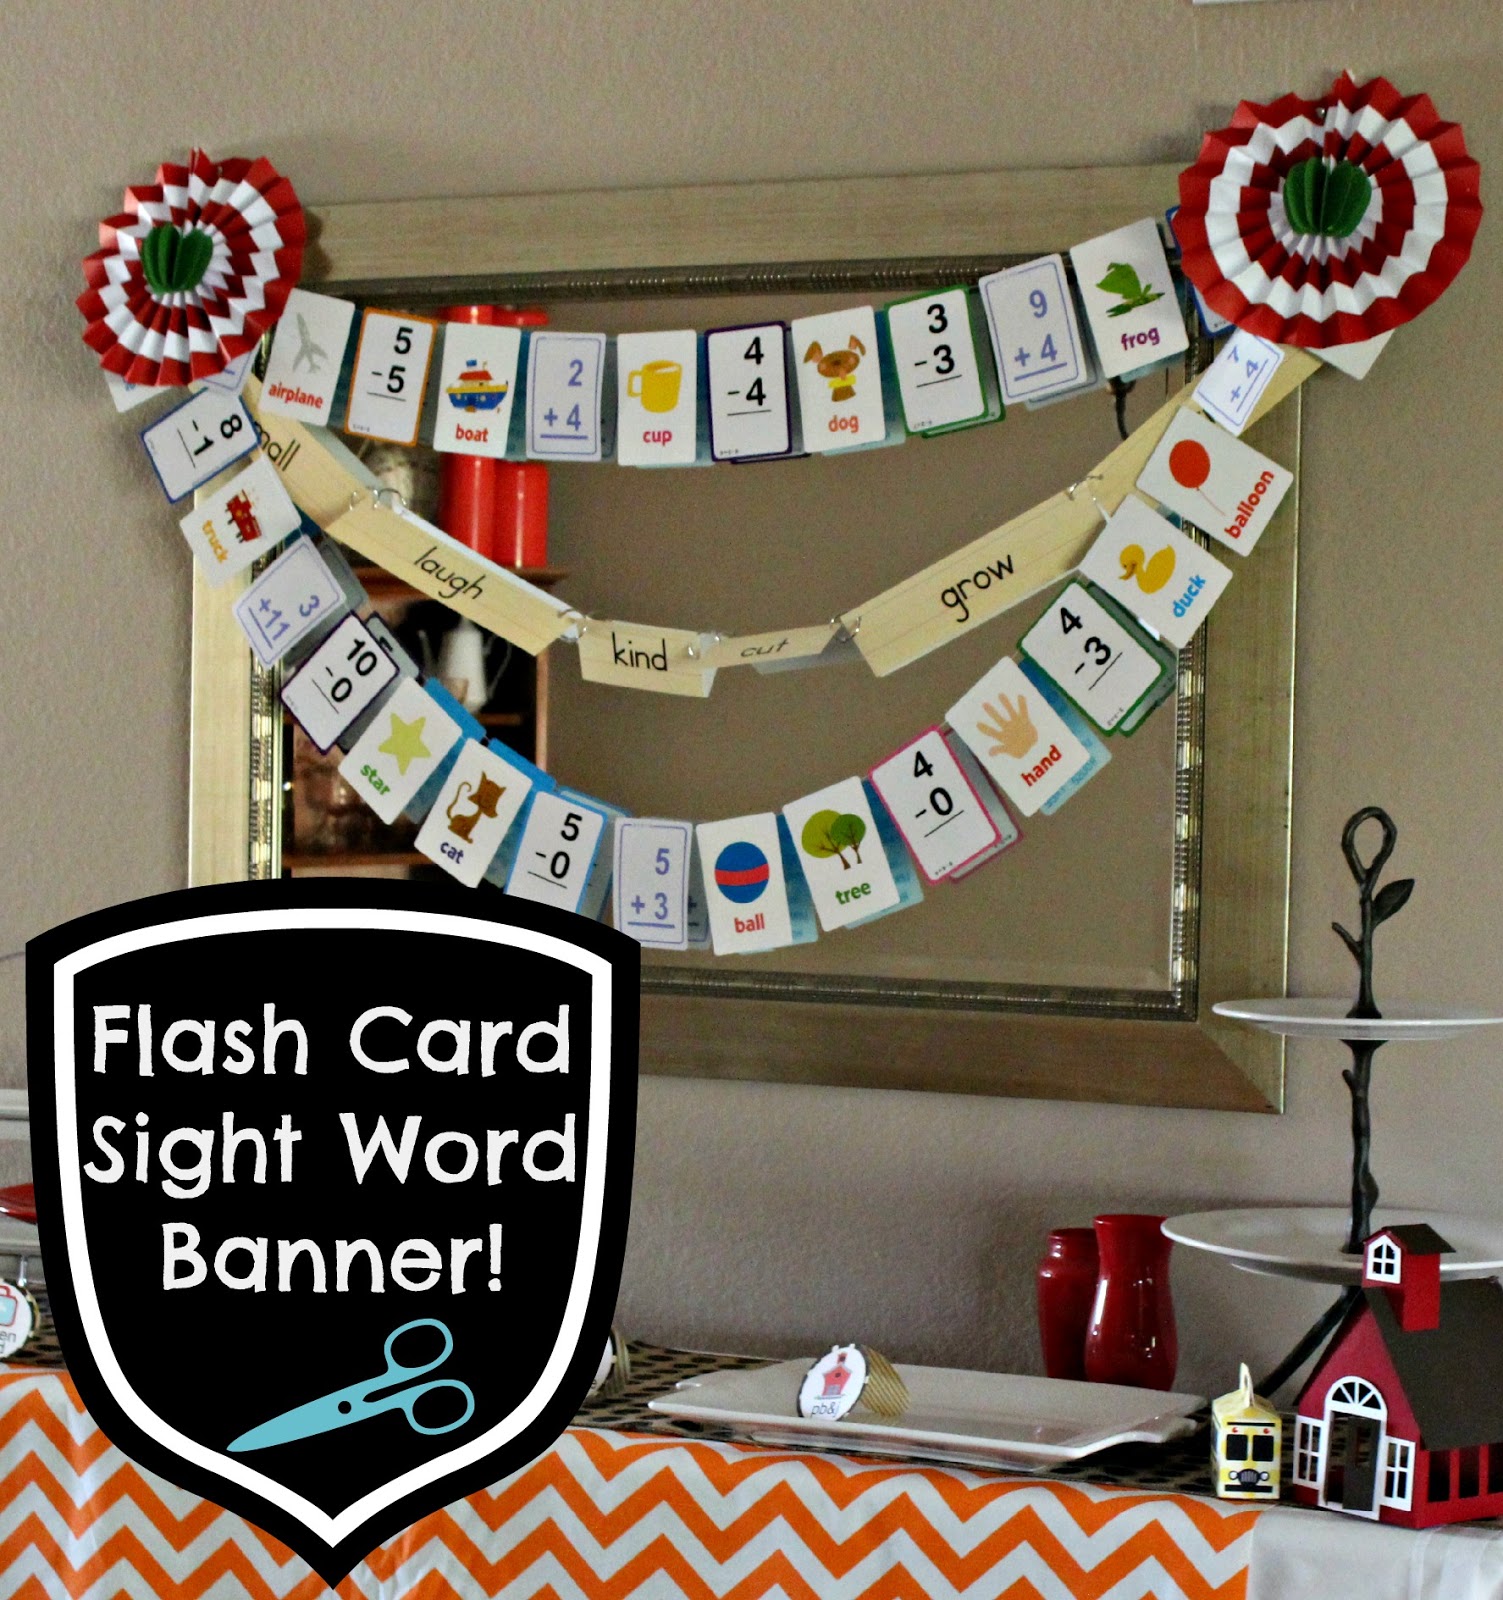
So, once again, when I was at the Dollar Tree where I spent way to much just enough money on supplies for the party... I fell in love with the 1st Words and Sight Word cards!  They were just so cute!  I loved the fun drawings, childish drawings and all the sweet words and knew that they'd be a cute addition to the party!  I didn't have anything specific in mind at the time but I pretty much used them all over!


I decided to hang the sight words with binder clips - hey, why not?  Binder clips scream school... or tests, depending on how you rolled through your classes.  I rolled that way.  The Binder Clip Way.

I also I sewed the 1st Words and some addition/subtraction flash cards together.  I used almost the whole box of word cards and probably half the box of addition and subtraction - Adam will be doing complex mathematical equations soon thanks to the remaining cards!  It probably took me about 10 minutes to sew this banner and I had so. much. left. over.  Seriously.  Easy, playful and quick!  Yes!


Oh, and the fun 3D Apple rosette guys?  Yes, the Dollar Tree... and my Silhouette.  Have I told you how much I LOVE my Silhouette Cameo?  I love it!  And before you ask, yes, I would marry it - if it looked like my husband!  Anyways, the red and white rosette was actually in a package of hanging Patriotic Decorations that I never used for the 4th and I thought it was the perfect backdrop for the 3D apple from Silhouette - it actually gives you enough apples to make an entire apple, but since I needed 2 halves, I just used half for one rosette and half for the other!


So there you go - fun, easy and playful banners for above the buffet table - or anywhere, really.  Very little effort, time or money goes into these cuties which makes me give them an A+!

Thanks for visiting!  We're almost at the end of the week which means that I'll finally get to share the whole, colorful and fun party!
Have a great one!
Andrea
KPS

Tuesday, August 13, 2013

School Banner!!! Back to School Week

Hello!

Well, today is our last day before we have a full-blown, Big, SMART Kindergartner!  Tomorrow it all changes... and while I'm still excited about some of them, I'm still fighting the feeling that my baby - my one and only little guy - is going to start a new adventure and it'll never go back to the way it's been with him being home with me, us being able to go to Disneyland on a Tuesday or Thursday, of us getting to play together all day... I don't want to seem melodramatic, but all I can see is time zooming away from me and my little guy going with it.  There, that wasn't too dramatic, was it?

When I was putting together the Back to School Party Invite, I decided to make a fun SCHOOL banner... so I grabbed my laptop and start formatting the banner using my Silhouette Cameo.


I knew I wanted it to have a lot of the same elements and feeling that the invites had and, if you've seen any of my paper crafts, you know I love some serious layering... but I wanted to incorporate something very school-ish into the banner and went through a tons of options in my head... "Pencils? Crayons?  Erasers?" and then I thought back to the invites...


And remembered the ever handy, very school-ish and nicely textured paper bags that I used to hold the invites!  Yes!


First I grabbed a real paper bag and tried layering my pieces on it - it was way to big.

Then I grabbed my Lifestyle Crafts large treat bag die and it was still way to big.

So, my last option was to try my Lifestyle Crafts small treat bag and it was just right!  I cut enough small treat bags from my paper bags because I knew I wanted that look.  I assembled each of them and then started putting it all together!


I used the Echo Park School bus and school house along with a fun font, scallop circle and label.  I then gave it a little more umph by adding the small, white dots using my Viva Pearl Pen.  A little bit of red gingham ribbon threaded through smallish holes ties the whole thing together - literally!


Hung and done!  Nothing says celebration like a banner in my opinion!  I love a good banner.  I love a fabric banner.  I love a chalkboard banner.  I just love banners!  I hope you do too!

See you back tomorrow with MORE School Party ideas!
Have a great one!
Andrea