Photobucket Photobucket Photobucket Photobucket Photobucket Photobucket

Thursday, September 5, 2013

Lifestyle Crafts BIG Announcement!

Hello!

This was in my inbox this morning - very exciting!!!


Hey Friends. We have some exciting news to share. We R Memory Keepers, an industry leader in crafting tools and supplies, announced that it has purchased the Lifestyle Crafts brand. We R wanted to purchase a brand that complemented its high quality product and innovation standards, and Lifestyle Crafts was the perfect fit. The acquisition of Lifestyle Crafts will continue to result in the creation of awesome products for virtually every crafting need. It will make it easier for the scrapbook and craft community alike to bring creating into day-to-day life through home décor, scrapbooking, handmade cards, celebrations, sewing, and more. Together we are excited to be able to inspire you in new ways as we lead the market forward. Check out the full press release on We R’s website http://www.weronthenet.com/File/View/e6cbe684-6411-476b-910a-92f6d31da86f

--------------------------------------------------------------------------------------------------------------------------

I cannot wait to see what changes await!  I'm hoping that maybe some of the WeR images will make their way to a die form??  So excited to see which direction the Studio Team takes!

Have a great day!
Andrea

Wednesday, September 4, 2013

Coming Up...

Hello!

Thanks for stopping by today!  I've been busy with KPS Products lately - I've had fabric come in for new Holiday runners, including Halloween, Thanksgiving and Christmas patterns, along with fun fabric for pillow covers to add to the shop.

I've also been working on iPad Covers, Fold-Over Clutches, Cloth Napkins, Camera Strap Covers and Pumpkin Pillows... I'm getting excited and gearing up for...


and


I'm so happy to be back at Penelope Lane - I love seeing Sarah and Nancy, visiting with the other vendors, seeing new products and shopping!

It's my first time at the CUW Boutique, which is at The Disneyland Hotel and it's a Luncheon/Boutique combination.  I was even more excited when I found out that the Redlands All American Youth Circus was going to be performing at the event.  You do need tickets for the Luncheon, but the Boutique is free and open to the public! 

So, if anyone has any custom orders/requests that they'd like to see or pick up at one of the boutiques, please email me and we can work something out! 

Hope to see you at one or BOTH of the boutiques!
Andrea

Tuesday, September 3, 2013

Getting Back to Business... Interactive Card!

Hello!

How are you?  I hope you all had a great holiday weekend... we sure did!  We somehow crammed in 1 evening of Magic at Disneyland, visiting with my Sis and her Family, sewing of some new products and a day at the Big Bear Zoo and Discovery Center...  It was just what our little family needed!  A nice, long weekend full of fun, a great way to end a rough few weeks of school and start off with a fresh, fun, new attitude for the rest of the year!

Why not start off this fun week with a fun, interactive Birthday Card? 

I shared this interactive card a few weeks back...


I saw this card on the Silhouette Blog and loved the idea of a card being a little extra special with the hands-on element, so after I watched the tutorial and created this card, I made one of my own!


I made this card a print and cut card.  I was able to turn the typewriter into a print and cut card using the paint, cut and offset button.  I did the same with the "Happy Birthday" slogan and the paper that is coming from the typewriter...


Sending some birthday love with this card!


I used ink splatters, glitter glue and a Viva Pearl Pen along with pop-up tape tape to finish off the card. 

There you go!  A fun, cute and loving birthday card!  I'm planning one in my head with a telephone... now I'm feeling inspired!

Have a great day!
Andrea

Tuesday, August 27, 2013

I Am Tired.

Yep.  It's true.  I.  AM.  TIRED.

I wake up tired, I walk tired, I talk tired, I eat tired, I work tired, I go to bed tired. 

I was even too tired to do my normal welcome in this post.  Too bad I wasn't too tired to complain, huh?

As you all know, Lil' A started Kinder 2 weeks ago.  It's been quite a transition.  For all of us.  It seems that Lil' A's internal alarm clock starts ring-a-ding-dinging around 5:15 am.  Yep.  You'd think that we'd have plenty of time to get dressed, take medicine, pack lunches, make and eat breakfast, grab the (well organized) backpack, water bottle, homework folder, lunchbox and start our walk since we've been awake since 5:15 am... but somehow, we're always running.  And then there's the after school routine.

But this isn't why I'm tired.  Lil' A has had his first few weeks of school marred by bullying.  So I've met with and spoke with the school monitors, Lil A's teacher and the Principal - numerous times.  I also think/worry/contemplate/worry/get angry/feel mad and frustrated almost all of the time.  I think this is why I'm so tired.  Stress can really take it out of you. 

I kind of feel like this...


Okay, so this is actually Lil' A's impression of "decaying" fruit.  But I still feel it's right on.

I think things are improving now, I think things are going to start getting better.  I feel like we have a good team behind us, watching out for Adam, making sure all of the kids are safe and happy and adjusting well.  It's hard, intrusting your child's safety and well-being... only to have him come home saying he was hit, spit on, called names, called bad words, spun around and more.  Almost every day.  It's hard to fix an issue that you're not there for.  It's exhausting to worry about it all the time, wondering what to do, feeling not in control of your child's world, feeling like you can't protect them and that's the only job you're supposed to do.  But I really do think it's going to get better.  Today was better.  I think tomorrow will be too.

So, please forgive my lack of posts.  I think we're almost back on track and as soon as we are, I'm sure my posts will pick back up just like usual. 

I'm betting by next Monday, I won't feel like decaying fruit any more.

Thanks!
Andrea

Thursday, August 22, 2013

Family Message Center! Trying To Get Orangized With What We Have

Good Morning!

In one of my more recent posts, I said that I was working on getting organized for the school year.  I wanted to minimize the crazy mornings, looking for the homework folder, backpack, shoes, lunchbox, water bottle so we could get out the door on time.  I'd seen a lot of Family Message Center ideas and had pretty much decided what I wanted our space to look like... but I was also trying not to spend money on it, so I made myself work with what we had and I really like the outcome!


Our Family Center is in our entryway.  I really wish we had mudrooms in SoCal but most houses aren't built with those, so I used the unused, empty, wasted space in our entryway for our center.  This forces me to keep it picked-up and we're actually able to use it for what it's intended for!


For our Family Center, I took 2 crates that I had left over from the KPS Christmas Booth Display and painted them cream.  Then Big A took them and screwed them into the wall into studs so that they'd be super secure!  I also kept my upcycled bench in the entry way, added a basket for shoes in the empty space and we now have a great place to put our shoes on and store them when we get home - this avoids 50 pairs of shoes next to the door, next to the bench, next to the couch, under the coffee table, well, you get the idea!


I had these pretty, ornate, old fashion looking door pulls turned hooks that I'd planned to use for my display, but never had, so I grabbed those and Big A secured them to the wall (again with screws into studs).  I hang my purse from one, Adam hangs his back pack from the other.  The wire that sits on the bench (I did purchase them from Marshalls for $7) holds any paperwork that we need to go through.  I downloaded the "Be Amazing" print from eighteen25, printed it at Costco and put it in a bright turquoise frame.

Inside one of the crates I put a basket that I had on hand, this holds mail that has to go out, sunglasses, misc. items that I typically grab while running out the door.  In the other sits my camera bag and library books that need to be returned.

One top of the crates is a chipboard, house box with a removeable lid - this is where I store all receipt's for the month so that we can see how much we've gone over used of our budget!  I also have an old "Be Kind of Leave" sign, an owl vase and a small, milk glass dish that holds the car keys and Chapstick. 


This chalkboard sign is ready to take our messages, calendar, whatever.  I do plan on adding a vinyl calendar that we can update easily on the bottom... we'll see if that ever gets done!  The chalkboard was originally a very bright green, but it just didn't sit well with the look I wanted (I wanted something a little more cohesive) so I ended up painting the frame white - this is just an old frame that someone was throwing away that I turned into a chalkboard.  And last, the wooden "Holla" sign is from an Etsy shop: Oh Dier Living and I LOVE it!  I was able to pick the color I wanted and it really added the fun, playful element I was striving for while looking polished in our entry way.

Let's see, am I missing anything?
Backpack?  Check.
Keys?  Check.
Sunglasses?  Check.
Homework?  Check.
Lunchbox?  Check.
Purse?  Check.
Chapstick?  Check. 

Yep.  I have it all thanks for my trust, functional and, I think, nice looking family center!  Fist bump organization!

Thanks!
Andrea
KPS

Wednesday, August 21, 2013

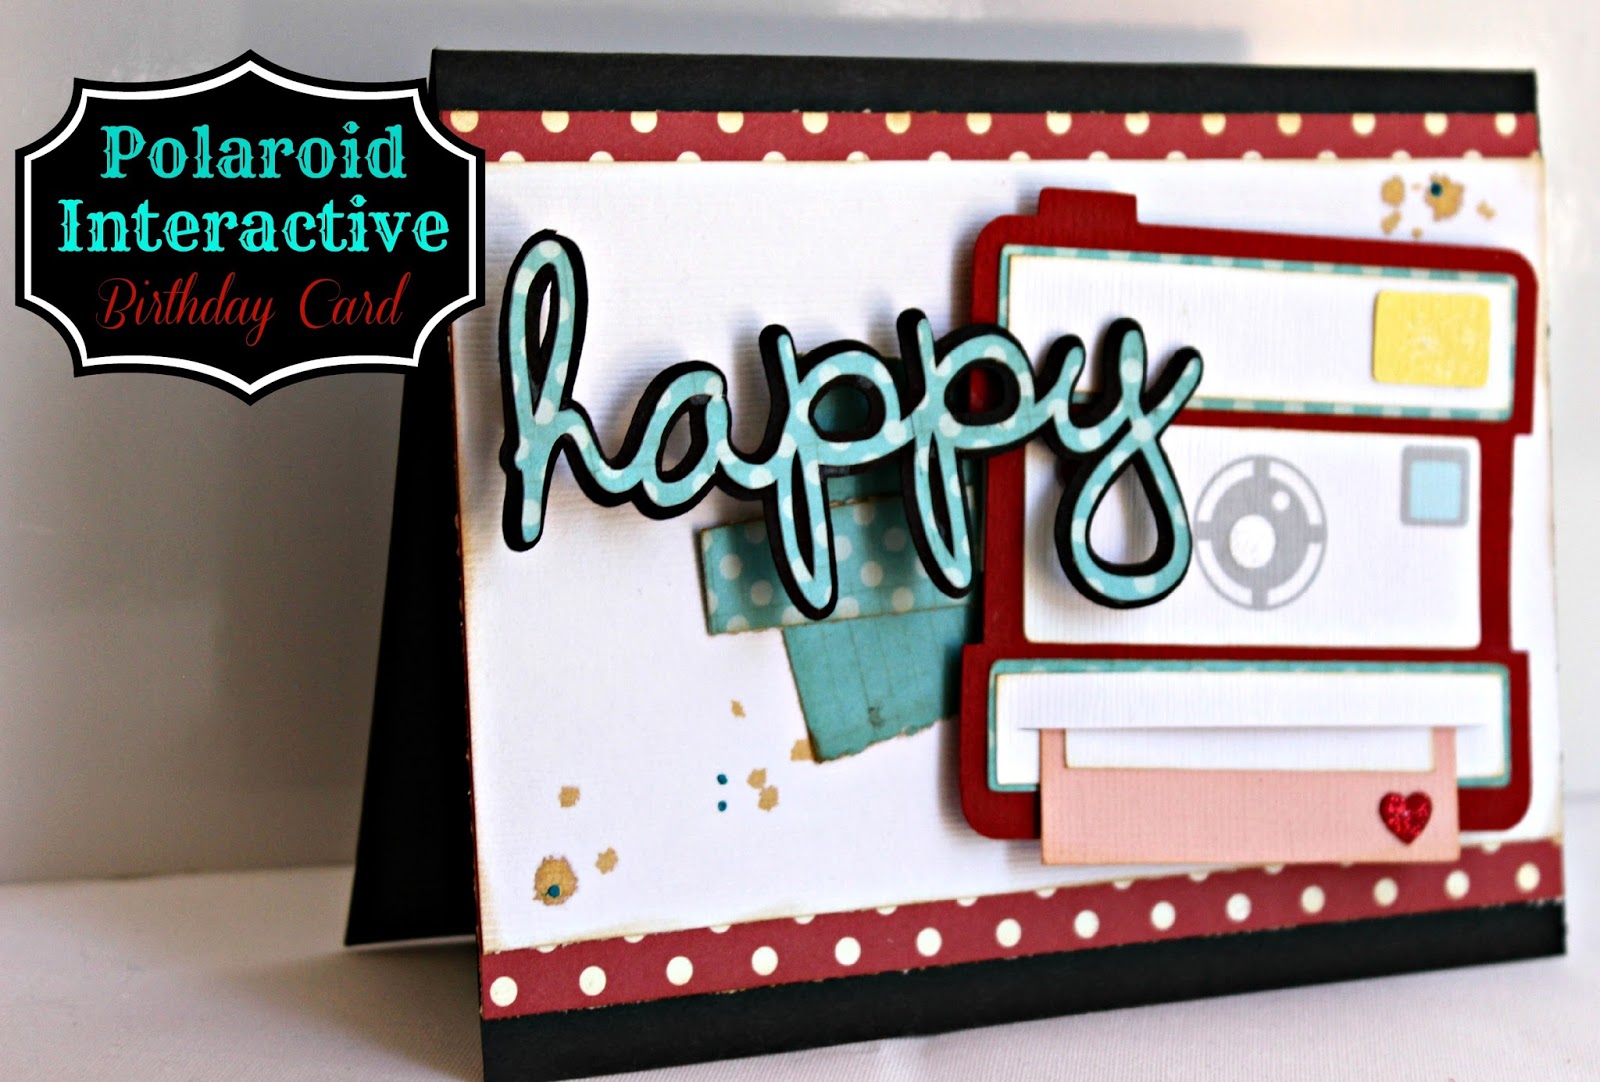
Polaroid Interactive Birthday Card

Hello!

I know I've said this before, but I've really be enjoying using my Silhouette Cameo - I used it for the Back To School Party, for work and for everyday occasions like birthday cards!  I had seen some really fun, interactive cards on the Silhouette Blog and, like any good student, got to work learning the tools so that I could make my own!


"Shake it Shake it
Shake
Shake it Shake it
Shake it like a Polaroid picture.. Oh ho"

Yes, OutKast and I have a love of Polaroid pictures in common.  Well, maybe their song is less about Polaroid pictures than my card, but still - once again, a card makes a song repeat like it's on a loop in my head!


I formatted the entire card with my Silhouette software after watching the YouTube video - it was surprisingly easy!  I also used my Offset tool for the "Happy" wording on the card so that I'd have a black background for the fun print.  You may remember me talking about the offset button when I learned how to use this tool earlier this summer!  I LOVE learning a tool and finding a constant use for it!

**CLICK!!**

Zoom.

Whirl.

ZZZzzzzzz


Pull on your Polaroid and wait to see how your photo develops...


A Polaroid of a cupcake!  Yum.


Isnt' it cute?  When I formatted the Polaroid camera, I made a slit where the photo would come out of my camera.  The hardest/time consuming part was making sure that the slit lined up on each layer of the camera.  I did turn the cupcake and some pieces on the camera into a print and cut for two reasons:
1.  I was lazy and didn't want to mess with tiny pieces on the camera
2.  I wanted the cupcake to look like a print since it's supposed to be a Polaroid!


There was a ton of dimensional tape used on this card.  The camera had to be popped up so that you could pull the Polaroid out.  The happy is popped up off the camera, so the "h" and "a" on happy have 2 layers of dimensional tape while the "y" only has one layer so that the word is level but still popped up.

Of course, I added glitter.  glitter on the cherry.  Glitter on the camera flash.  Glitter on the camera lens.  I added some brown, spray ink and tiny drops of blue from my Viva Pearl Pen for a little extra something... and because they did it in the sample on the Silhouette blog and I loved it!

I saved the formatted file so that I can easily make these cards for a variety of occasion's - just change the word and the picture and you're good to go!

I hope you enjoyed this fun card!
Have a great day!
Andrea

Tuesday, August 20, 2013

Back to School Party Table Decor! Back to School Week

Hello!

Phew - today's the day that everything gets pulled together!  I love the way the table came together... I still have pieces of the decor up in our dining room - hey, it's school time until Halloween in our house!


Now, I'm not going to lie - I was not ahead of the game with this party.  We passed out/put invites in the mail the Friday before the party, which gave me about 6 days to get everything ready.  And I didn't even really start getting stuff together until the Monday before, so really, I had Monday thru Thursday to prep... and of course, I wanted to do way more than I should've, but this party was just so fun, I couldn't stop!


I started with cream tablecloths that I always use - they were given to use by one of Big A's homeowners and they've gotten a ton of use!  I also cut down some extra orange/cream chevron fabric into runners to run crosswise on the table - I love the extra punch of color they gave!  I used my Alphabet Burlap runner to go down the center of the table.
 
 
I borrowed a ton of old, childrens books from my Mom - I used to think she was crazy for collecting them but boy was I wrong!  Or, if she's crazy, then this crazy apple didn't fall too far from the crazy tree!  I tied the books together with brown bakers twine - thank goodness I have thousands of yards of that stuff!  I hotglued pencils around a mason jar to create a vase for flowers, tied the same brown bakers twine around it and hotglued a fun, school-ish word card to the front.  I couldn't stop there, that would be crazy, so I glued a small, red gingham bow to the side.  Yes, that's exactly what it needed!


I cut stems and leaves from my Silhouette and hot glued them to my red plates - hello apples!  I used fun, dot napkins (again, from the Dollar Tree) which added just a little more cuteness!  I wrote each childs name on a blank name card and laid them on the plate - what kid doesn't like to see their name all over?


The bus goody boxes were filled with erasers, pencils, sharpeners and a little bit of candy.  Each bus was placed right next to the childs place.  I also found apple juice's (Martinelli's) that are in the shape of an apple!  Those were so stinkin cute and I'm already planing what I'll use the discarded plastic containers for!


Big A and I made some paper air planes and hung them with fishing wire from the hanging light fixture over the table.  Big impact, little expense or time!


I know it's a little hard to see, but in the middle of the tables I put a glass bowl full of apples and another mason jar that I glued crayons to.  Every vase (pencil and crayon) was filled with a wildflower assortment for the party.

Phew!  So that's it!  That's our Back to School Party!  It was so much fun, the kids were great, the cost was minimal and I loved every second of it!  I also love that I'll get to use the decor year after year!  Oh, you want to see a picture of Lil' A on his first day of Kindergarten?


Thank goodness we got one before the tears!  Have a great day!
Andrea