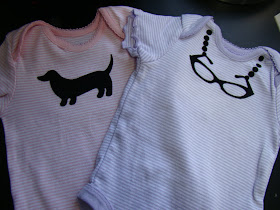
{Fun and Easy Little Miss Shirts}
I measured each of the shirts from arm pit to arm pit to see how big I wanted my image, I then found the images on my Silhouette and adjusted each to be the size I wanted - I didn't take any pictures of this - I will next time (this is a learning process for me!). For the wiener dog, I adjusted it to the size I wanted and was done. The librarian glasses took a little more work. I found the glasses images and sized that, but I knew that I wanted a chain for them (I debated doing pearl buttons, but kept thinking about choking hazards...), so I used the circle drawing tool on the software and made a "String of pearls" going from one arm of the glasses. I then highlighted the circles and clicked on the "Meld" button, which connected them. I wanted the exact same string for the other side of the glasses, so I highlighted them, made a copy and also mirrored the image so the slight bend in the string would be going the other direction. I moved it to the other arm and then highlighted the WHOLE image; glasses and both strings of pearls. I then clicked my "Meld" button again and everything attached and became one image! Super cool!
I then fed my Heat Transfer Material (from Silhouette) into my Silhouette and let it work it's magic. Once it was all cut, I weeded off the material that I didn't want to iron onto the shirts.
{Weeding images}
Here's my wiener dog image and part of my glasses image.
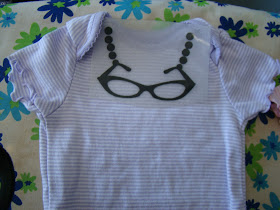
{Placed glasses, waiting for ironing}
{Placed Wiener Doggie, waiting for iron}
{Ironing on Heat Transfer Material}
When I think my image should be good and stuck on, I try lifting a corner of my plastic covering from the transferred image. If it starts to pull off easily and the image sticks to the shirt then I keep pulling. IF the image starts to pull from the shirt as well, then I quickly put it back down and repeat the iron step.
{Pulling back the clear sheet from the image. Cross your fingers for a quick and easy pull!}
Since I'm a little anal, I always iron over the image once the clear film is all the way off - just to keep my mind at ease.
Well, that my first tutorial! I think that I can do better next time, I'll definitely show all the steps in setting up the images with the Silhouette software...
See you later - and don't forget to check out the Design Team Call from Pages!
Andrea


No comments:
Post a Comment