Today I'm sharing how you can create the heart garland from my Tray Shadow Box. The garland was very easy and inexpensive to create, so let's get started!
Sewn Heart Garland
Supplies:
Fiskars Heart Punch (you could use a die instead of a punch)
Old Book Pages
Sewing Machine
Wet Glue (I used Scrappy Glue)
Distress Ink
You'll want to punch a lot of hearts from old book pages. I used a book that I'd already read and was in the Goodwill box.
Ink the edges of all of your hearts. This is the most time consuming part, and you don't have to do this step, but it does help since we're layering hearts.
Stack your hearts on top of each other (I used 2 different types of paper for the tutorial so you could see both easily)
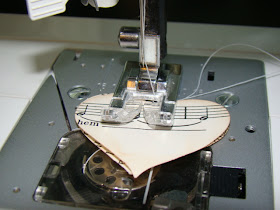
To create my banner, I just sewed to the end of one heart and then grabbed another heart and started sewing again. If you want more space between your hearts, you can sew extra empty space with your machine before you start your next heart.
There you go!
Since I don't backstitch, I like to put a dab or glue at each ends, where I started and stopped sewing.
Fluff up your hearts by grabbing the top heart and folding it up.
And that's it! So easy, you could do this with any shape and any paper! I do use a light weight needle in my machine when I'm sewing on paper, but that's the only modification that I made to my machine and it's not necessary, I just like to make my needles last longer.
Have a great day!
Andrea


No comments:
Post a Comment