Hello!
Today I'm over on Dandelion Deals, which is a very cool handmade deal website that is great for customers and shops! The concept is super easy, each shop decided to put an item/items on discount for 24 hours and Dandelion Deals promotes it and has a direct link for shoppers! I think it's neat! And, if you make a purchase through Dandelion Deals, leave me a comment that you saw this blog post - I'll send you a free goody with your purchase!
And what, you ask, is the deal?! Well, it's Chevron Pillows Covers, of course!
Thanks for stopping by today! See you tomorrow!
Andrea


Wednesday, August 8, 2012


Tuesday, August 7, 2012
A Girl, A Butane Torch and A Love of S'mores
Good Morning!
Thanks for coming over today! I appreciate everyone that takes time out of their day to take a look at my latest projects, recipes, rehabs... and ravings!
Today I'm sharing a very easy S'more cupcake. Have you noticed that I have an unhealthy love of S'mores? Ya, it's pretty transparent, huh?

I made these for our Backyard Movie Night a while ago. It started with a popcorn idea and transformed into a S'more cupcake.
I made a simple chocolate cupcake from a mix. Nothing fancy. I did replace the oil and water with melted butter and buttermilk to make them taste a little more homemade, but I used a dark chocolate frosting from the can.
 I piped the frosting onto the cupcakes with a ziplock bag - I was too lazy to get the piping bag and attachments.


Thanks for coming over today! I appreciate everyone that takes time out of their day to take a look at my latest projects, recipes, rehabs... and ravings!
Today I'm sharing a very easy S'more cupcake. Have you noticed that I have an unhealthy love of S'mores? Ya, it's pretty transparent, huh?

I made a simple chocolate cupcake from a mix. Nothing fancy. I did replace the oil and water with melted butter and buttermilk to make them taste a little more homemade, but I used a dark chocolate frosting from the can.
I then grabbed graham crackers, marshmallows and a small, kitchen torch.
I crumbled up the graham crackers and sprinkled the crumbs onto the cupcakes.
I then placed 2 or 3 mini marshmallows on each cupcake and then toasted them with my torch. The frosting melted some and a few of the marshmallows caught on fire, but it was pretty fun.


So good. So easy. So fun. Sounds like a good recipe for me!
Have a great day!
Andrea
Monday, August 6, 2012
Pinned Up Mondays! Dresser to Bench Rehab!
Good Morning!
I'm back from my self-imposed break last week... I wish I could say we went on vacation or that I figured out how to create sustainable energy from scrappy glue and patterned paper but neither of those are true. I did something way more important than either of those - I took care of my little boy who had croup - oh, and I started shipping off pillow covers from the 400+ orders I received on the groopdealz feature.
So, I've been working on my Dresser/Vanity turned Bench for the past... um... well, too long. But, I am happy to say that it's finally finished! Yay! And, it's actually in the house where it's going to live!

Here it is when we got it. Remember, it was left in the garage of my Brother-in-laws new house for who knows how long. I did think about rehabbing it and keeping it as a vanity, but we really didn't need one and I didn't have anywhere to put it. So, I had the idea of turning it into a bench, which I've been wanting for the entry way, for sometime now. I then saw one on Pinterest and showed my husband so he'd stop thinking I was crazy.
Here's a reminder of the transformation...


I'm back from my self-imposed break last week... I wish I could say we went on vacation or that I figured out how to create sustainable energy from scrappy glue and patterned paper but neither of those are true. I did something way more important than either of those - I took care of my little boy who had croup - oh, and I started shipping off pillow covers from the 400+ orders I received on the groopdealz feature.
So, I've been working on my Dresser/Vanity turned Bench for the past... um... well, too long. But, I am happy to say that it's finally finished! Yay! And, it's actually in the house where it's going to live!

Here it is when we got it. Remember, it was left in the garage of my Brother-in-laws new house for who knows how long. I did think about rehabbing it and keeping it as a vanity, but we really didn't need one and I didn't have anywhere to put it. So, I had the idea of turning it into a bench, which I've been wanting for the entry way, for sometime now. I then saw one on Pinterest and showed my husband so he'd stop thinking I was crazy.
Here's a reminder of the transformation...
Original beauty

Without Legs... and with a little boy
Naked. Out in the yard. What a exabitionist

Primed, sanded, vacuumed, dusted. Ready to be painted...

She's so pretty! We painted her in smoke screen, which is a grey/blue color. We used drawer pulls that we already had on hand, someday I'll switch them out with something a little more exciting, but for now, they work. I still need to actually sew the pad cover, but I'm having a hard time committing to a fabric. I've tried brown/natural chevron, this slub yellow chevron, but I'm thinking of going towards a navy blue fabric. We'll see, but I'll share the cover once it's done.


In the top drawer are our keys, sunglasses, miscellaneous items that we always unload from our pockets when we come in. I had the idea yesterday after the bench came inside of cutting out holes in the back of the drawer so phone charger cords could go through and our phones can live and charge inside, hiding the mess...

And, my favorite part, we can keep our shoes in the drawers! Yay! No more shoes strewn all over the entry way for us to trip over, kick out of the way and make our already messy house look more messy! I've had to stop a little boy from filling the drawers with toys numerous times so far, I'm sure I'll constantly be surprised to open a drawer and see what's in it - hopefully it's never something that's alive!
So, that's it! So happy that it's done! I'm looking for a shelf with hangers to go above it so we have a place to hang our sweaters, bags, etc.
Thanks for coming back this week! I have lots and lots to share, so keep checking back!
Andrea
Friday, July 27, 2012
Fun Friday!
Hello!
Thanks for stopping by today!
With a few weeks left before school starts back up, I wanted to share a few super fun places in So Cal for you and your kiddo's to explore... I realized this week that we only have 3 weeks before Adam goes back and we've barely crossed anything from our Summer Bucket List!
First, there is this awesome children's museum/workshop in Old Town Temecula called Pennypickles Workshop. This place was amazing! Both my husband and I went to this place and I think we were both as entertained as Adam! And the other cool part is that Adam can go from now till he's a preteen and get something new from it every time! It's a fun, science/math based museum that does everything from arts and crafts to music to optical illusions and so much more!




Thanks for stopping by today!
With a few weeks left before school starts back up, I wanted to share a few super fun places in So Cal for you and your kiddo's to explore... I realized this week that we only have 3 weeks before Adam goes back and we've barely crossed anything from our Summer Bucket List!
First, there is this awesome children's museum/workshop in Old Town Temecula called Pennypickles Workshop. This place was amazing! Both my husband and I went to this place and I think we were both as entertained as Adam! And the other cool part is that Adam can go from now till he's a preteen and get something new from it every time! It's a fun, science/math based museum that does everything from arts and crafts to music to optical illusions and so much more!


They had everything! A hot air balloon that the kids could get in and pull the handle, turn tables, instruments, a garbage/recycle plant, duct tape wallets and soo soo sooo much more! And the price was really reasonable, well worth it!
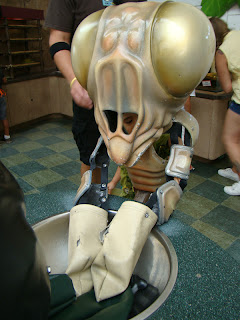
Another place that was very fun was KidSpace Museum in Pasadena! This is also a museum, but it's very hands on and interactive with lots of cool stuff inside and outside! The KidSpace Museum is right next to the Pasadena Rose Bowl... which we'll get to!


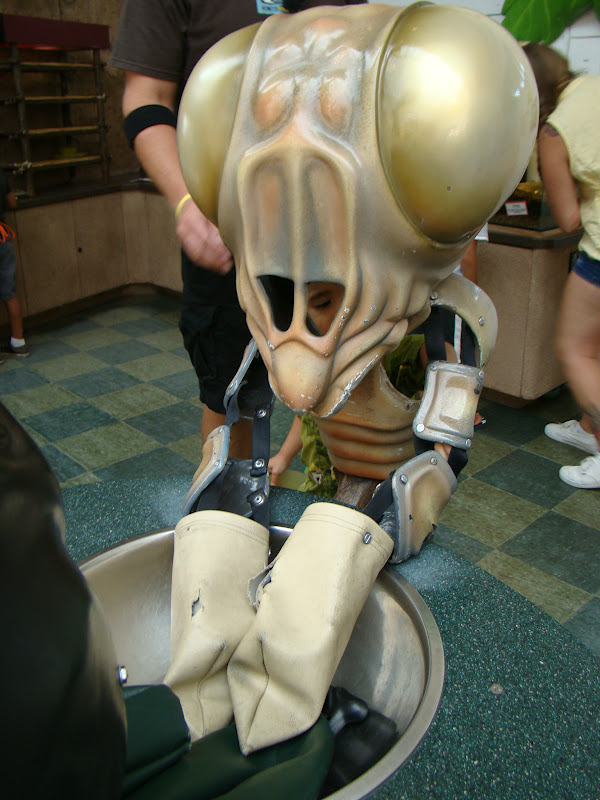


We loved this museum! It had so much cool stuff to do, from this super tall climbing thing to an ant hill that the kids could climb in and out of and an earthquake stimulator, a fossil digging jeep, gold mining water area, HUGE garden area and so much more! They also have fun special events, so check out their calendar!
Then there's Pretend City in Irvine... This place is pretty neat for the little ones, I'd say once they're able to pretend and act out different things, they'll have fun. It wasn't quite as fun for the grown ups though... we were mostly just trying to keep track of our own kids! I think we'd been there for about 1.5 hours and I felt like it had been twice as long! But it's really neat for the kids, nice and clean and big! There's something for every kids desire, from an Art Studio, Library, Vet Clinic, Marina, Police Department, Fire Department, Beach, Construction Site, Farm, Grocery Store and more!


It was a little pricey, we went on a AAA special day so there was a little bit of a discount, but it was nicely air conditioned, and in 102 degree heat, you cannot beat that!
If you're not looking for kid friendly outings, try the Rose Bowl Flea Market, which is the 2nd Sunday of each month or the Saw Dust Festival in Laguna Beach where you can see cool handmade items from local artists! Of course there's always the beach, if you go to Balboa, take a ride on the ferry!
Have fun your last few weeks of summer!
Andrea
Wednesday, July 25, 2012
Yarn "Laser" Course...
Good Morning!
Thanks for stopping by!
I was trying to clean my house the other day... one of my least favorite things to do! I love love love having a clean house, and we try so hard to keep it picked up so cleaning won't be this huge obstacle, but I swear I spend 2 hours picking up misc and putting it all in the right room/closet/bin/cabinet/drawer - and then still have to clean clean!
Anyways - my hard work'n man was working both Saturday and Sunday and I knew I had to clean with Adam, who is a wonderful helper, but who I try to keep away from the cleaning supplies... so I knew I'd have to find something for him to do... and then I remembered seeing this on Pinterest...
 So, I grabbed these from my craft supplies...
 and made this... (please please please forgive the horrible photos - remember, we live in a cave)


Stepped over and bent and ducked all at the same time...


Thanks for stopping by!
I was trying to clean my house the other day... one of my least favorite things to do! I love love love having a clean house, and we try so hard to keep it picked up so cleaning won't be this huge obstacle, but I swear I spend 2 hours picking up misc and putting it all in the right room/closet/bin/cabinet/drawer - and then still have to clean clean!
Anyways - my hard work'n man was working both Saturday and Sunday and I knew I had to clean with Adam, who is a wonderful helper, but who I try to keep away from the cleaning supplies... so I knew I'd have to find something for him to do... and then I remembered seeing this on Pinterest...


And he did this...

He stepped up and over...

crouched under...


He played with this obstacle course off and on for the whole day. Of course, this meant that I played with the obstacle course for the whole day - at least any time I wanted to use the restroom, grab something from one of the bedrooms, do laundry, go into the garage... well, you get the point.

We took it down that night after Adam went to bed, but it'll definitely be making more appearances in our house!
Have a great day!
Andrea
Monday, July 23, 2012
Pinned Up Mondays!
Hello!
Thanks for joining me today!
I'm sorry for the lack of posts last week, but I'm back this week and with an almost complete project! Yep, I said it! A pinspired project that is practically finished! Remember this?

The last time that I shared the progress, this is what you saw...

I had primed the former dresser turned bench but here's the steps since...

I sanded down the bench because even though I primed it, it was still not smooth. I'm not sure if I used the wrong type of roller, next time (if there is a next time!), I'll try a foam roller, but it needed to be smoothed out.


After sanding, we used the shop vac and vacuumed all over the bench. My big helper was happy to vacuum! I then took a damp, microfiber rag and wiped down the bench.

After sanding the drawers, we used the air compressor and blew off the dust. I then took the damp rag and wiped down each drawer. Someday he'll hate the fact that I posted a photo of him with his eyes closed, but I'm just so proud and impressed by hiswillingness eagerness to help!

We then set up the paint booth. This was super pain to do in 102 degrees! We used plastic sheeting that I had left over from the giant water pillow, and hung sheets of it to the top of the garage that extended to the floor. We then taped the sheets together at the seams. This was NOT fun at all!
After that, Alan (best husband ever) used our air compressor and an air paint gun to spray the grey/blue color onto the bench. I'm sorry that there are no photos of this, but with my and Adam's asthma and allergies, we were hiding in the house! But, here's the painted bench...


Yay! It looks pretty good, if I do say so myself! Next time you see this, it'll be sitting in the house, assembled and with a bench cushion on top!
See you next Monday for the finished product!
Andrea
Thanks for joining me today!
I'm sorry for the lack of posts last week, but I'm back this week and with an almost complete project! Yep, I said it! A pinspired project that is practically finished! Remember this?

The last time that I shared the progress, this is what you saw...

I had primed the former dresser turned bench but here's the steps since...

I sanded down the bench because even though I primed it, it was still not smooth. I'm not sure if I used the wrong type of roller, next time (if there is a next time!), I'll try a foam roller, but it needed to be smoothed out.


After sanding the drawers, we used the air compressor and blew off the dust. I then took the damp rag and wiped down each drawer. Someday he'll hate the fact that I posted a photo of him with his eyes closed, but I'm just so proud and impressed by his
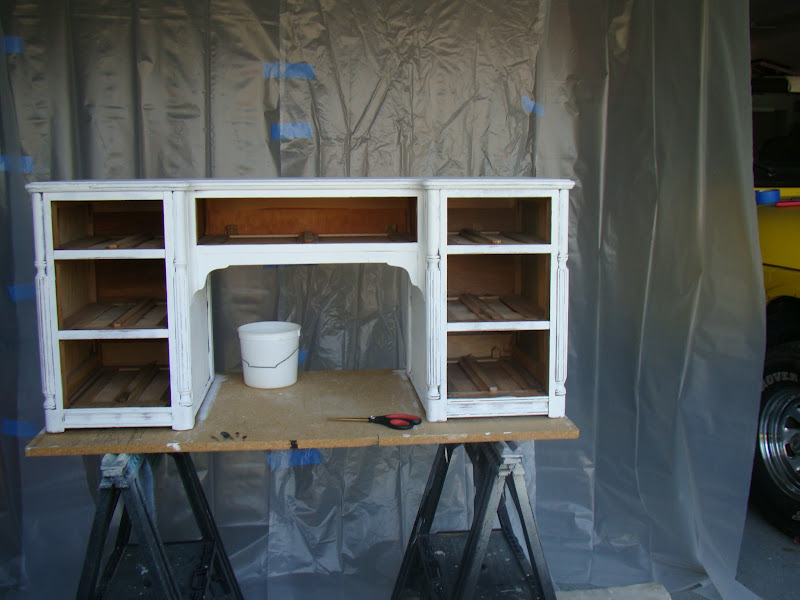
We then set up the paint booth. This was super pain to do in 102 degrees! We used plastic sheeting that I had left over from the giant water pillow, and hung sheets of it to the top of the garage that extended to the floor. We then taped the sheets together at the seams. This was NOT fun at all!
After that, Alan (best husband ever) used our air compressor and an air paint gun to spray the grey/blue color onto the bench. I'm sorry that there are no photos of this, but with my and Adam's asthma and allergies, we were hiding in the house! But, here's the painted bench...


Yay! It looks pretty good, if I do say so myself! Next time you see this, it'll be sitting in the house, assembled and with a bench cushion on top!
See you next Monday for the finished product!
Andrea
Subscribe to:
Posts (Atom)