Photobucket Photobucket Photobucket Photobucket Photobucket Photobucket

Wednesday, January 25, 2012

Needles

So, on Pinned Down Monday I shared a little piece embroidery that I made the other day...

It's for my soon to be sister-in-laws bridal shower.  And once I got going, I couldn't stop!  So I made this one too...


It's a mason jar, which is a main part of the Wedding.  The wedding invite is in the shape of a mason jar, mason jars will be adorning the tables at the wedding, we'll be using mason jars for different parts of the shower...

But mason jars remind me of my Grandma Grace, who's taught me how to make jam from scratch like she did with her Mom.  And they remind me of Missouri, of catching lighting bugs in mason jars and so much love... so that's that.

And I made this one, it's not my favorite but that's okay...

I like the idea, but I wish I would've made the banner triangles larger...


The banner says Mr + Mrs Jessup but it's hard to read with the yellow thread.  I wish I had purple embroidery thread to use for the letters but I had to use what I had because...

I really hurt my back.  I found out today that it's worse than a sprain or strain and a little more serious than I thought it was.  So, I'll be flat on my back for some time now.  So, unfortunately I won't be able to do the Threads Thursday's like I'd planned because sitting up to sew just isn't in the foreseeable future but I'll find something else exciting to share with everyone and as soon as the vertebra, nerve and disc damage that I've done is better I'll start that up.

Talk to you all soon!
Andrea


Monday, January 23, 2012

Pinned Down Mondays

Hello!

Today is Pinned Down Monday and I'll be sharing a project that I made based on an idea that I found on Pinterest!  Here's my inspiration...

Opps - Pinterest is having some server problems!  I'll just describe it to you and try to fill in the image later!

My soon to be sis-in-law showed me a picture of a painted tree that she liked in place of her sign-in book for their wedding.  It's a painted (?) tree that has a heart with the bride and grooms initials in it.  The tree then has a lot of stamped leaves all over it that people can sign their names onto.  She'll then put this into a picture frame and hang in their home.  I thought it was very clever - so much better than a sign in book that you just put into a drawer and it collects dust...

So, I decided to do a little bit of needle point with the tree/heart initials in mind...

I started off with...
I used a scrap piece that I had left over from cutting down playroom curtains.  Now remember, I'm couch bound so this project is exactly what I needed to keep me entertained!


I used a 4" embroidery hoop.


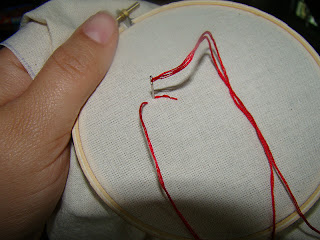
I then started my red heart.  I didn't sketch out the pattern or anything, I just started.  I didn't want to see any pencil marks or anything.  But you could always sketch it out if you felt more comfortable.

Here's the finished heart.  The D+K are their initials...


I then went back in and, with brown floss, made a wood grain.  Very simple and easy and inexpensive!  Just a little time consuming, but it was really relaxing and enjoyable for me!

I haven't decided how I'm going to use these yet.  I know that I want to use them in the shower and I'm planning on hanging them from a tree branch that's suspended from the ceiling.  I am debating about putting it into a mason jar lid and letting that frame it or if I want to get more of the wooden hoops and let those be the frames... any suggestions?

I'll let you all see the nest few that I finish - the mason jar is looking pretty cute right about now!  The jars done, just need to figure out how I'm going to decorate it!

Have a great day!
Andrea

Friday, January 20, 2012

Couch Potato...

yep, that's me.  I've had some, ummm, down time this week after injuring my back last weekend.  After a trip to Urgent Care, xrays, shots and lots of meds, I was able to lay flat on my back for 3 days.  Now, I alternate between lying flat and sitting up on the couch - both positions require a heating pad.

I didn't injure it terribly, which I'm very thankful for - no slipped discs or vertebrae issues, just a sprained muscle that only time will heal.  I'm lucky because between my parents and my Mother-n-law, Adam has been very spoiled and well taken care of.  My husband has been amazing, keeping up on laundry and dishes, bedtime routines and supplying me with lots of chocolate to ease the pain.

So, I've spent A LOT of time surfing my favorite blogs, checking out pinterest, re-reading my favorite books and magazines, formatting new signs for my Etsy shop and watching horrible, time sucking, brain-cell killing, television shows.  Anyways, with all of this couch time, I decided a few changes would be a good thing for my blog and myself!

I bought this book last summer...
1-2-3-Sew by Ellen Luckett Baker.  I love this book - her fabric choice, projects, instructions, everything!   I like to sew but I really don't know what I'm doing most of the time.  I've never taken a class, everything that I know is from my Mom and Grandma and I'm incredibly intimidated by patterns and instructions unless their accompanied with great photos.  Anyways, I thought this book would be a great way to increase my skill base so I've decided to go project by project from number 1 to number 33 in this book.  I'll be sharing my first project next Thursday, which will now be Thursday Threads!  I'm excited!  If you want to follow along that would be awesome!  I purchased this book from Amazon.com - it's currently $16.47 on Amazon and $17.82 on B&N.

Okay, so from now on, Monday is Pinned Down by Pinterest projects and Thursday is Threaded Thursdays!  All the other days are open for papercrafting or anything else that I hope you might enjoy!

So, today I'm sharing another card that I made for my 1 Sketch, 6 Cards class at Collective Journeys.
Again, this card is using October Afternoons Farmhouse line - aren't those silhouette stickers cute?  I thought this would great as a Valentines, Anniversary card... whatever. 

If you'd like to sign up for the 1 Sketch, 6 Cards class, please call Collective Journey's at 909.793.2200!

Have a great weekend!
Andrea

Wednesday, January 18, 2012

I just realized

that I never updated all of you on where I placed some of my "25 Day's of Pinterest" projects! 

Let's take a quick look back!

So, I made these...
And instead of grouping them like a little village, I put them on our ladder bookshelves with my other collectibles...
I added some fake trees that I'd bought for a snowglobe project here and there along with some little berry pics - I felt like it needed some extra pops of color...

To get different heights, I used plastic children's bowls as stands and just clustered cloudy snow all around.

My taped reindeer mantle piece grew a little over the season...
My reindeer got a few more antlers - he was more of a young Bambi in the beginning buy grew to be quite an impressive buck by the end!

And last, here's the painted $1 Store vases in my dinning room hutch with my favorite PB Santa Plates...


  Well, that's it!  I just wanted to share the end result of my Pinterest series! 

I'm planning on using some of the same ideas for Kerry's bridal shower that I found for my 25 Day's of Pinterest series, I'll share as I go!

Thanks for taking a look back with me! 
Andrea

Tuesday, January 17, 2012

GiGi's Petals

Hello!

I'm so excited because today I'm a feature over on Gigi's Petals, which is a super cool daily deal website that concentrates on handmade items! 


All of the items are handmade and they range from 25%-50% off!  There's a super cute small bird with initial stamped leaves necklace that I've been debating on ordering and giving to myself for Valentines...

My featured product is my "I love you because" chalkboard sign...

If you're a fan of cute, fun, inexpensive! handmade items, then you should check them out daily!  There's always 1 or 2 new features to choose from!

Have a great day!
Andrea

Monday, January 16, 2012

PInterest Mondays!

Hello!  Happy Monday!

In December I did a special series called "25 Days of Pinterest", and I LOVED doing it!  It was so much fun, following through on inspiration!  So, I decided to go ahead and continue the series, but modify it a little!  So, I'm starting a new series called Pinned Down, which will take place every Monday!

So, today I'm focusing on an obsession of mine - Burlap.  It's such a cool, sturdy, inexpensive, rustic, and natural material to use!  I've been pinning up a storm with burlap because I'm hosting my soon-to-be sis n' laws bridal shower at our home and the theme is "rustic elegance".  I'm very excited, I've been getting so inspired that I had to do a trial run with burlap this weekend!

Here's my Pinterest inspiration...
Did you notice number 1?  The ruffled burlap bag?  Well, I went to my cousin, Susan's, bridal shower on Saturday and I needed a gift bag... so... instead of buying a gift bag (I've been trying to avoid wasteful purchases lately), I made one from my burlap and fabric scraps.

I started with a piece of burlap folded in half - it was roughly 18" x 21" post fold.  I wanted it very large because we were putting a pillow and other goodies in it and Susan is a Stamp'n Up consultant and I wanted her to be able to use if to cart around supplies.
I pinned up the 2 sides and sewed around them to make a pouch.  I did a zigzag stitch with a 1/4" seam allowance.  Put bag right-side out and iron seams so that it lays fairly flat (it's burlap so it's not going to have a super clean edge but it's okay, it's very forgiving)


 Next I made a very wide binding.  I wanted a tri-fold binding, so I started with a 6" x 36" wide piece of fabric.  I folded the piece in half like a hotdog bun and ironed it.

I then opened it back up and folded in the 2 edges about 1 inch and ironed them, so now, if you were to look at the piece, there should be 3 creases.

I then folded it back in half and ironed it again once for good measure!  Hello thick, wonderful binding!

I then pinned the binding to the top of the top so that it would have a nice, clean opening.  Since I pinned the binding on both sides I only have to sew once - hello easy!
Sigh.  Nice. 

Then I grabbed some more fabric scraps and cut 2 strips - I didn't worry about getting them super even and I didn't care about the seam.  I just sewed them wrong side to wrong side and let the seam show.  Again, easy.  And since this is a casual, burlap bag, I felt like rough edges were allowable.  Don't tell my Grandma Grace.
I sewed the strips onto the bag, I wanted them secure so I made a large rectangle with an "x" in it - sturdy sturdy sturdy.  And it looks cool.  Cute huh?  But, could I leave it at cute?  Nope, I had to add just a little more!

So, I grabbed my Stamp'n Up Exclusive Butterfly die and cut a few from the scraps of my binding.

I pinned the butterfly's on the bottom, right corner of the bag to make them look like they were flying up and away...

Then I zig zag stitched the bodies of the butterflies but left the wings free.  Fly free, winged friends!
And there's the finished (I promise) bag.  I love it!  And I had to give it away, which was very difficult but I hope that it it shows my strong character and selflessness... but I guess talking about my selflessness shows another character trait - sigh...

On another note, Page's From the Heart is having a Design Team Sponsored Crop this Saturday, November 21st from 1-9 pm.  Dinner and lots of yummy snacks will be served and you'll have access to all of the members of the team!  We'll be sharing demo's of our favorite tips and techniques and you'll  be making a fun Make-n-Take that I create using QuicKutz latest products!  Fun!  Call Page's to reserve a spot today - (626)358-5334!

See you all soon!
Andrea
 

Saturday, January 14, 2012

A fun day and a card!

Hello!

I meant to do this post yesterday, but time escaped from me.

But we had a g-r-e-a-t day!

Nothing a boy likes better than throwing rocks in a stream.  He could've done this all day long. 


We went to White Water Preserves, which is off the 10 FWY between Cabazon and Palm Springs/Palm Dessert.  Its a great Wildlands Preserve and it's completely free!  It has 3 good size Trout ponds with HUGE fish begging for food - it's clean, the bathrooms are great, the hiking trails are well marked and the whole time that we were there we only saw 1 piece of trash.  It's a great place for a picnic, hike or just to get a peaceful feeling.

Or to throw rocks.  Not very peaceful, but certainly a good activity for a little boy!

Okay, switching gears - onto a new class that I'm doing!  I was scanning blogs last week, or 2 weeks ago and stumbled onto an idea.  An October Afternoon design team member explained that, in order to get a good amount of cards done at one time, that she takes 1 sketch and creates 10 cards from it.  Fantastic!  I'm a huge fan of sketches!  So, I decided to design a class based off the same idea! 

I used a very simple sketch and created this card from it.  For this card I kept a very literal translation of the sketch, I want to show how you can add layers on your cards to change them from the sketch, so for every card in the class I'll explain how I got from the sketch to the end result!


I used OA's Farmhouse line for this card.  And I know it's a little hard to see, but the middle heart is layered.  Here's a better look.

If you'd like to sign up, please call CJ's and reserve a spot in my 1 Sketch, 6 Cards class at the end of February.  I'm very excited!  I've been trying to think of a good card class for a few months and feel like I've finally found it! 

Have a great Saturday!  I'm going to tea at Barbara's Victorian Tea House today to celebrate my cousin's upcoming nuptials!  Yay, Susan!

Andrea

Wednesday, January 11, 2012

Another Layout!

Hello! 

Today I wanted to share another layout that I made the other week.  It's a double layout all about my adorable nephew, Aidan's, 3rd Cowboy birthday.

I used October Afternoon's Campfire paper along with Fly A Kite.  I saw the sketch for this layout in Creating Keepsakes January Magazine.

I made the brackets with an AccuCut die at Collective Journeys - it's actually a book page but I figured it would work just as well on a layout!  I also used a bracket edge punch on my star patterned paper to keep the same design through the layout.

For the title I used a Jillibean Kraft Tag, different stickers from the Campfire line, Thickers, and the pin from Campfire.
I love the way the banner came out!  This is probably my favorite part of the layout, besides the cute boys in the pictures!  I wanted to make sure that the layout stayed masculine, so I used bakers twine, the red/white gingham, buttons and word stickers from the Campfire sticker set.  I started off with 1 string of bakers twine but it just looked dinky, so I added a second line and it really made a difference!

That's it for this layout!  I hope that you're having a great start to 2012 and getting some scrapbooking in!
See you soon!
Andrea

Monday, January 9, 2012

Page's from the Heart Design Team Reveal

Hello!

Today is my turn over on the Page's blog...

My assignment was to create a 1 page layout using WeR's Vintage T collection.  Our only stipulation was that we had to include a calendar idea on our layout, the interpretation of the calendar was totally up to us.  Here's what I made...

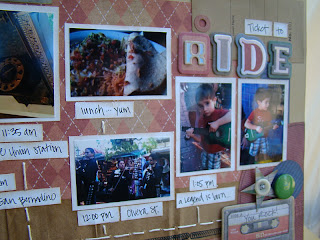
Once I saw the paper, I knew that I wanted my layout to be about a train trip on the MetroLink that we'd taken into LA Union Station... and where Adam got his green guitar!


Instead of doing a monthly or daily calendar, I decided to do more of a timeline of the events of the day.  I used a brown paper bag behind my hand stitched timeline.  I cut strips of white paper and wrote the times and where we were doing and placed a picture above each of the different times.

I punched out different shapes and clustered them towards the bottom right corner of my timeline.  I added button and a penny, along with the cassette tag for interest.


My title was super simple, I backed the stickers with a Jillibean Kraft Tag and used WeR Letter Stickers for the focus of my title.

To keep the eyes moving, I added half a circle and a strip of patterned paper from my scraps along with a hand cut cassette. 

I love that this layout highlights Adam's road to being a musical legend!

Have a great Monday!!
Andrea