Photobucket Photobucket Photobucket Photobucket Photobucket Photobucket

Saturday, June 29, 2013

Patriotic Mantle Reveal

Good Morning!
 
Today's the Patriotic Mantle Reveal!  Yay!  I know, it's just a mantle... why am I so excited about a silly mantle?  Well, mostly, it's because it was created from items that I had onhand and with projects that are easy to reproduce (the United States Silhouette is probably not as easy...) AND that you can manipulate for a variety of ocassions!
 
 
Yup, the past week of ideas are all there!
 
 
The Poster Board Backing...
 
 
The Patriotic Scrap Bunting...
 
 
And the USA Silhouette Sign!
 
 
Here's the rest of the decor:
 
The candle glass hurricane on the left is sitting on a mercury glass candle stick that I've had since Big A and I were married...
 
The small star plaque is something I bought a few years ago from the Target Dollar Bin...
 
The tall, metal vase is also from the Target Dollar Bin - I placed 2 mason jars filled with marbles into the bottom of the vase for weight and as a space filler.  I bunched up tissue paper and filled the rest of the vase to the top, threw some shred onto the top and stuck in the 3 American Flags (from previous Independence Days).
 
That's it!  I'm sure that if you take a look around your home, play with a what you have, you'll find an Amazing mantle-scape to Grace your home for the 4th!
 
Have a great day!
Andrea  
 

Friday, June 28, 2013

Poster Board Backdrop

Good Morning!

We're so close to the Mantle Reveal... so today I wanted to share one last project idea that you can use for any occasion!


This is such an inexpensive, easy way to add color to a mantle, party, photo shoot, wherever you need an extra umph!


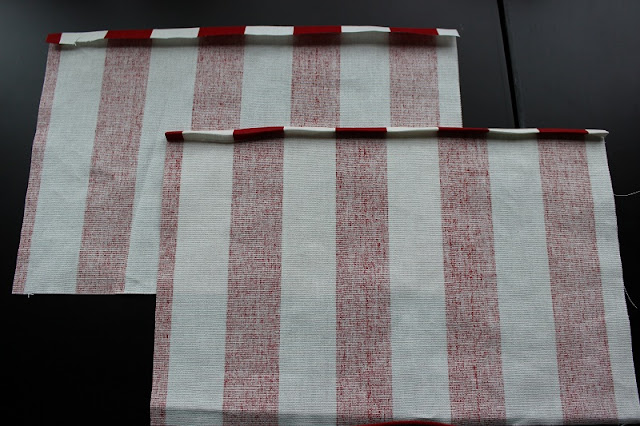
First, you'll need to grab a foam poster board, the one I used is 20"x 30", fabric that is slightly larger than your board and tape; I used masking tape but you can use duct tape, blue tape, whatever you have on hand!


Lay your fabric face down on your work surface, then lay your poster board centered on top.


Start by wrapping the fabric around the board and taping each edge down, pull the fabric taunt to get the best look.


Wrap the other sides around your board and tape, pulling tightly so that your fabric is as snug on your board as possible.


That's it!  I used removable poster tape by 3M in each 4 corners and on the sides to hang my board on the wall so that it'd be easy to remove and reuse.

Can you see my wiggly lines at the bottom?  Note to self: Avoid lined fabric!

The best part of this project is that I had all of the supplies on hand... maybe not everyone has foam board, fabric and poster tape on hand, but even if you had to purchase the supplies, it wouldn't be too much and you could reuse the board and poster tape...

Until tomorrow!  Mantle Reveal!
Andrea

Thursday, June 27, 2013

Patriotic Scrap Bunting

Good Morning!

I finally finished my Patriotic Mantle and am so excited to share... but we have to be patient a little longer so I can share a super easy, scrap using banner tutorial!

I'm sure it's a cut and dry idea, but I'd rather be thorough than assume someone knows hows to create one of these easy, fun and colorful guys (I'm thinking of my not-so-crafty-sis here).


Let's get started!  Here's what you'll need:

-Fabric or paper in whatever color scheme you want!  Since this was for my Patriotic Mantle, I choose scaps of Red, White and Blue Fabric .

-Scissors

-Sewing Machine

-Coordinating Thread


First you're going to want to cut your fabric or paper into squares, recutangles, circles, whatever floats your boat.  Here's my sizes:
Red/White Stripe 3"x 5"
Red/Blue/White Strip 2.5"x 2.5"
Blue/White Knot 2.5"x 5"

Put your pieces into the order you want them to be for your bunting - this will make your sewing process way faster.

Grab your first piece (top piece) and start sewing!  I used a 1/4" seam allowance, but it's up to you.  I also used red thread so that it would pop.  Before you start sewing, pull enough thread so that you have something to hang your bunting with!

Leave your sewing foot down and just keep sewing!  I tried to keep my pieces evenly spaced, so every time that I was done sewing one piece, I'd just grab the next, slide it under my foot and keep on going.  I used a straight stitch but you can use a zig zag or decorative stitch just as easily.

Bam!  Bang!  Boom!  You have a fun, easy and scrap using bunting to hang where ever you want!  I love using scraps!  I also love a 5 minute project...  Check back in tomorrow for the last idea before the Mantle Reveal (too much fan fare for a mantle?)!

Have a great one!
Andrea

Wednesday, June 26, 2013

USA Silhouette Wooden Sign

Good Morning!

We're still in the Red, White and Blue mode around our house so today I'm sharing a fun and patriotic sign that I made the other day...

Do you remember this inspiration that I posted the other day?
{Silhouette}
 
I've been playing with my Silhouette Cameo A LOT lately... I've been following their blog for a few years, enjoying their tutorials, projects and challenges... but recently I've started following their YouTube channel and recreating their projects step by step.  I know, some of you may call me a copy-cat (and sometimes I totally am!) but I think that every time I copy their project to learn their technique and tips, that it's not copying, it's more of a classroom.
 
Here's my take on the above project...
 
 
I recently learned about using my Silhouette software to offset fonts for a Father's Day Card (more on that later!), so I figured, why couldn't I do the same with a shape?  So I did.
 
The white space around the United States Silhouette is actually the offset shape of the silhouette.  Here's how you can recreate this painted sign.  I first painted my 12"x 12" wooden board white and let it dry.  Then, once I formatted my sign, I cut the design from Silhouette Vinyl and used the vinyl as a stencil, laying it (centered) on my painted board.  I rolled red paint all over my sign (knowing that my stencil would keep the negative white) and let it dry; once it was dry I peeled off the vinyl and threw it away while admireing my nice, mostly crisp lines!  I grabbed my blue vinyl, cut the United States Silhouette and used my transfer paper to stick it right mostly where I wanted it!


I wanted my sign to look a little distressed, so I lightly sanded the entire sign and then did a heavy sanding on the edges.


Pretty easy, huh?  I love the way this sign turned out and cannot wait to add it to my Patriotic mantle display! 

If you have any questions on how to format your sign using Silhouette Software, please email me at ayokleyjessup@gmail.com  and I'll walk you through the steps!

Have a great day!
Andrea

Tuesday, June 25, 2013

Patriotic Pinwheel Pillow Tutorial

Good Morning!

If you looked at yesterday's post, you saw a lot of red, white and blue... and after writing the post, I was inspired!  I decided to start decorating the house for the 4th and got out our banners, lanterns, flags and more... and then I realized that I didn't have any red, white and blue pillows!  What?!  It's only my job to make pillows... so that's what I did!

To make your Patriotic Pinwheel Pillow, you'll need the following:
(1) 14"x14" square red pattern fabric
(1) 14"x14" square blue pattern fabric
(2) 12"x 9" coordinating fabric
sewing machine
pins
scissors
chopsticks (or something pointy that you can push your corners out)
12" Pillow Insert

* I used heavy weight upholstry fabric for my pillow.
** I used a 1/4" seam
*** Finished cover size is 12"x 12"

Let's get started!

Grab your 2 14"x14" fabric squares.  Since this is a patriotic pillow, I went with red, white and blue but if you could always do a different color scheme to match your decor.

Take one of your squares and you're going to cut a long, diagonal cut from one corner to another.  If you have a straight, long ruler and rotary cutter use them!  If not, I'd suggest drawing a straight line (on the back side of your fabric) with a pencil or chalk and then hand cut with scissors.

You'll now have 2 large triangles.

Take one of your triangles and cut down the center.  Repeat with your other triangle.

You'll now have 4 triangles.

Repeat with your other 14"x14" square of coordinating fabric.  Once all of your triangles are cut, you'll have 4 red triangles and 4 blue triangles.

(I ironed all of my triangles at this point... you could've ironed the squares before you cut as well, it's just preference)

Now you can lay out your triangles so that they create a square.  Make sure that your patterns are going the way you want them go... You'll have enough triangles cut to make 2 pillow covers.

Now it's time to assemble your front.

Take 1 of your blue pieces and lay your red piece on top, I like to keep my triangles in the shape of the square so that I can sew the edges correctly.  Here's a suggestion, move counter clockwise... as in, grab the red triangle to the right of your bottom blue triangle and place it on top with the right sides together.  Make sure your points meet.

 
Now sew along the right side of you triangle, from the top point to the bottom right point with a 1/4" seam allowance.  Don't bother back stitching.

Once you've sewn your triangles together, open them up.  You now have half of your front done!  Yay!

Repeat these steps to sew your other 2 triangles together.  Remember to move to the right and sew your seam on the right... this ensures that your pinwheel pieces are all in the right order.

Don't forget to press the seam!  This will help your cover lay nice and flat!

Now that you have your 2 large triangle pieces together, it's time to finish the cover!  So close to being done!

Lay your two triangle pieces on top of each other, right sides together.  Do you best to line up your seams. 

Sew along the long bottom edge of your triangles using a 1/4" seam allowance.  Viola!  You now have a pinwheel square!

Turn your square over and press the seams so that your pinwheel lays nice and flat.

You're so close... you just need to get the back together!

Grab your 2 back pieces (9"x12").

You're going to make 1 hem on each piece.  On one backing, make a 1/2" hem along the long edge.  I like to iron my hem as I measure it.  On the other backing, you'll want to make a finished hem, so fold your long edge 1/2" and iron, then fold it 1/2" again and iron.  You won't see any raw edges on this hem.  Sew both hems down with a straight stitch.

Now, grab your pinwheel front and lay it face up.  Grab your FINISHED hem piece (the hem with no raw edges) and lay it on top of your pinwheel piece, right sides together.  You want your bottom and sides to line up.

Grab your other backing piece and lay it on top of your pinwheel piece.  You'll want both hemmed edges to be in the middle of your pinwheel with all of your raw edges on the edges of your pinwheel.

I like to pin my edges a little before I sew, just to make sure I grab all of the pieces when I sew my pillow together.

Sew all around your square with a 1/4" seam allowance.

Trim your corners, this will help with the bulk and make your corners nice and pointy!

Turn your cover right side out and admire your pillow cover!  Nice... use your chopsticks to push the corners out so that you have a nice, clean point on all your corners!


I like to iron my seams before I put the pillow insert inside, just to give my cover a nice, clean look but it's not necessary...

Shove your pillow insert inside your cover and admire your mad quilting, sewing, home decor skills. 

Go ahead, hum the National Anthem... you know you want to.


Place your pinwheel pillow where ever you need a boost of patriotism... remember, you have enough triangles cut to make another one of these beauties!

I'm off to make some more Red, White and Blue awesomeness!  I hope you are too!
Have a great day!
Andrea

Monday, June 24, 2013

Patriotic Inspiration

Good Morning!

Last week I was off the grid - we were hanging out with family and didn't have Internet access (WHAT!?!?!)  unless we went to the library... I made it through okay... you know, after breathing into a bag for a few hours little while, and then I adjusted rather well and ended up enjoying not being constantly plugged in.  In all honesty, I did still have Internet on my iPhone, so I'm not as tough as I might be sounding, but I also don't have the highest data limit so once I got over my need to read every email that came in and move past my usual habit of wasting spending time on Pinterest, I was happy to spend an hour reading to Adam or playing card with my parents or going to the pool for hours on hours on hours... on hours.  The only thing I felt bad about was not having time to schedule posts for last week, so this week I'm all yours!

I cannot believe that next week is Independence Day!  Anyone else shocked by how quickly June has flown past?  Shoot, I feel like I'm still in November 2012!  I did buy some fun 4th of July decorations at the Dollar Tree a few weeks back so I guess I need to get on it!  If you're needing some fun Red, White and Blue ideas, here you go!  You're welcome.

4th of July Printable and Hanging Sign


Firecracker Treat Pops
 
Patriotic Printable
 
Mason Jar Flag
 
 
Glow Stick Printable
 
 
4th of July Recipes
 
4th of July Milk Carton Treat Boxes
 
Patriotic Vignette
 
 
DIY United States Patriotic Decor
 
 
 I'm feeling pretty patriotic... time to go create and decorate!

Have a great day!
Andrea