Photobucket Photobucket Photobucket Photobucket Photobucket Photobucket

Thursday, July 12, 2012

Yummy! Recipe Day!

Hello!
Thanks for stopping by! 

Today I'm sharing a very yummy desert that I found on, yes.... Pinterest!

{Photo and recipe courtesy of The Girl Who Ate Everything}
Ingredients:1 lb large strawberries
1 (8 ounce) package cream cheese, softened
1/4 - 1/2 cup powdered sugar (depending on how sweet you want it)
1 teaspoon vanilla extract
1/4 - 1/2 cup graham cracker crumbs

Instructions:
1. Rinse strawberries and cut around the top of the strawberry. Remove the top and clean out with a paring knife, if necessary (some of them are hollow already. Prep all of the strawberries and set aside.
2. In a mixing bowl, beat cream cheese, powdered sugar, and vanilla until creamy. Add cream cheese mix to a piping bag or Ziploc with the corner snipped off. Fill the strawberries with cheesecake mixture.
3. Once strawberries are filled, sprinkle or dip the tops with graham cracker crumbs. If not serving immediately, refrigerate until serving.


Now, I first tried these at Movie night a few weeks back, and Margarita had already tried them and adapted a different recipe, which is the one that I used, below:

Ingredients:
2 lb large strawberries (we got ours from Costco)
1 (8 oz.) pkg cream cheese, softened
1 jar Marshmallow Fluff

Directions:
1.  Rinse and pat dry your strawberries.
2.  Cut around the top hull of your berries.  The hull will come off and the inside will be hollow.  Depending on the size of the stawberry, some may be more hollow than others - I always left the berry the way it was made, seemed like I had the perfect amount of cheesecake mixture and berry this way!
3.  In mixing bowl, combine block of cream cheese and entire jar of marshmallow fluff.  Mix until creamy.  I did this by hand, but you can use a mixer if you prefer. 
4.  Add cream cheese mixture into a Ziplock bag and snipe off 1 corner - this will be your piping bag!  If you have a piping bag, guess you can use that too!
5.  Pipe the mixture into your hollowed out strawberries.
6.  Eat immediately, the berries can get a little soggy if left too long!

I made mind for the 4th of july, so I ended up dipping them in blue tinted white chocolate, so my berries were red (berries), white (cream cheese filling) and blue (tinted white chocolate).

Enjoy!

This are super easy and yummy!  Just the right amount of sweet and richness!  And so easy... did I already say that?

Have a great and berry sweet day!
Andrea 


Tuesday, July 10, 2012

I've zigged and zagged to something new!

Good Afternoon!

Thanks for stopping by!

I wanted to invite you to come visit me over at GroopDealz...


These pillow covers are each 18" and come in a variety of patterns!  I stuck with the grey, yellow and navy color scheme, and while I tried to be a little daring with new and different patterns, I couldn't leave out my beloved Chevron!

Head on over to GroopDealz to see the covers and other fun items, like...

These fun, colored skinny jeans ($19.95 each)...

These reusable sandwich wraps ($5.50)...

and

A set of 4 Lip balms!  ($3.50 per set)

I'll see you later!  Have a great day!
Andrea


Monday, July 9, 2012

Pinned Up Monday!

Happy Pinned Up Monday!

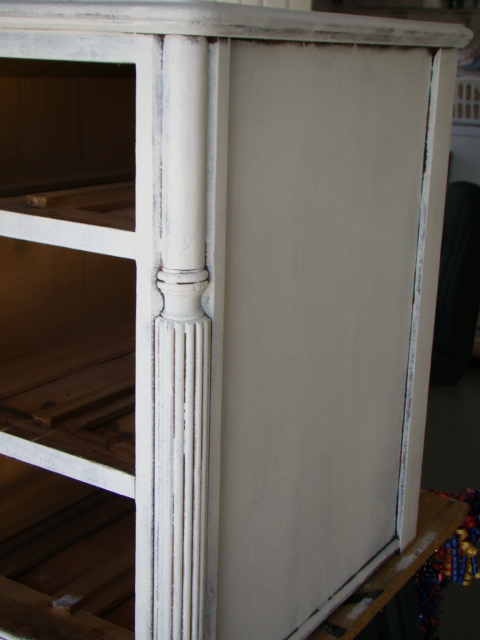
Thanks for joining me... today I'm back with the next step in the dresser/vanity turned bench project!

Here's where we started...


and here's where we ended...


And this is what happened this past weekend...


After doing A LOT of research on refurbishing, there were a few commonalities in the different posts.  1 - sanding is a good idea, even if not mandatory and 2 - Zinsser Cover Stain Primer is fantastic.  So, I bought some Zinsser and grabbed a fresh roller (delinted - this is important!  If you're roller is brand new, you'll end up with fibers in your paint, thus ruining the finish of your project!) and went to work!


I used a roller and a paint brush.  My husband has Purdy paint brushes, which are the best and super expensive, but I'm not allowed to use them.  So, I used my brush to get in the nooks and crannies and then went over it with my roller to get rid of the brush strokes.  If your husband is generous with his paint brushes, you can use those! 


I did 2 coats of primer because I really really really want a nice finish.  You could probably get away with 1 coat but I figured if 1 was good, 2 is best.  This is my first piece of furniture that I'm refinishing correctly so I'm trying to do it right.  If this is successful, all of my dining room furniture is next!

Here's some tips:

1. This is an oil based primer so it's going to stick to you, your clothes, etc.  Wear gloves and long sleeves/clothing you don't care about.  I wasn't wearing long sleeves and I still have splatters of paint on my arms after mineral oil and 2 days of showers/hand washing!

2.  De-lint your roller!

3.  Get all of the dust off your piece of furniture!  We used an air compressor and blew off the surface and then I followed with a soft rag.

4.  Use the primer in a well ventilated area!  I did this in an open garage near the front of the garage while wearing a serious painters mask.  I couldn't smell a thing while my mask was on, but once it was off, the smell was over-powering.

I'm letting it sit for a few days because I'm going to use a paint sprayer to apply the colored paint and I need my husbands help/knowledge!  Hopefully the next time you see it, it'll be all done!

Have a great day!
Andrea

Saturday, July 7, 2012

Tea for Two Giftset - QK June Club Project...

Hello!

Thanks for stopping by today! 

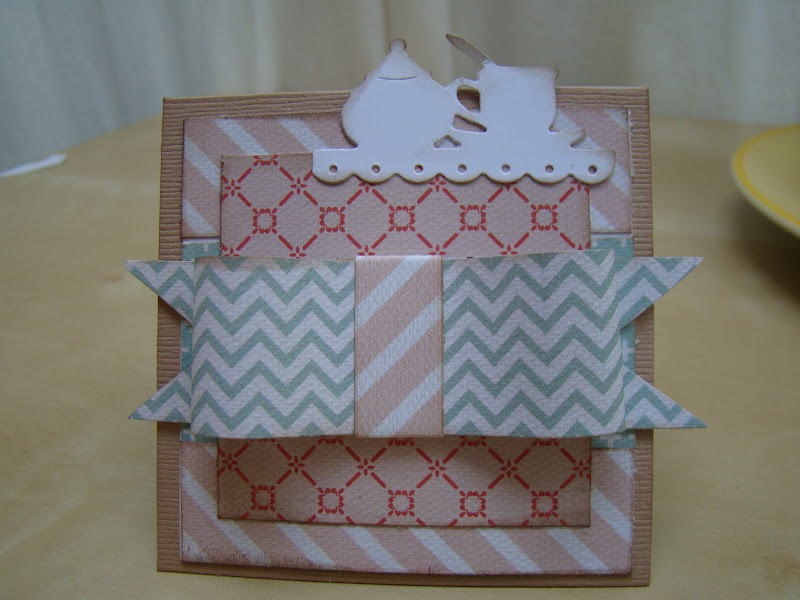
Today I'm sharing the QuicKutz Club June project that I created for all the "die" hard QK fans over at Page's From the Heart!

 I created this cute little card set using both QuicKutz and Cottage Cutz dies! 

The container is from QuicKutz - I love the look of it.  Its so easy to put together and I love that you can make it look different depending on which paper you use!


I used the Cottage Cutz Tea border to decorate the front of my container...


I made a few 3" mini-cards to sit in my container.  I cut different areas of the tea border to use on all my cards - how I love a die with versatility!


If you look back at my latest sketches, you might see how I used those sketches to create my mini-card...  To see the sketches, look here!  And if you want to see the other project I used the QK Container die for, check here.

See you laters, alligators!
Andrea

Thursday, July 5, 2012

Gift Wrap Ideas...

Good Morning!

Today I'm sharing a few easy and inexpensive gift wrapping ideas!

I like including Adam in, well, everything!  In most of my favorite Memories, my Mom was letting me help her make cookies, rolling out the dough, helping her craft... the important part wasn't what we were doing/making, it was that I was included. 

Adam's always liked to be a helper - and yes, sometimes it takes twice as long if he helps, but in the end, it's more fun this way and he feels good about himself!  So, for Father's Day, he helped me wrap up my dads gift...


We wrapped it in plain kraft paper and I let Adam pick out the stamps that he wanted to "decorate" it with.  I let Adam stamp with the Stamp'n Up Construction set in (washable) black ink.


  Adam spelled "Papa"  - well, the letters are all there, we're still working on the order of the spelling.  Easy, personalized gift wrap!

And here's another gift wrapping idea...


I bought a big box from the U-Haul Store -


And filled it with balloons.  I got the balloons from the Dollar Tree and blew them up with an air compressor.  I think there were 25 balloons in the pack - 1 popped and there were 2 left over.  My fingers were number after tying 22 balloons!  I then wrapped the box in gift wrap.

She kinda had to search for her gifts... In one balloon there was a gift card to a nail salon and in the other was a gift card for a movie outing - can you tell that we were doing a Girls Day/Night out gift?  She did have to pop the balloons to get to her gifts, but that's part of the fun!

So that's it!  2 fun and easy gift wrapping ideas!  The balloons in the box would be a great idea for kids - and you could ship it this way and it wouldn't weigh a ton!  I had planned on putting confetti in each of the balloons but forgot when I was blowing them up.  For kids you could put dollar bills in the different balloons too...

Have a great Friday!
Andrea

Wednesday, July 4, 2012

Happy Independence Day!

Happy 4th of July! 

Hope your day is full of family, fun, sparklers and pride!

Andrea

Tuesday, July 3, 2012

Reduce, Reuse, Recycle! Patriotic Wind Sock!

Hello!  Good Morning!

Well, it's almost the 4th of July, and our town makes a pretty big deal about it.  We have a parade in the morning with different bands, lots of picnics, fun booths... and then the University of Redlands opens the stadium gates and people flood in to claim a seat on the grass and spend the day having fun till the sparkly fireworks display that night!  We live less than 1 mile from the University, so we have a pretty good view of the fireworks from the open park area right next to our house...

And since it's such a big and fun deal around here, Adam and I made a fun craft to show our patriotism!  And the best part, we used all items that I had in the house and reused tin cans!

{Tin Can Patriotic Wind Sock)

So, here's what we did.

I grabbed a few CLEAN and EMPTY cans - grabbed them from the recycle...


And then I spray painted them with Krylon Indoor/Outdoor red paint in gloss.  It took 2 coats to cover.  We let them dry over night.


I then grabbed my Crop-a-Dile and punched 3 holes into the top, open end of the can.


We then cut streamers from crepe paper and taped them to the bottom rims of the cans.  We alternated between blue and white streamers.


We then punched stars with an EK punch and used glue dots to glue them where the streamers were taped to the can.  We used the scraps from our USA Banner...  Don't forget to tie twine, string, yarn or ribbon to your can, using the holes that you punched with the crop-a-dile. 


Hang them from your porch, patio, light fixtures - anywhere - to show your American Pride!

Hope you all have a very bright (and safe!) 4th of July!
Andrea

Oh!  And we're updating the design of the blog so please excuse the mess!  At the end, the blog will be more user friendly!