Photobucket Photobucket Photobucket Photobucket Photobucket Photobucket

Friday, June 14, 2013

Lil' A Fashion Week - Upcycled T-Shirt

Good Morning!

I told my brother that I was making Adam clothes, to which he replied "Poor kid..." - I get it, I remember growing up and wanting certain brands (ESPRIT, LA Gear- can you say 80's child?) and I know that at some point, Adam's not going to want me to make his clothes because he'll realize that it's not cool...  We'll probably have s Crosby moment like this one...

 
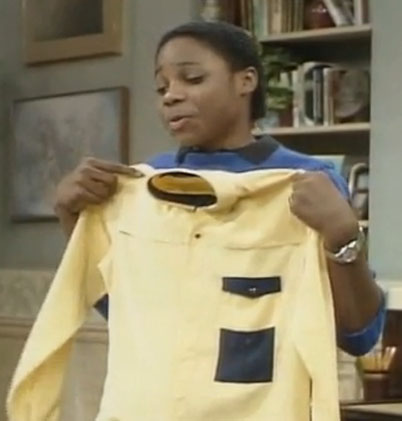
Theo bought this new shirt for a dance (?), which Denise thought was ridiculously expensive so she offered to make him one JUST LIKE IT...
 
 
Which obviously, didn't go exactly as planned (laugh sound track). 
 
Yes, I can see this in Adam's future.
 
Anyways, as for now, he likes that I make him stuff, anything from a die cut to a t-shirt, he feels special and I feel warm and gooey inside when he happily tells something "my Mommy made it for me."
 
 
I think I mentioned once or twice that Big A NEVER gets new clothes... I believe its been 4ish years since I bought him something new, he just doesn't care too much about what he wears.  A few months ago I was folding his clothes and putting them away when I realized that I had a constant scrunched up nose from looking at his paint splattered, worn/faded clothes - which I promptly took out of his drawers and in a donate bag... except for a few items that I figured I could reuse to make Lil' A play clothes!
 
 
I used the basic TEE pattern/tutorial from MADE and grabbed one of Big A's shirts.


I looked over the shirt, finding the wear and tear parts (gaping hole anyone?) so figuring out what I wanted to use from the shirt and what I definitely wanted to avoid.  I didn't mind the fray edges, I liked the worn look since this was a little boys play shirt or pj shirt (so far it's been both).
 
 
I folded the shirt in half, reminding myself that the folded part of the shirt would end up being the center part of Lil' A's t-shirt.
 
 
I laid down my pattern exactly where I wanted (don't forget to use the front pattern piece if your material had a design you want to keep).
 
 
I traced the pattern with a red marker (not my best idea, I just wanted the tracing to show up in the photo) so yay! for bad but successful ideas!
 
I
Also did the same for the sleeves, purposely getting some of the worn edges on the sleeve.


And I have all the pieces for Lil' A's NEW (resused) t-shirt!  I then just went about sewing it all together per the tutorial instructions and...
 

Jumped for joy when it was done!
 
 
Because Lil' A now had a great, Daddy t-shirt to wear with his pj's (as seen here with Mommy made pj bottoms) or to play or just be a lump on a log with!
 
Yay for old, gross and holey shirts that get to be NEW, cool and comfy shirts!  I feel like the shirt would be smiling here if it could...
 
 
Oh wait... it is!  Happy Happy Happy!
 
Have a great day!
Andrea

Thursday, June 13, 2013

Lil' A Fashion Week!

Good Morning...

Yesterday I shared a few Muscle Tee's and Shorts that I made for Adam... today I'm sharing a few more!  I LOVE repurposing... I love making something usable from something that we'd normally be throwing away.  And not just making something from fabric I happen to have, but something from something else!

I made these checkered shorts from an old skirt of mine that... it was a gathered skirt that is way too small but fortunately, since it was gathered, there was enough fabric for these shorts!  Thank goodness I've gained weight, otherwise Adam wouldn't have these awesome 80's skater shorts!
 
At first I wasn't sure about the shorts, I had a hard time matching anything other than black T's to them, but Adam's actually really good about grabbing shirts that match and he looks super cute!
 
For some reason I want to start singing "You've got to fight!  (Boom Boom) For your right!  (Boom Boom)  To PARTY!!" whenever I see this outfit...
Anyways...
I also upcycled one of Alan's old work shirts for Adam... and my favorite part is that I upcycled his collared work shirt into shorts!  Adam loves these, we call them Daddy Shorts and Adam wants to wear them all the time!  They're a nice, medium weight cotton fabric that wash and wear nicely.
 
I cut the pattern so that the shirt pocket, company name/logo and my husbands name (which were on the front of his work shirt) would be visible on the back of Lil' A's shorts... I thought this would make it more special and Lil' A would think of his Daddy every time he wore them!


I hemmed the bottom of the shorts... I have a few more of Alan's old shirts to cut up, they either have paint splotches or holes in them so I'll see what I can use and what I can't... I'm actually thinking of trying my hand at making a collared shirt for Adam from one of these... we'll see!
 
So there you have it, two upcycled Lil' A shorts from our old clothes!
 
Have a great day!
Andrea
 
*** I used the pattern and tutorial from MADE, which were easy to follow and use!  I cannot recommend it enough for any level of sewer!***
 

Wednesday, June 12, 2013

Fashion Week Interuption - End of School Teacher Gift

Good Morning!

Lil' A Fashion Week will resume tomorrow... today I'm sharing a great gift idea for a special teacher's end of the year gift!

Remember my friend who needed help putting together Student gifts for her husbands class?  Well, since we were at it, we made a cute tag for the gifts to his partner teachers!  Why not?  They'd seen an idea on Pinterest (yes, if I had a quarter every time I said 'Pinterest'...) using a gift card, fun tumbler and summer items (towels, magazines, cd's) with a cute tag, so I grabbed my computer and started formatting the tag using my Silhouette software - I tell you, if you're on the fence between a Silhouette or a Cricut, I'd urge you to look long and hard at the Silhouette - I use mine all the time for a WIDE variety of projects!  It's simple to use, simple to customize and can do just about everything that you want!

 
Now, my favorite part of the gift is the super cute sunglasses chip clips that they found at Target in the $1 Bins, which is what she used to attach the tag to the gift.
 
 
I found a sun cut file in my Silhouette account and since it was already outlined in a circle, I went with that.  I did change the sun a little, it originally had each ray separate, so that there was space between the rays and the circle of the sun, but I didn't think that would look good with the writing, so I attached each ray to the sun and melded all the shapes.
 
 
I again changed all of my cut files to print files, except for the circle, and added all my wording.  That's it!  I simply printed the tags and then used my Silhouette Cameo to cut the tags.  I did add the pink rhinestones because there's never a reason to not add a little bling! 
 
That's it!  A cute, easy and thoughtful gift for your child's teacher or a friend!  You could even give it to a to a baby sitter or care giver that watches your child during the school year!
 
That's it!  Have a great day!  See you tomorrow with the return of Lil' A's Fashion Week!
Andrea

Tuesday, June 11, 2013

Breif Fashion Week Interruption... Student Gifts!

Good Morning!

Please excuse the interruption to our regularly scheduled Fashion Show... but I'm sure you'll understand since I'm sharing an end of school project idea before the end of the year... hopefully!

A friend of mine needed some help getting some little goodies made for her husbands students, she'd been perusing Pinterest and found a few ideas that she liked so we got to work and made some super cute treats that any 5th grader would enjoy...


We were lucky and found the Pop Rocks at the Dollar Tree, three in a pack!  What!?  I know, fantastic!  I had the cello bags, she had the orange and yellow shred and I had my AWESOME Silhouette to format the toppers!


Using my Silhouette, I found a cool guitar graphic and changed it from a cut file to a print file, adding the colors that we wanted to be bright and cheerful.  I then grabbed a pinking square file and used that for my bag topper, sizing it to be 5" wide to fit on the bags.  I then added the wording, the most time consuming part was formatting "Rocked" because I had to do each letter individually so that I could have different colored outlines.  We first had the "ROCKED" letters solid, but it looked a little juvenile, so we switched to just the outline and bam!  We were feeling rocked! 

I printed the toppers, then put them into my Silhouette Cameo and cut the toppers - so easy and fun!  You could do something similar with a word processor program and some boarder punches!  And don't forget, the Pop-Rocks and Cello bags are from the Dollar Tree - can't get much more economical than that!

Have a great one!
Andrea

Monday, June 10, 2013

Fashion Week... Lil' A Style

Good Morning!

Confession:  I'm not an amazing sewer.  There, I said it.  It's true.  I can figure some things out, I love a good tutorial with lots or photos to help me along my way, I cannot read a pattern to save my life, I always have to call my Mom for sewing questions.  But I LOVE it!  I LOVE being able to make something that I saw in a store or that I've coveted from a magazine... I've tried my hand at a tank dress and 2 skirts for me, and while they ended up okay (and I wear them because fabric=$$), they were far from perfect and each time I ended up frustrated that they didn't look how I had envisioned them once they were on.  But my favorite person to sew for is Lil' A!  I LOVE making him clothing that I KNOW he'll love for various reasons... so this week we're doing a Lil' A Fashion Show! 


I used BOTH the Muscle Tee and Basic Shorts pattern from MADE... Dana has done an amazing job of creating patterns that are functional and easy to use.  I believe the pattern is made for a size 2T/3T so I just increased the width of the pants on either side by about 1".  Since my guy is on the skinny side (so did not get that from my side of the family), this worked well and I have it labeled as a 4T/5T...


I love bright colors on little people... especially for summer.  I think my kid totally pulled off this look, I used a simple knit fabric for the blue tank and a green knit for the neck and arm holes.  I didn't even finish the bottom for this shirt since I knew it was going to be a play shirt.  Since I did not use a ribbed knit for the neck/arm holes, Lil' A's giant head (so big because he has a big brain and is therefore, a genius - true story) I had to increase the neck size to 15" instead of 12" (I believe that's what the pattern calls for).  This was my first time working with knits so I'm still learning the lingo... just so you know, not all knits are created equal.  I prefer to work with a jersey knit, just your basic t-shirt fabric...


I dressed this shirt up a little.  I used some left over gray knit for the neck and arm holes, then added a pocket with a little trim at the top to give it some "POP"!  I used a small piece of green/blue stripped knit and made a sort of bias tape to go at the top of the pocket.  So simple but it added a lot.  I did finish the bottom of this shirt because I wanted it to be a shirt he could wear wherever. 

Confession: I had to use bathroom words to get that smile.  It went something like this...

"Adam, smile and look at the camera."  To which I got this photo...


So, I took it to the next level and said "Adam, what's your favorite word?  Is it Tutu fart head?  Or cuckoo loco head?  Or maybe Tutu Fart Toilet Head?"  That's when I got the smiling photo... and the rest of our shoot was easy...

His natural Blue Steel look...

 Our Catwalk Pose...  Yes, he did that all on his own.


Jersey Shore Fist Pumping... it's a natural transition from Catwalk.

And now we're at the gun show...

Yes, these guns are illegal in most states... 

The shorts are a stretch cotton twill.  I liked the fabric because it's a bottom weight, which means it's a little more heavy duty but I didn't like it because it had stretch, which at first I thought would be great and comfy but ended up a pain to work with.  I don't like it when my fabric moves, it's makes it harder for me to get a nice clean seam and hem.  I used the flat front pattern from MADE for Lil' A's shorts so that they'd look a little bit fancier... you know, for the gun show.  Fancy pants for the gun show.

See you tomorrow with MORE tough and rugged fancy pants!
Andrea

Friday, June 7, 2013

Zuc'n It Up... Zucchini Pizza Bites

Good Morning!
 
 
More zucchini!  Yay!  This recipe is super quick, super yummy and I felt so good giving it to Adam as a pre-game snack!
 
(photo courtesy of dolcemente via Pinterest)
 
I saw the photo above (on Pinterest, of course!) and figured... "I can do that!"  I never even looked at the site until I went to get the address so I could reference it, and I realized it's all in Italian!  But here's what I did...
 
Zucchini Pizza Bites
 
1 lg zucchini, rinsed and dried, cut into thick slices (about .5" thick)
Marinara Sauce
Mozzarella Cheese (shredded)
Parmesan Cheese (shredded)
Salt
Italian Seasoning
 
Grab your sliced zucchinis and spring salt on them, set aside for 10 min to remove excess liquid.
 
Turn on your broiler.  Line a baking sheet or broiler pan with foil, grease with EVOO or butter.
 
Grab a slice of zucchini and spoon a good amount of marinara sauce on top.  Make sure to cover the entire top of your zucchini.
 
Sprinkle some of your shredded mozzarella and Parmesan cheese on top... we're BIG cheese fans so we had that bad boy covered!
 
Sprinkle a little Italian seasoning on top, you decide how heavy you want it!
 
Repeat on all zucchini slices.
 
Place the zucchini slices on your greased broiler pan and place under broiler.  I watched mine, they took about 5 minutes to cook in my oven, but you should really watch it so that they don't burn! 
 
Remove from oven as soon as the cheese is bubbly and light brown... yum!  Eat as soon as you can bare to, they're super good while warm and you don't even think about the fact that you're eating a zucchini pizza!  I made these for my little A as a snack before his tball game and I think it gave him the extra umph he needed to play hard and stay concentrated!
 
Happy zucchini eating!
Have a great weekend!
Andrea 


Thursday, June 6, 2013

Teacher Gift - Movie Night!

Hello!

The school year has officially ended for us... we are going to miss everyone at Barton House Playschool... Lil' A's Teachers were amazing and caring, the Director and Staff were so supportive and loving... We cannot find enough nice words to say about the whole experience!

Adam and talked about what he wanted to give his teachers... some of his ideas were Lego's, a trip (such a nice idea but so not going to happen), maybe some movies or something?  BINGO!  I remembered seeing a printable on Tatertots and Jello a few weeks ago and that was all it took!


Adam and I went to the store and I let him pick out the candy... I did have to remind that not everyone likes chocolate so that we should mix it up and get some fruity candy as well... this was met with an incredulous look.  I know son, I don't understand it either.


Adam choose a KitKat Bar, Reese's PB Cup, Skittles and Starburst so we just bought two of each (he had two teachers this year).  We grabbed a gift card for a movie theater at the grocery store too!  Who doesn't like a one-stop shop?!


I then went to my Closet of Shame Supplies and pulled out popcorn boxes that we used last year at our Backyard Movie Nights... PERFECT!  I threw in some red shred, the candy and gift card then printed out the "THANKS FOR MAKING ME FEEL LIKE A STAR!" printable that you can find HERE!  Instead of using boring clear tape, I grabbed my black and white polka dot washi tape and taped it to the popcorn box on the corners - easy cheesy! 


I hope that each of his teachers is able to take a night out and enjoy!  Trust me, after having unending patience with my Lil' Energy Ball, they deserve it and so much more!

Thank you Barton House Playschool, Mrs. Dierking and Ms. Michelle!

Have a great day!
Andrea