Photobucket Photobucket Photobucket Photobucket Photobucket Photobucket

Saturday, February 22, 2014

Husband and Wife Communicator!

Hello!

Thanks for visiting!  I cannot believe how long its been since my last post!  February is always so busy around here, between Lil A's birthday, T-ball resuming, Valentines and a shortened month, it seems like there's way too much to do in February!  And with this busy schedule, I was inspired to make something helpful for Big A and I... a way to keep things straight and look good doing it!

 
Yes, I know there's always texting, phone calls, etc - but what about those thoughts, items, to-dos that wake you up in the middle of the night?  Or that aren't important enough to interrupt a work day but that you still need to communicate about?  Let the Husband and Wife Communicator help you out!  I've hung ours from a suction cup on our bathroom mirror, but maybe yours would be more useful at your Kuerig Station or fridge.  Whatever floats your boat!  Big A has to wake up early for work... way earlier than my alarm goes off and I often stay up later than he does, working on KPS items, the computer or chores so it's pretty typical that I think of something to remind him of at 11 pm (and I've learned NOT to wake the giant while he's sleeping) while he might need to tell me something about upcoming plans for the weekend at 5 am... and since we don't seem to have a memory after having Lil A, this Communicator gives us a helping hand!
 
Would you like to make one?  Okay, let's go!
 
Supplies:
 
 
- Binding Tool - I used the Cinch by WeR Memories
- Patterned Paper - I used Notable by WeR (seemed fitting, ya?)
- Textured Cardstock - I used Avalanche by Bazzil Basics
- AME (Albums Made Easy) Frame Dies by Lifestyle Crafts/WeR (Large and Small)
     - Hello
     - Favorite
     -You
     - Today
     - Frame
     - Happy (Small)
     - Love  (Small)
     - Fame (Small)
- AME Journaling 4"x6" Cards and AME Journaling 3"x4" Cards in Snapshots, Grayson, Unscripted and Notable
-  Lifestyle Crafts/WeR Dies (Banners, Heart Beats, Nesting Circles, Stamp, etc.)
- Scrappy Glue
- Write-on Transparency (I used 3M)
- Evolution
- Sewing Machine
- Dimensional Tape
- WeR Washi Sheets
 
Let's get started!  First, I die cut all of the AME Frames that I wanted to use.  This was super quick and easy.  The words and frames are all cut at the same time, so easy and cute!  I think Instagram has turned me onto Polaroid Frames big time!
 
Next you're going to want to cut your transparency into 3 1/2" x 3 3/4" rectangles.  Cut as many rectangles as you have frames.
 
 
Lets adhere your transparency onto your frames.  You'll want to turn your frames over, apply a thin line of glue around all of the frame opening as close to the edge as possible.  Place your transparency onto your frame, covering the glue.  Quickly wipe away any glue that spills over onto your transparency before it dies.  I used a baby wipe for this buy a damp paper towel does the trick just as well.  Set it aside and assemble all of your other frames.  By the time you're done with the last frame, your first frame should be dry!
 
 
Next, grab your frames, the WeR AME Journaling cards and your scrappy glue,  Glue your frames to your journaling cards.  I didn't want my sewing machine to go though a ton of glue so I just put glue at the bottom of the frame, around the word.  I did this to all of my frames.  Then I took my pages with the frames to my sewing machine and stitched around the edge of the frame on the sides and bottom ONLY.  I left the top open so I could slide photos/memorabilia in and out.  After I sewed all of my frames I cut off any excess paper from the sides and bottom of my pages.
 
 
Once all of your pages are done, it's time to bind this bad boy.  Grab your Cinch Binding Tool and get to work!  I LOVE this binder!  This is actually my second binding tool (I have the Bind-It-All as well) and this is, by far, my favorite.  Its so easy to get right!  Gone are the days of worrying if my pages will be centered.  Gone are the days of holes in the wrong spot!  Seriously.  I found the Cinch so easy to use, with great color photo instructions!  I love that I can punch all of my pages at the same time - talk about quick!  And it has a holder for your binding coils so you can just slide your pages onto the coils - easy peasy.  The binding part of the tool is on the back - you adjust the binding tool by twisting a knob to the size binding coils you have and use the handle to press the machine down to close the coils.  The instructions are so much clearer than me!  And remember to put the front of your book as your last page when you go to bind it so that once your done with the binding you can just flip it around to the front and the closure to the binding is hidden in the pages.
 
 
Now, you can embellish your pages to your hearts content.  I made a pocket on the back of the "FRIENDS" page so that we can store photos of friends there that we can slide in and out of the frame.  You can leave love notes, a to-do list, items you need from the store, anything you can think of, with a Dry Erase Marker.  I LOVED the WeR Washi Sheets - it was great cutting those with my dies or cutting a strip to edge my pages with to add just the right amount of ta-da!  So quick and easy.  On a few of my pages I added die cuts, bling, banners, hearts, hand-cut embellishments but I didn't do it on every page.  You totally could, but I was trying to control myself since this is for BOTH my husband and I to use and he doesnt' seem to love flowers, hearts and bling as much as I do.  WHAT?!  I know, shocking.
 
 
There you go!  You can make these for your kids, leave them in the bathroom or on their bedroom door.  You could also make these an educational tool, helping your kiddos learn to write their letters, do multiplications, memorize their sight words...  yep, can you tell which journey I'm on now?  We are sight-word obsessed around here!  After you through with your notes, words, etc, just grab a Kleenex, wipe your transparency and it's all ready for another day/memo/hunny-do or love note. 

If you have any questions, leave me a comment!  Also, if you like ANY of the products I used (like the Cinch!), go to ShopWeR and use discount code KUTZPAPER to receive 20% off your purchase!  Yay!

Thanks for stopping by today! 
Have a great weekend!
Andrea

* As a member of the WeR Lifestyle Crafts Studio Team I do receive compenstation from WeR/Lifestyle Crafts for my project BUT all opinions, projects and ideas are 100% mine*

Thursday, February 6, 2014

A Little More Love

Hello,

I wanted to share a few of my past Valentine favorites today!  Since Lil A's birthday is right before Valentines Day I don't normally decorate too much for the Day of Love... I've found that little boys aren't big into red and pink all over the house when celebrating their birthdays, but I was able to find a few things I've made for the lovey dovey holiday!


I made this chair backpack for Lil A last year.  I wanted it to look like an envelope and be full of love.  I put love notes, little goodies, candy in it every night before I went to bed so Lil A would wake up in the morning and run to look and see what was in it.


Another Valentine treat I made was a Mailbox and Love Coupon Book Combo...


I still LOVE this sweet mailbox!  Both the Mailbox and Coupon Book are made from the Lifestyle Crafts dies, along with all the fun and frilly details!  After seeing the honeycomb embossing on the coupon book, I'm feeling inspired to go make something related to "bee mine!"...  You can still get some of these dies at the WeR Shop - if you make a purchase from there, use code KUTZPAPER at checkout for 20% off!


Have a great day!
Andrea

Wednesday, February 5, 2014

Feelin' Lovey Dovey - Valentines Goody Box and Arrow Pencils

Hello!

Yay for Wednesday... Boo for first post of the week on Wednesday!  Better late than never?  Anyone else hit hard with numerous bugs, virus, doctor trips this season?  I was thinking about it, we've had some sort of illness every. single. week. since the week before Christmas.  The stomach flu has gone through our house twice, I've lost track of colds, I'm pretty sure that someone in the house has been on some kind of antibiotic every week since Christmas and I've now decided that Lysol is my new BFF.  Cross your fingers that Lysol does that trick and we can all stop getting sick so I can keep on keeping on!

Today I wanted to share another project from CHA... a Valentines project!  Yep, somehow February came and with it, one of my favorite Holidays - Valentines Day!  Now, I know there's plenty of people out there who are anti-Valentines Day, who say that the Holiday is an "industry" Holiday but you know what?  I don't care!  I LOVE any holiday that is comprised of telling people close to you that you love them, a holiday that adorns everything with red, pink and hearts and a Holiday where it's expected to give or receive chocolate!  My kind of Holiday!  So when I saw the new Arrows Die from WeR/Lifestyle crafts, I knew I wanted to incorporate it into a Valentines Project.


I ended up using a lot of the new WeR/Lifestyle Crafts dies for this fun, sweet and simple Valentines Treat Box and Pencil Set.


I used the following supplies for this project:
WeR/Lifestyle Crafts Large Bakery Box
WeR/Lifestyle Crafts Arrows Die Cut
WeR/Lifestyle Crafts Cut Out Chevron Die Cut
WeR Chevron Washi Tape
WeR Bakers Twine
WeR Happy Campers in Flannel Shirt
WeR Textured Card stock in Leather
Crop-a-Dile
Dylusions Ink Spray by Ranger in Postbox Red
Printer
Pencils
Lifestyle Crafts Valentine Matchbox Die (unavailable on WeR Site)

First I decided to cut my Large Bakery Box from the WeR Textured Card stock and from there, I knew how large I wanted my tag.  I formatted the writing on my tag to fit on a 3"x5" rectangle, making sure to leave room in the wording for my arrow.  I printed the working on white card stock, cut it down to the desired size and then put a piece of Emerald Green Chevron Washi Tape down in the blank area I wanted my arrow to go in.  I then wrapped some red and white Bakers Twine around my white tag, overlapping the Chevron Washi a little.  I die cut my arrow using the Arrows Die and popped it off the tag using dimensional tape. I then glued it to my Happy Campers Flannel Shirt paper that was cut to be 3 1/8" x 5 1/8", just wide enough to frame the tag.  I then used my Crop-A-Dile to punch a hole in the top of my tag so I could hang it from my Baker Box.

For the Bakery Box, it was looking a little plain, so I decided to stencil on it with the negative of a die cut!  I love this, I've done it with actual metal dies (cookie cutter dies work the best for this) or by making a stencil from paper, which is what I did here.  I cut out the chevron pattern (mimicking another arrow... are you seeing a pattern here?  Or an unhealthy affinity for arrows?) using the Cut Out Chevron Die.  I tried to cut the pattern from the center of a 6" x 9" piece of card stock, leaving me enough room around the shapes so that when I sprayed it with my color, it would protect the area around it.  If your paper isn't large enough to cover the area you DON'T want color on, just layer some scrap paper over the area that's still exposed.  Note: You want a heavier paper so that you can spray onto your paper without it bleeding though and distorting the image.

Once you have created your negative (I didn't use the arrows it cut out, just the paper it cut it from), lay it over the bottom of the box, about 1.5" up from the bottom and spray your color over your stencil. Gently remove your stencil and admire your awesome image below!  I used the Dylusion Ink Spray in Postbox Red for my spray.  It has a nice mist, not too heavy and the color is really saturated.  If your hands hold your stencil down, you'll want to wear gloves so you don't stain your skin... yes, I had one red hand for a few days after this project!  Stencil all around the box, trying to keep your stencil even on all sides.


I love that some of the arrows are slightly darker or lighter, depending on how heavy I sprayed that area.  Also, I thought the little bit of over spray would bother me, but I like the way it looks a little distressed.

Once I was done stenciling my box I glued the edges together and created the actual box. I added 2 bands of card stock around the box, one below the stencil and one above.  The box was taller than I originally realized so it was nice to break up the tan color of the card stock.

Now lets turn our pencils into arrows of love.  You'll want to die cut enough arrow ends and heart points for each of the pencils your plan to give to your Valentine (BTW - you could do this with any round type of candy, like pixie sticks, if you wanted to give something sweet instead of practical).  Hot glue your arrow ends (feathers?) with hot glue to the end of your pencil, trying not to get glue on the eraser, and the hears with the points down at the bottom of your pencil.  I used unsharpend pencils for this project, but you could easily use sharpened one, or patterned ones - whatever you have on hand.


Cute, huh?  I love these Arrow Pencils... maybe they'll inspire your Valentine to pen you a sweet, lovely thank you note?

Fill your box with some shred (I always get mine from the Dollar Tree), your Arrow Pencils and some sweet treats and have your child take it to their teacher, give it to a co-worker, anyone that might have an affinity for office supplies...


If you decide to purchase any of the supplies that I included links to, use code KUTZPAPER at checkout and get 20% off in the WeShop! Hope you have a lovely day!

Andrea

** As a member of the Lifestyle Crafts Studio Design Team I do receive compensation for the projects I post using their products but all projects and opinion are all me!

Thursday, January 30, 2014

Police Station Loft Bed

Good Morning!

Today I'm sharing the Police Station portion of Lil A's Big Boy Bedroom.  This past summer we purchased a loft bed from Ikea - it wasn't the original plan, I wanted a trundle bed but Lil A fell in lurve with the loft bed so we changed directions and I'm so glad we did because he's loved it since we assembled it!  And now we all love it since changing it from a play area to an official government building!


Part of Adam's Wish List for his Big Boy Room was an actual Police Station.  I remember when the Home Makeover show came out and they would take a child's passion - say for Dinosaurs - and they'd do an over-the-top Jurassic Park Room that I figured the kid would outgrow within a few years.  I didn't want to run that route, so I was very concise of what we were putting in Lil A's room, if it would be easy to change and grow with him and I think his loft bed Police Station is a great example of this!

It started with me making a curtain to turn the Loft Bed into a fort style Police Station.  I used Kona Cotton fabric in gray and... I cut it wrong.  Oops.  So I added two panels of Navy Blue Chevron on either side of the gray and I actually like it more!  We used a tension rod to hang the curtain from so that Lil A could open and close it to hide his mess use his imagination with creative play.


I made the very official Police Sign with white duck cloth, my Silhouette Software, Silhouette Flocked Heat Transfer in Navy and Yellow and my sewing machines.


Since I knew the curtain would be handled A LOT, I serged the edges of my white duck cloth rectangle before I  ironed on my wording, then I glued on the sign with FabricTac and then used my sewing machine to edge stitch around the whole sign.  This sucker isn't going anywhere!!!

I then called my Dad (who happens to be a Retired PO) and asked him to give me a list of all the different departments/units in a Police Station.  Let me just put it this way, he was very thorough... and if I'd included all the different areas, I would've needed to add on to our house!  So, I went through his list, looked around our house and figured out what I could include in the Police Station and here's what I ended up with!


I wanted a place for Lil A to hang up his Uniform (we have a ton of Police dress up costumes) so I placed a few small, plastic Command Hooks on one of the bed walls, cut out "Locker Room" using Silhouette Vinyl and my Cameo, to designate the area.  Lil A also has a ton of small police gear, i.e. badges, whistles, etc., so I grabbed a small Tupperware container and attached it to the wall with 2 of the same hooks above a small ledge (this helps it stay in place).  No more Badges all over the house with the constant question being asked, "Mom!  I can't find my (fill in the agency) badge!)


No respectable Police Station would be complete without a Communications Unit (its kind of a big deal) so, again, I used my Silhouette Cameo and some Silhouette Vinyl to cut out a computer screen and the "Communication" sign.  We then added a keyboard (kids love the clicking of a keyboard) that was pulled from the trash along with an old office phone and some hand radios.  Lil A is ready to co.mmun.i.cate!!  Oh, the "desk" is actually a stool that Big A and his Dad built when he was little...

Now, there's a lot of areas I really wanted to include but just ran out of space, like an Evidence Locker, Break Room (was thinking felt donuts and fake coffee), Holding Cells, etc., but 2 areas I thought would be fun for Lil A (and his officers) would be a Forensics Unit where they could do fingerprints and comb through clues along with a Prisoner Intake Area where they'd photograph the bad guys and fill out intake forms to document all the illegal activities of the bad guys (I have a feeling it's not going to be an innocent until proven guilty station).  And I didn't forget the Arms Storage area (so happy to have a designated area for all the little Nerf bullets!)...


I used my Silhouette Cameo and Vinyl to label my units along with making a Fingerprint sign from cardstock. I cut the fingerprint image and "Fingerprint Station" wording from the white cardstock and then backed it with black cardstock to show the negative.  I also printed out some fingerprint cards courtesy of the US Government and will be adding a WASHABLE black ink pad as soon as possible.  As for the Prisoner Intake area, there's a camera just waiting to take numerous mugshots (its an old, old one but Lil A thinks its awesome) and I'm going to add some mugshot/prisoner forms so no bad guys slip through the system.

His first mugshot photo... of me!  I was framed, I tell ya!

 Don't bother him, he's very busy and important!

And serious.  This is what a very serious cop face looks like - well, a Trying-Not-To-Laugh-Serious-Cop-Face at least.

So that's it!  Lil A's Loft Bed Police Station!  There's also a small shelf with bins of Police Cars, Emergency Vehicles and Playmobile Figures/Vehicles at the other end of the Police Station so Lil A can be either a Big Shot Police Man or a fun, sweet, almost 6 year old playing with his toys!

Thanks for visiting today!  We love creative play around here and enjoyed sharing it with you!
Have a good one!
Andrea  


Wednesday, January 29, 2014

Big Boy Police Room!

Hello!

Today is (part) of the Big. Boy. Room Reveal.  Yep, Lil' A is almost 6!  SIX!  VI!!  Seis!  Want me to keep going?  Six (that's French for six...).

And, as an almost 6 year old, he is so mature now, that he NEEDED a room as BIG as he is!  So, instead of a baby room, he now has a big boy room!  He's practically in college... no wait, I think he may be looking to start a career - as a Policeman/FBI/Game Warden/Sheriff, hence, the Law Enforcement themed room.


Lil' A's baby room was woodland themed.  It was brown and tan with a little brick red, olive green and BROWN thrown in for good measure.  It was the same color/bedding/theme from his nursery that has gradually grown with him except we took out the crib, threw in a toddler bed and then his loft bed, which should (cross fingers) last until he's a teen?  But enough talking about his new room, let me show you the bazillion pictures of it!


When I asked Lil' A what he wanted for a Big Boy room, he said he wanted a Police Station.  With a jail.  Hmmm.  And he picked out navy blue, black, white and gray for his colors.  I could work with those and off we went!  I started off with a striped navy and white wall, I was thinking of the cop phrase, thin blue line, when I decided on the stripes and I love the way it turned out.  And while I couldn't figure a way to do a jail, I decided to use a silver Sharpie and draw thin vertical lines to look like jail bars.  He was cool with this.


I've been loving the Marquee Light trend and I'm super fortunate to be around a ton of talented, skilled people that I can totally take advantage of; so I asked a friend if he knew how to make a marquee sign and  a few weeks later, I picked up this awesomeness that adds so much official fun to Lil' A's room!


I've also been feeling the industrial look and figured a Police Station is probably pretty industrial looking with the steel desks, handcuffs, file cabinets, jail cells, so I decided to go with an open shelving system around Lil' A's desk (I still need to make something for above the desk - hopefully tomorrow?).  I initially wanted pipes for the hardware/brackets but after pricing it all out, we went with a metal shelving system from Home Depot.  We purchased the wood for the shelves, had the helpful worker from Home Depot cut them down and then we stained them a dark brown (trying to match his desk).  Best part of the staining process - it has a protecting sealant coat included in the stain!  That cut down on the time frame dramatically for only a few dollars more!


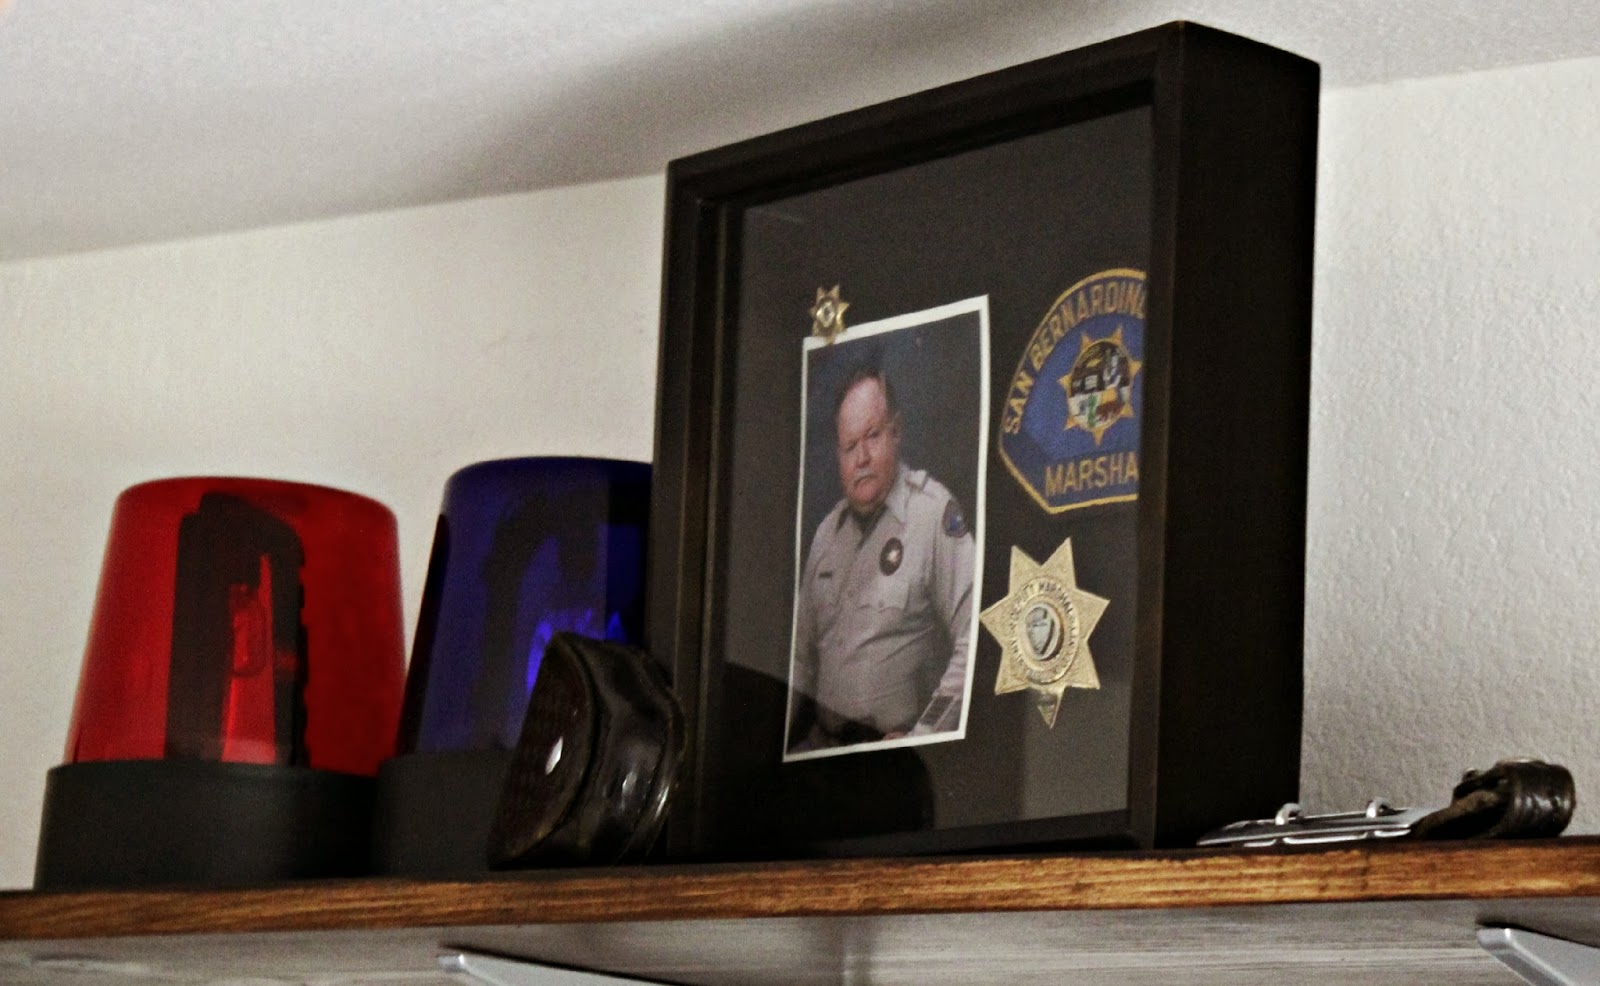
My favorite thing about Lil A's room is all the personal touches.  My Dad is a Retired Ontario Police Officer, my Grandpa Lloyd was an Ontario Police Mounted Police Officer, my Father-in-Law was a Retired San Bernardino County Marshall/Sheriff and my Brother-in-Law is a SBC Sheriff...  so I basically ransacked numerous family members homes and jacked all of the law enforcement memorabilia I could find to put on Lil' A's shelves!  We even have a photo of all the Grandpas in uniform on each of the shelves along with different tactical equipment, coffee mugs and even my Dad's old badge.


And although it's definitely a Police themed room, we couldn't leave out all of Adams Angels Baseball collection, so we did a display of his signed baseballs, signed batters gloves, signed Braves hat and the ticket from his first game (he was around 4 months old)... Yep, I keep saying "signed" because I can't read all the autographs but it's my goal to figure it all out and slide the correct names in the label holders!


And since he requested a Police Station, I did my best to give him a Police Station Loft Bed - I'll share more about the Police Station tomorrow.


Above Lil' A's loft bed, we hung a basket to hold books since we normally read each night at bed time - the basket helps keep the book clutter down (like books in stacks on the chest... or stacks that had fallen behind the chest and under the chair...).  The Police Parking sign was my Dad's... I'm sure it's a copy, because I know he'd never take city property... EVER. The two framed photographs of vintage police cars are from Saint & Sailor on Etsy - which I highly recommend!


This painting is another favorite of mine, which we hung over Adam's rocking chair.  The painting is of my Father-in-Laws locker at the Sheriff's Station.  I love all of the details, our last name at the top of the locker, his shoe cleaner tool box with the names of his family scratched into the wood... it's an amazing, completely personal and custom piece that will be a treasure as Lil' A grows.


And last, I used a leather belt connector as the tie-backs for Lil' A's curtains (which are lined and only $10 at Target!), which were my Father-in-Laws.

Phew!  So many photos - thanks for baring with me!  I am just so excited about Lil' A's room - it is so personal to me, has so many pieces of our family that I feel like he's always being looked out for while he dreams, plays, grows...

Let me know what you think - if you have any questions about any of the DIY - like painting crisp, clean lines on a textured wall or the cost of the shelving unit, I'm happy to give you an answer if I know it or can find it!

Have a great day!
Andrea


Monday, January 27, 2014

You're Such A Deer Card

Hello!

I hope you all had a wonderful weekend!

We were busy trying to finish up Lil' A's Big Boy Room (he's almost 6 - gasp)!  We've been working on it for the past few weeks... it sure is taking longer than I originally anticipated but it's totally worth it - its better than I'd pictured it in my head!  And, of course, Lil' A is pretty proud of it!  I'm hoping to get it all done in the next day or two so I can share it and a few tutorials at the end of the week... cross your fingers!

Anyways - today I wanted to share a card that I made for the Lifestyle Crafts/WeR CHA booth using their new dies, new letterpress plates and a few other fun products!


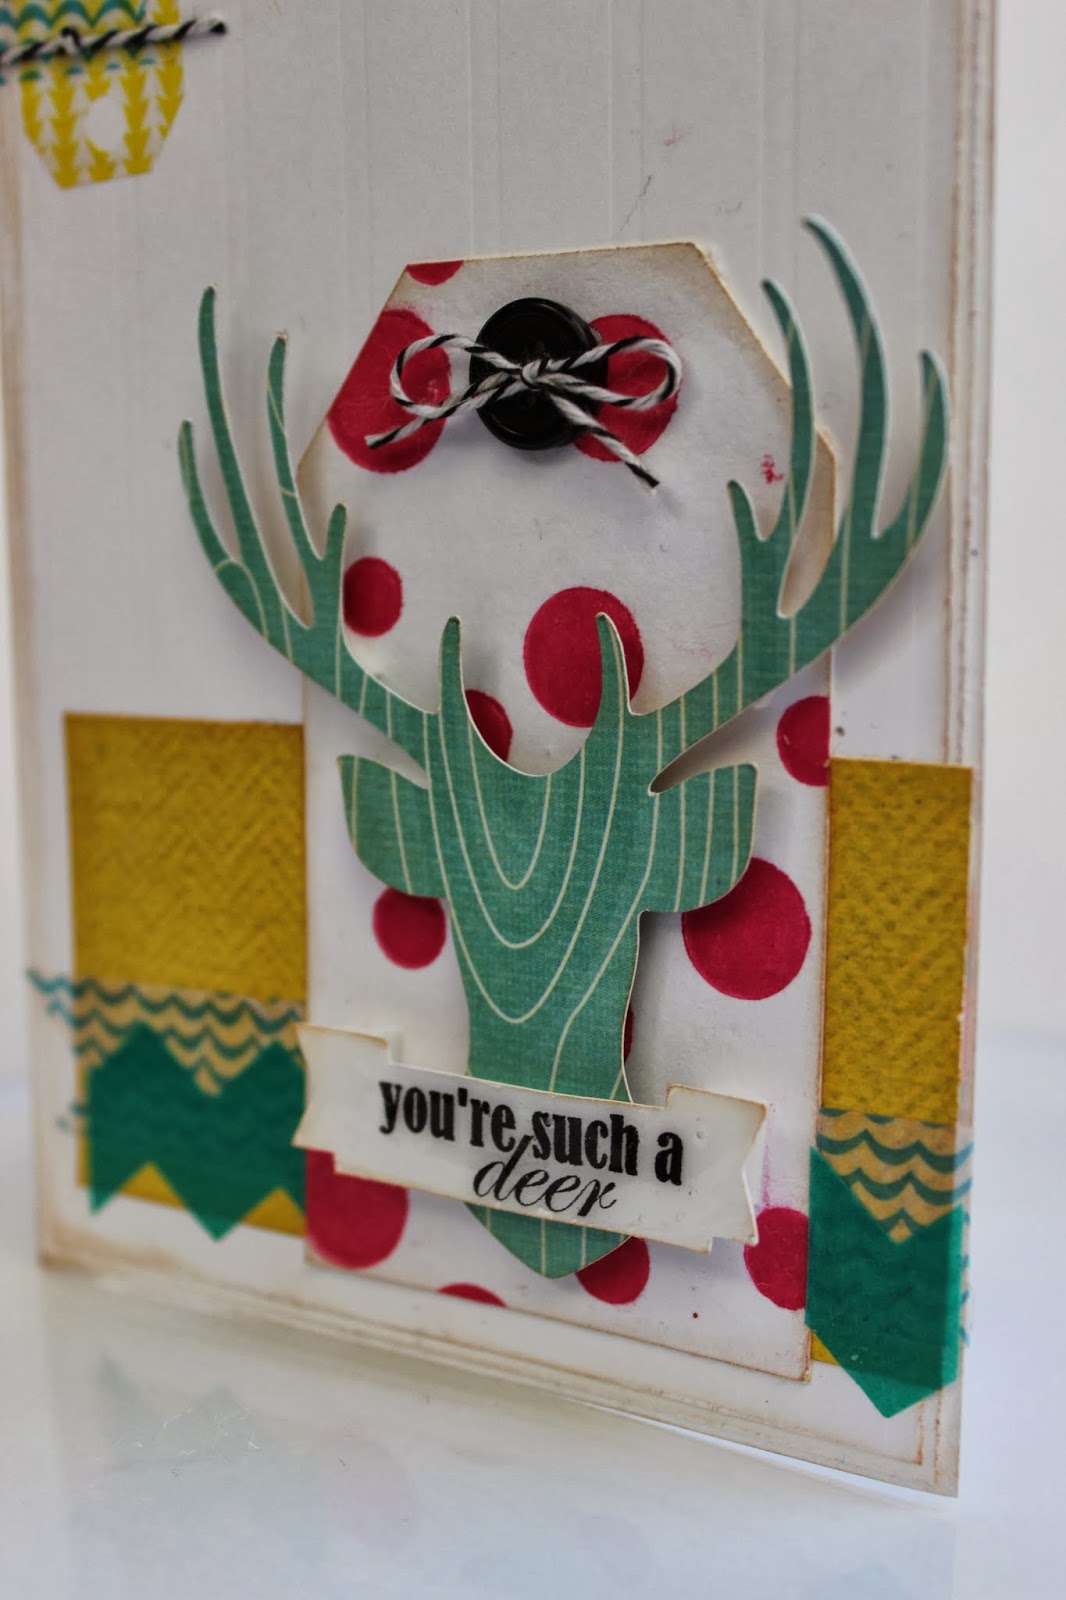
This card is 4.25"x5.5", basically a letter sized paper cut in half.  I LOVE layering with cards, so I started off by making 2 mats in the same white paper, but decreasing their size by about 1/8" each, I then used the WeR Sweet Heart Tool - the Heart Attack Destresser to give my edges a nice, worn look.

To give my plain, white cardstock a little extra pizazz, I used my letterpress to dry emboss.  I used the Dots and Stripes* printing plate, which is NEW and super cool because they're actually double plates - which means you can turn the plate over and print again in a different color and you'll have double the pattern!  Look for a tutorial on that soon!  I love the extra effect with minimal effort this technique gives!


Next, I started layering my card - super easy.  I used the WeR Country Livin paper in Flower Field for the mustard yellow rectangle that I glued down to the bottom of my card.  I then added a piece of the ChevronWashi Tape in Emerald at the bottom of my mustard yellow rectangle and a die cut flag of the Shape N' Tape over both the Chevron Washi Tape and the yellow rectangle.

Next, I grabbed my Letterpress, my Dots Printing Plate* and the Hot Pink Ink and ran my plain, white cardstock through - BAM!  Hot Pink Dots!  LOVE it!  I then used my Nesting Tag Die and cut a tag shape from my embossed, pink dot cardstock.  I inked the edges of my tag with the Sweet Heart Inker in Brown.

I used my Deer Silhouette* Die Cut and the WeR Happy Campers paper in Flannel Shirt for my Deer- I love the teal wood grain pattern - and popped it up with dimensional tape on the tag.  I die cut a banner from the Flags Dies* and then printed my saying on it, popping it up over my deer silhouette with dimensional tape.


Glue a bow made from the WeR Floss on a button and adhere them to the top of your tag.  I also used some more Shape N' Tape that I die cut with both my Nesting Tags and Flags Dies at the top, left corner of the card with a little piece of floss... It doesn't take a lot of time, but it sure does add a lot!


And that's it!  I really enjoy using the Shape N' Tape with my dies - it made it so quick and easy to put this card together.  The Letterpress is another great tool to add a lot of dimension - I've started keeping mine out so I can just grab a plate, the ink and print away.  Of course, I love the deer, but I'm pretty sure I've made that obvious!

* This product is NEW and not available on the WeR site now but will be in the Spring.

If you decide to purchase any of the supplies used, please click on the link and when you check out, use promo code kutzpaper to receive 20% off your order!

I hope you have a great day!
Andrea

Some products used were provided to me by WeR and Lifestyle Crafts as a member of the Studio Design Team but all opinions and creations are 100% mine.