


It's December.
Did anyone else realize that?
Its. December.
And by extension, Christmas is in 22 days.
I'm still without a computer (do you think Santa frequents blogs?) which makes blogging challenging, to say the least... but I am so excited about the outcome of my 1st Studio Design Team Project that I couldn't wait to share it with you all! After all, sharing is caring!
Here it is!

For some reason, I knew exactly what I wanted to do as soon as we got the go ahead to create a December project. I gathered my supplies and started die cutting, and die cutting... and die cutting.
Here's what you'll need to get started:

1. Evolution
2. Nesting circle dies (I used the pinking edge circles, but any will do)
3. Chipboard
4. Tissue Paper
5. Adhesive (I used a glue gun but it's up to you)
6. Paper Trimmer
7. Cardstock and Patterned Paper
8. Plates to trace (for snowman outline)
9. Winter Wonderland Pocket Kit
10. Flower, Greenery
11. Dimensional Tape
Let's get started!

After gathering my plates, I taped 3 pieces of 12" chipboard together on both sides.


I then grabbed my largest plate and traced it on the chipboard.

Continuing this until you have 3 sections of your snowman.

This is how mine ended up looking when I was done tracing all of my plates. I used the two outer rings of the bottom circle for my snowman's body and the top ring for the head. Don't worry if your rings aren't perfectly even, you'll be covering them up and you won't be able to tell when we're done.

Cut your rings out and lay them out, overlapping each other, to get your snowman. Tape your rings together on the front and back.

Now the fun part (not tedious at all) - grab your tissue paper and lay out your dies to see how wide you need to cut your strips. Go ahead and cut your strips, trying to keep all your layers of tissue together. I used probably 15 pieces of tissue.

Using your Evolution and platform, start die cutting your circles. I love that the platform is magnetized so your nesting circles won't move around! Here's how to use your Evolution - lay your dies face up on your platform. Lay your material to be cut on top of the dies. Place your cutting mat on top of both the dies and material you want cut and place into machine, gently pushing it into the opening until you meet a little resistance. Now start cranking your handle and watch as your platform moves through the machine. Easy!

Say hello to your die cut circles! Now repeat until you've cut all your tissue! This may take a while, but the snowman it totally worth it.

When you're done die cutting, grab your piles of tissue circles, your glue gun (or adhesive) and your snowman so we can start making him all fluffy!

Grab 3 pieces of your tissue circles.

Make a little stack of the and place your thumb in the center.

Gently push down on the center with your thumb so that the edges start curling up. Once they're concave, grab the center from the bottom and pinch together.

Twist the bottom so that it creates a little flower looking guy. Twist it nice and tight so that you have a little stem. This is what we'll be gluing to the chipboard outline.

I liked to put a little bit of hot glue on the chipboard and then stick my tissue to that spot, but you do it how you're comfortable. Once it's glued on, go ahead and gently pull the different layers apart, giving it more fullness.

Keep going, butting each new tissue flake next to the last one. Depending on how fluffy you want your snowman, you can leave more or less space between each flake. I also liked alternating the pinking circles with the regular circle - I thought it would make it interesting.

Just keep pinching and gluing...

pinching and gluing...

Until you have this guy! Yay! He's starting to take shape! Notice how I left a section at the top bare? This is where I'm going to put my stove pipe hat!
Which we need to make!

Grab your chipboard again and cut 2 rectangles, one measuring 6"x7" and the other measuring 2"x8". The larger of the two will be the top of your hat while the smaller becomes your rim. Tape them together with the top piece centered on the rim. Tape the front and back.

Do the same with black cardstock, but don't bother taping them.


Grab your adhesive and glue your black cardstock pieces to your chipboard pieces. I used my StickyThumb tape roller for this.

Here's what you'll end up with - don't worry about the seam, we'll cover it up with our hat band (sorry about the glare in the photo, the weather hasn't been supportive of picture taking!).

Now you can start playing! I cut a 1.5"x6" strip of patterned paper for my hat band and added some washi tape for extra umph (super technical term). Now, if you know me, you know I like to take out a ton of different elements and just play with them before I glue anything down - sometimes what works in my head doesn't work on paper.

I ended up making a little pocket with coordinating paper and my QuicKutz Pocket die from the Winter Wonderland set. I grabbed an extra tissue die cut and gathered it behind a paper flower, adding some greenery that I'd dipped in "snow" and sprinkled glitter on.

I also glued some green ribbon to the top of my card that sits in my pocket and then punched a hole through it with my crop-a-dile to add a button

When it came time to glue my hat to my snowman's head, I realized how uneven my surface was. I didn't want to smooch down the tissue flakes but I knew it needed more of a solid surface if I was going to hang anything from it, so I decided to build up my base before gluing down my hat.

To do this, I cut a long strip of cardboard off a box. I then cut it into smaller strips that I could glue to my snowman.

Using hot glue, I stacked my pieces of cardboard on each other until I was almost flush with my tissue flakes.

I glued my hat to the cardboard base and viola! A stove pipe top hat! I added a little bit of snow to the corners and edges of his hat... he is, after all, a snowman.
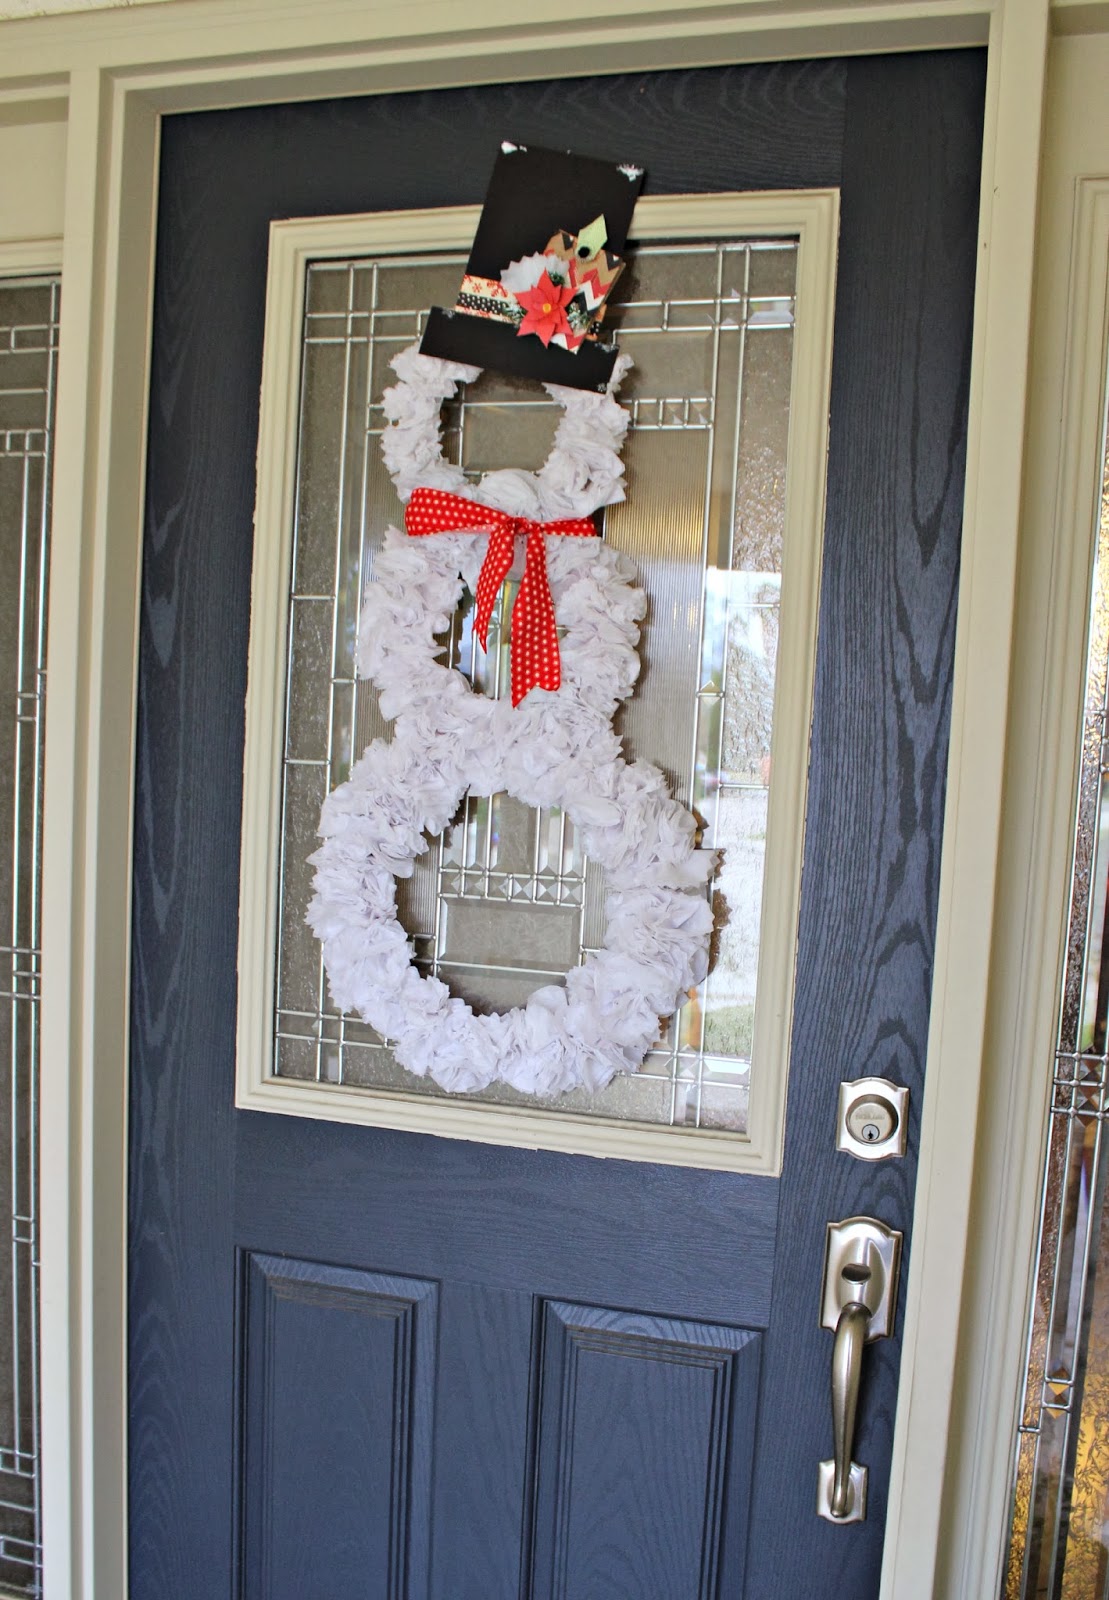
I could've stopped there, but what snowman is complete without his scarf (I know, you may have been thinking of practical things like eyes... carrot nose... coal mouth but that's where you went wrong!)? I cut a 2x36" piece of scrap fabric I had laying around and tied it around his neck, making sure the tails of the scarf were hanging down and facing the right way.

Doesn't it just make you want to start humming Frosty the Snowman? Hmm Hmm Hmhmhm...
If the entire snowman body seems a little too much for you, just do the head! You could use the same basic idea, use a paper plate for his face and just do his face and hat. You'd even have a solid enough surface to add eyes, nose and mouth!
That's all for me today! Thanks for visiting, I hope you enjoyed the tutorial as much as I enjoyed making this fun, flaky and cute guy!
Have a great day!
Andrea
So cute! You put a lot of detail into this, love the snowman's hat!
ReplyDelete